


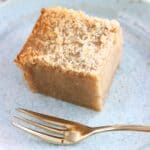
This Gluten-Free Vegan Blood Orange Cake has a moist sponge packed with juicy, fragrant blood oranges. The recipe comes together in one bowl and is refined sugar free too. It's a beautifully colourful dessert, but is also great for breakfast or brunch!
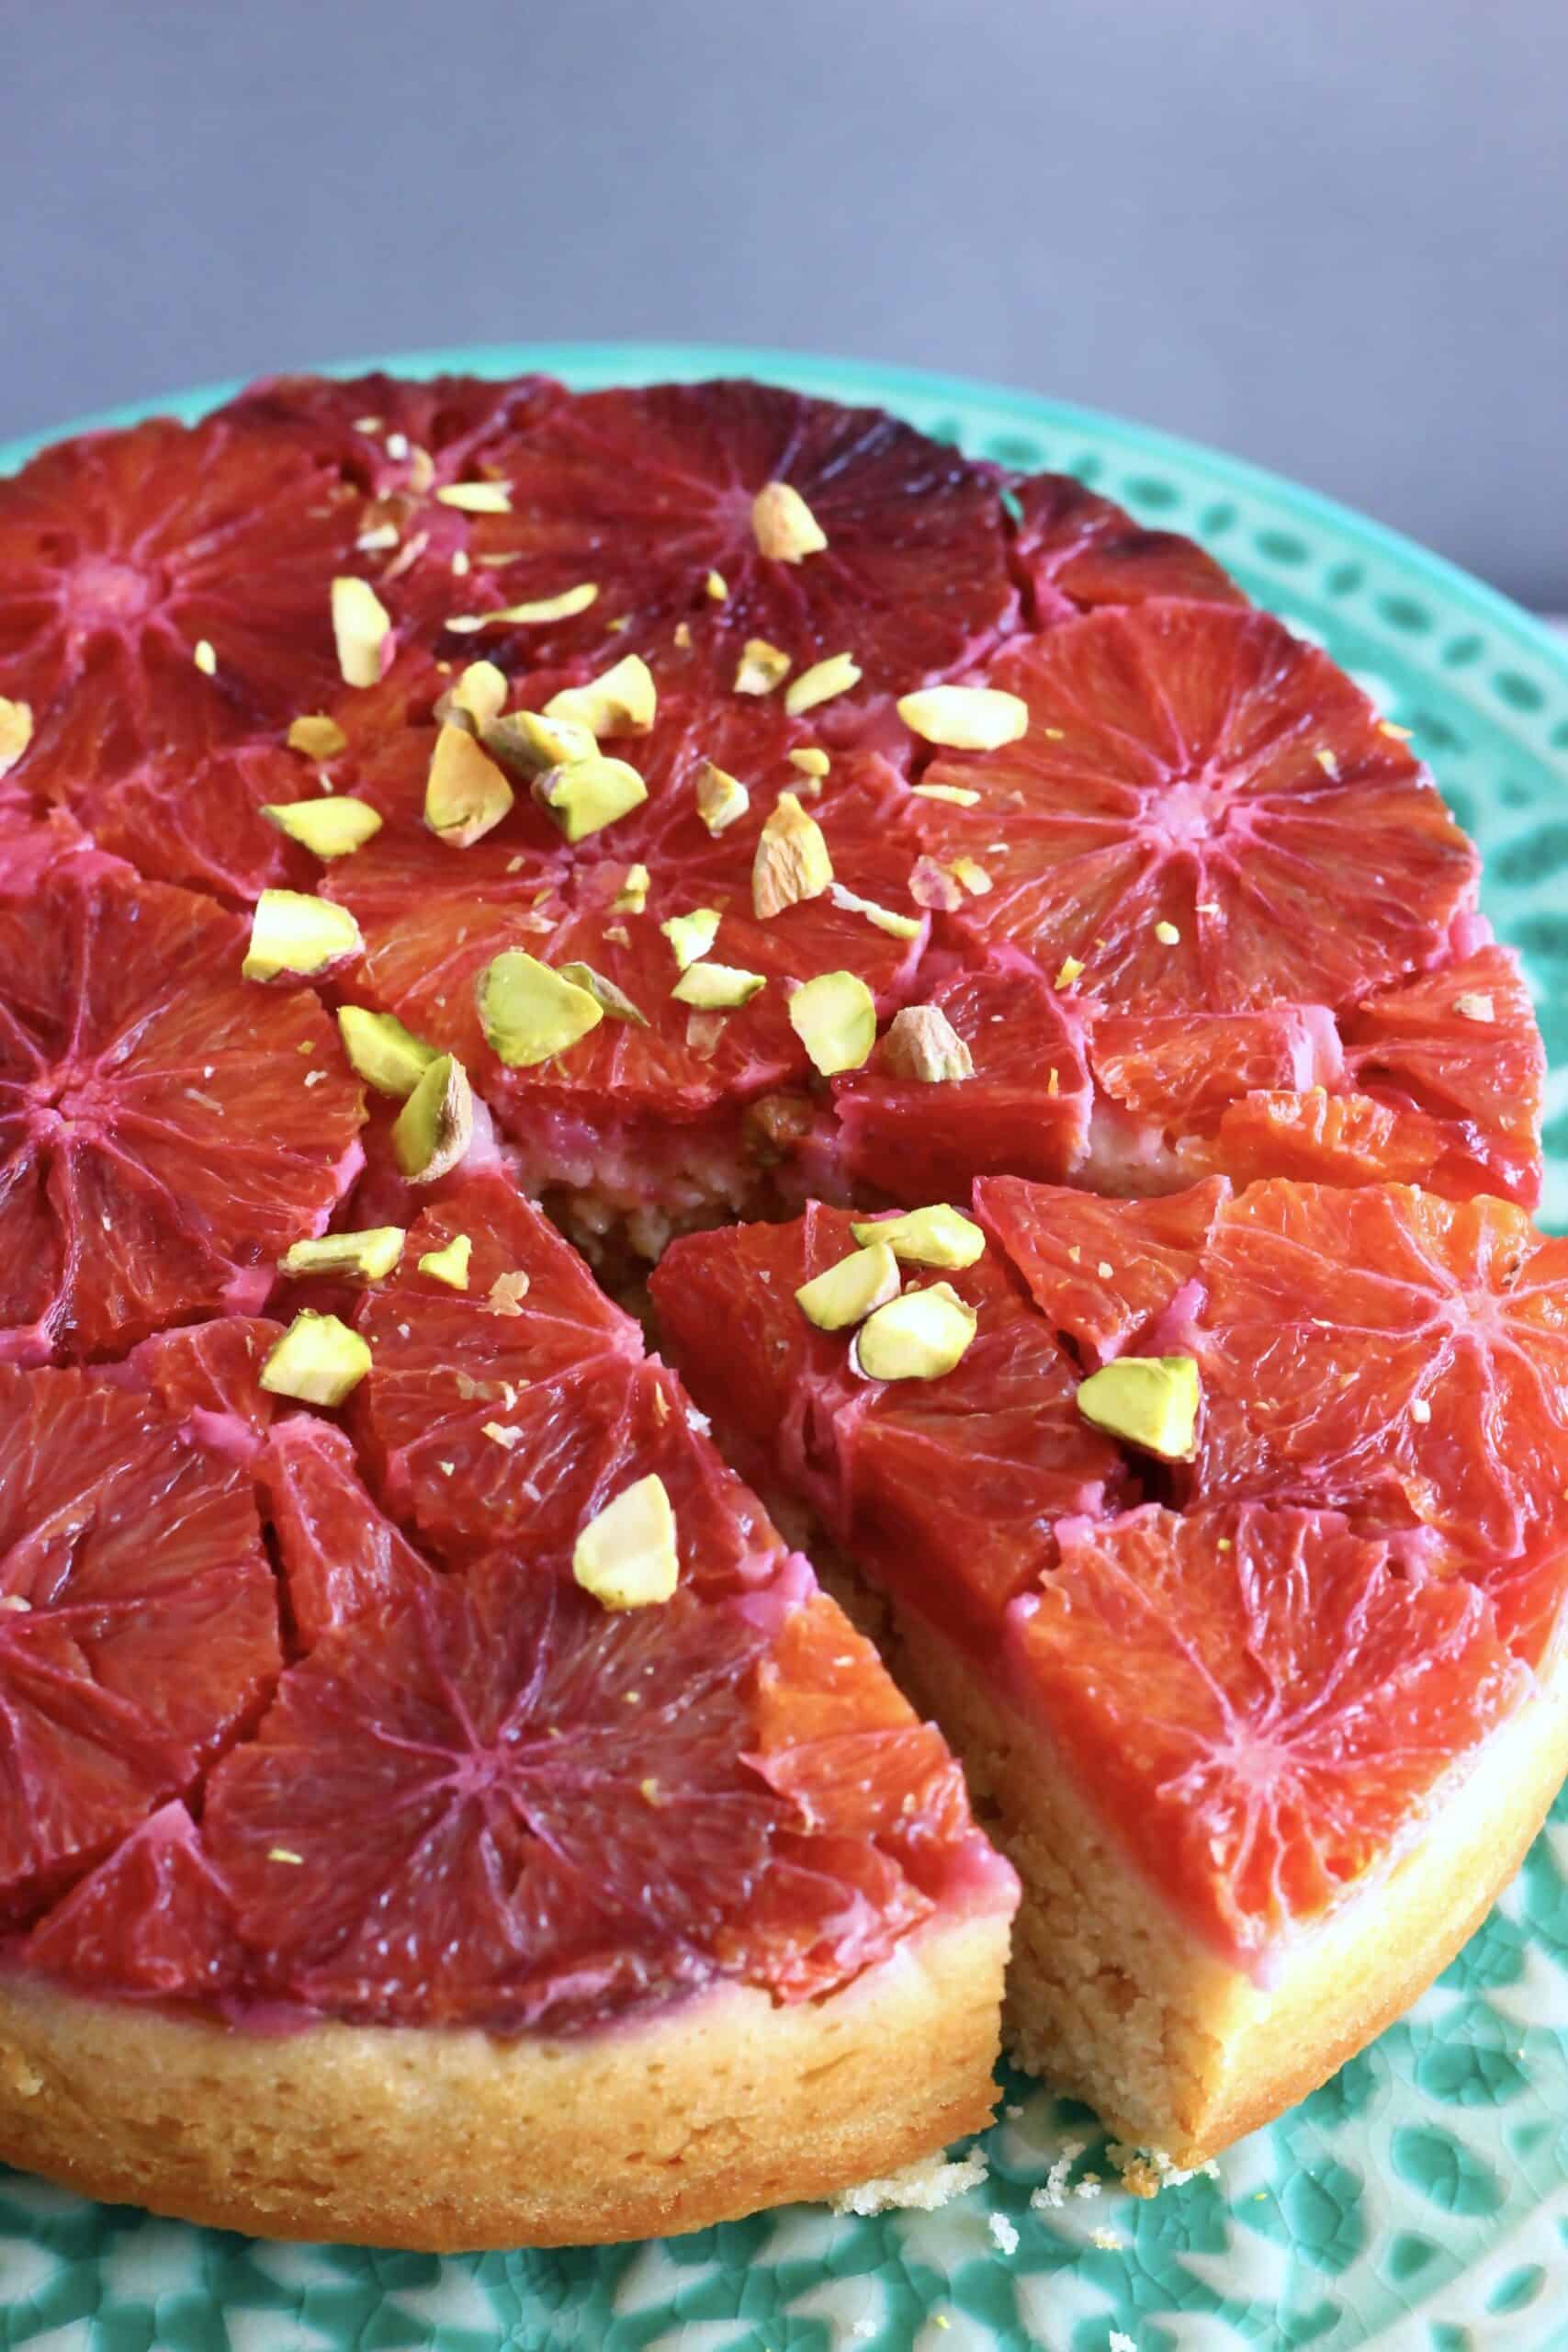
This Blood Orange Cake is an upside down cake, like my Pineapple Upside Down Cake, Fig Upside Down Cake or Apple Upside Down Cake. Upside down cakes might seem tricky to make, but it'll be quick and easy if you follow my tips and tricks!
What are blood oranges?
- Blood oranges are a variety of orange.
- They tend to be smaller than other types of oranges.
- They have a dark pink, or bright red-coloured flesh.
- Their juice is dark red.
- They taste less sour/acidic and slightly sweeter than normal oranges, and have a fragrant flavour reminiscent of raspberries.
Can you use normal oranges for this cake instead?
Yes, but you won't need to use as many, since normal oranges tend to be bigger than blood oranges.
Tips for making this Blood Orange Upside Down Cake
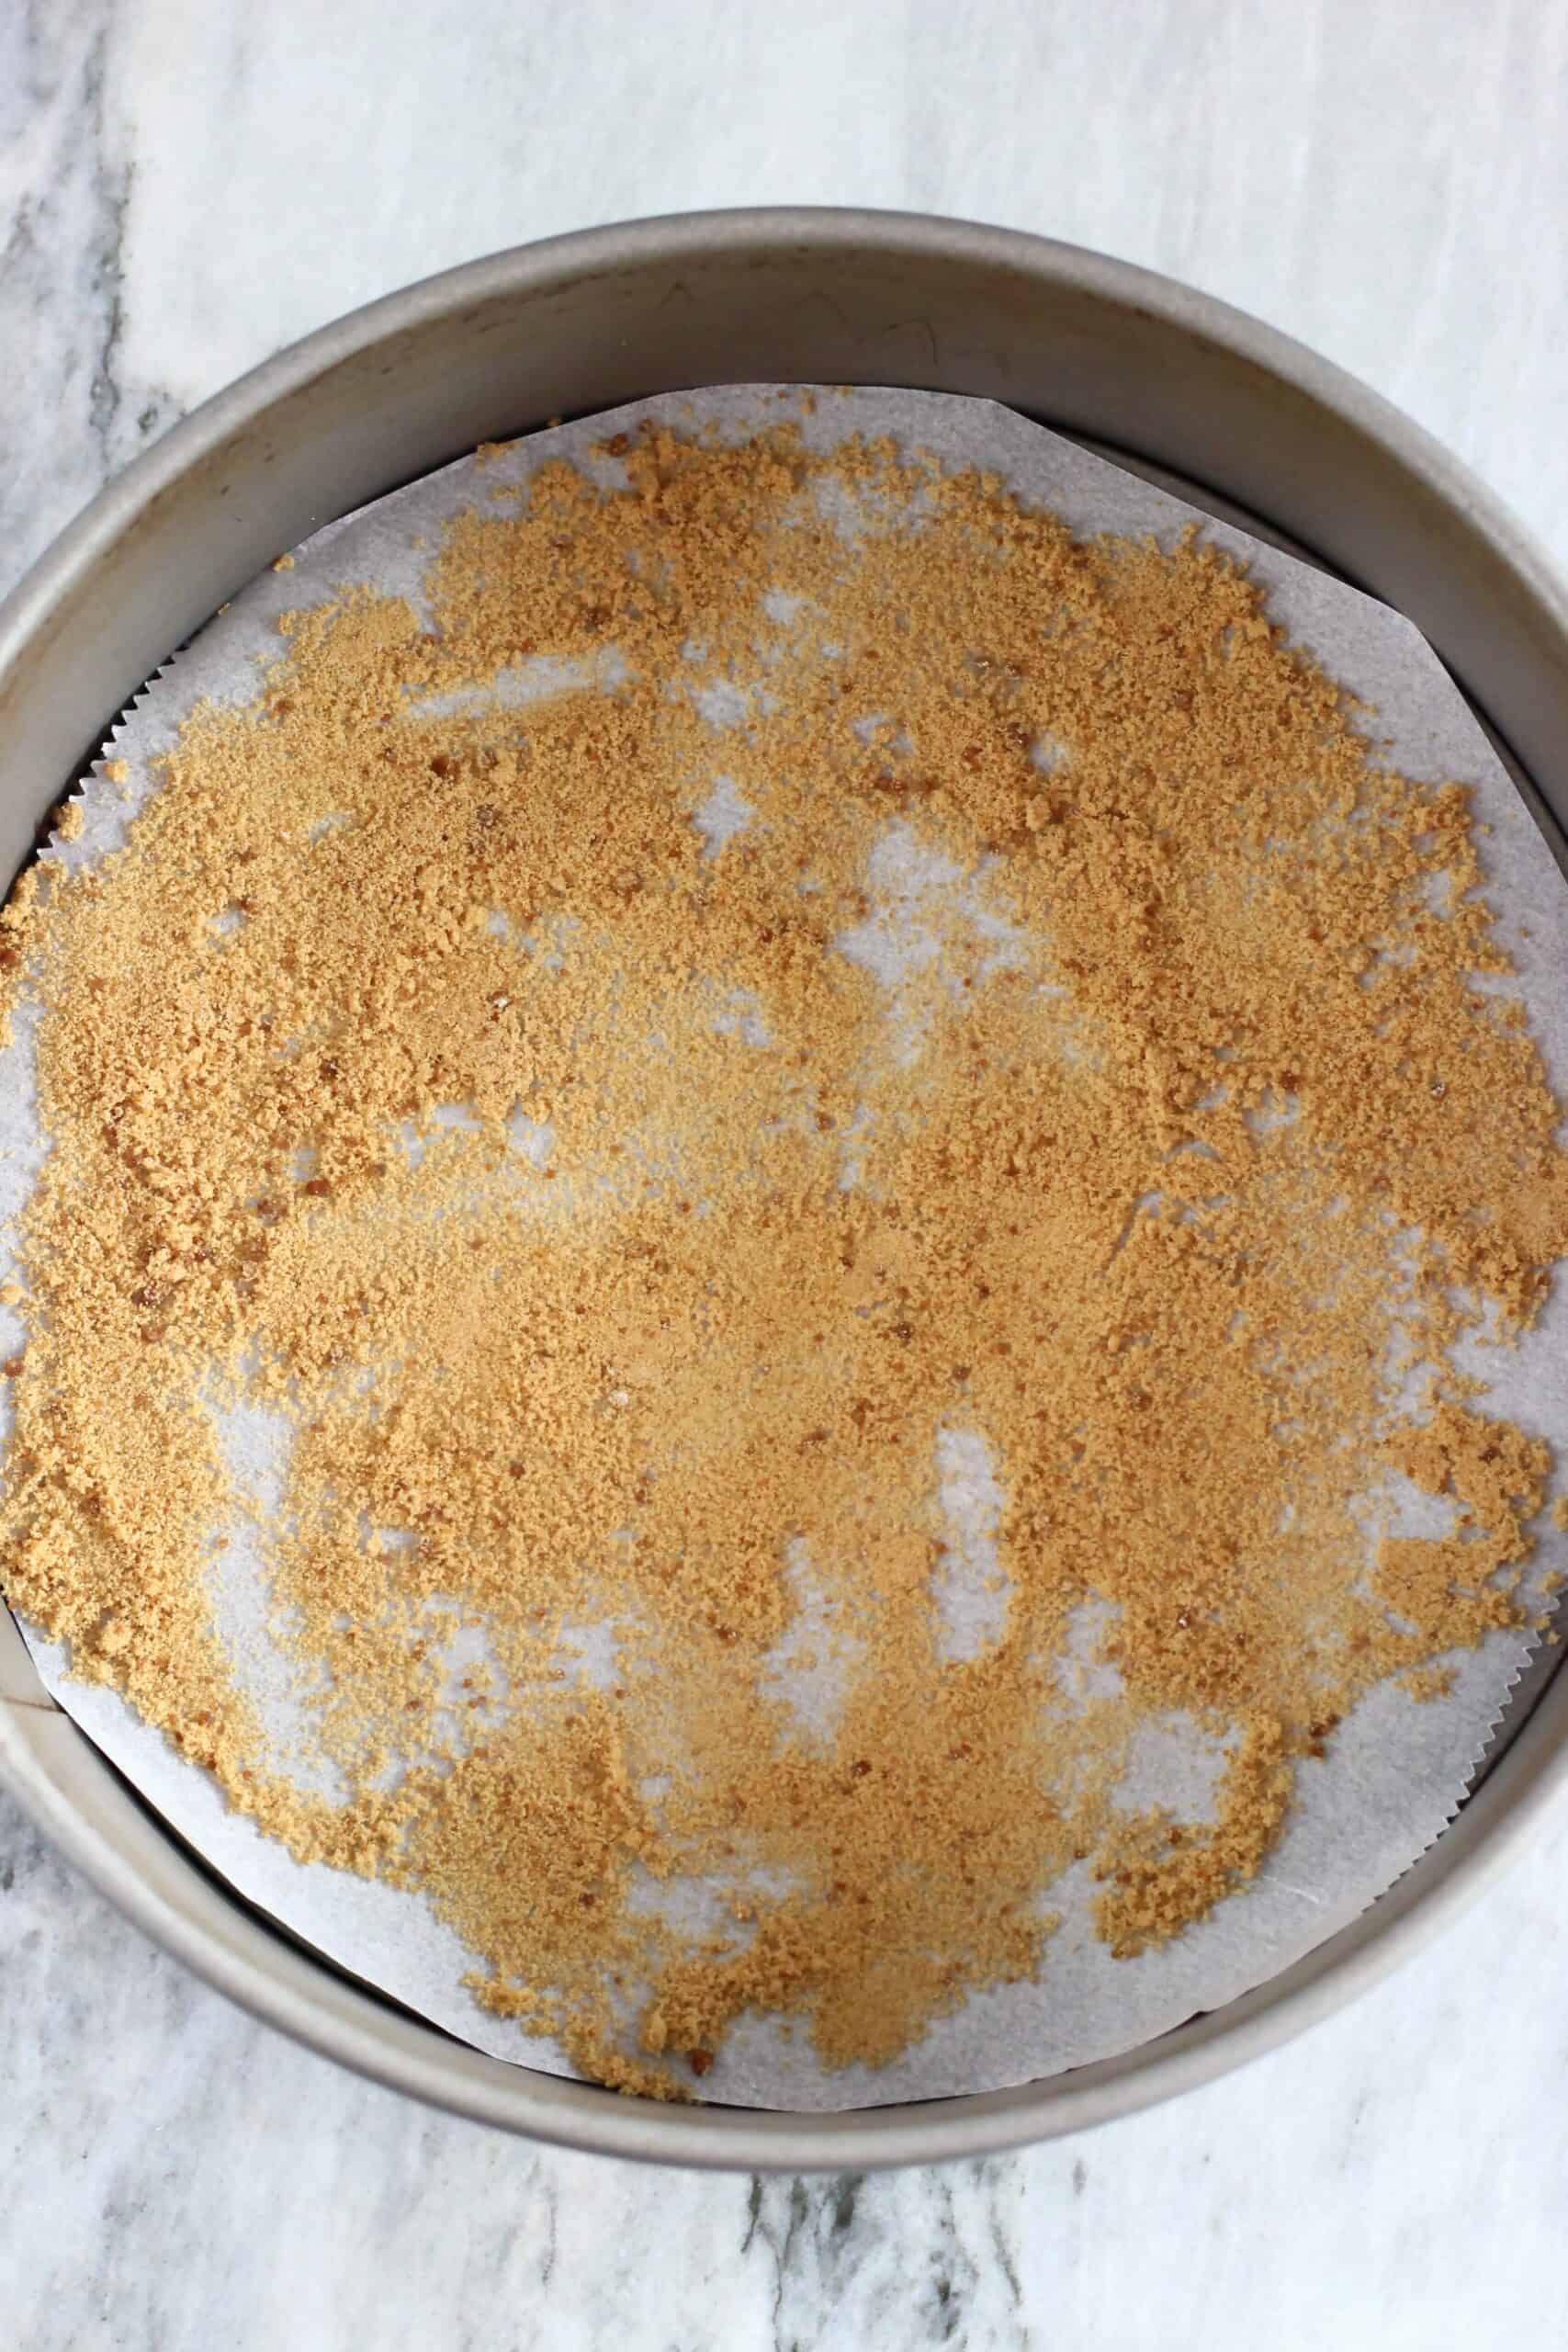
- It's best to use a springform baking tin to make this cake. I used a 18cm / 7 inch springform baking tin.
- Cover both the bottom and the sides of the tin with baking paper, to prevent the sides of the cake from getting burnt.
- Sprinkling sugar before laying out the orange slices is necessary as it improves the overall taste of the cake, as otherwise it might not be sweet enough due to the acidity of the oranges.
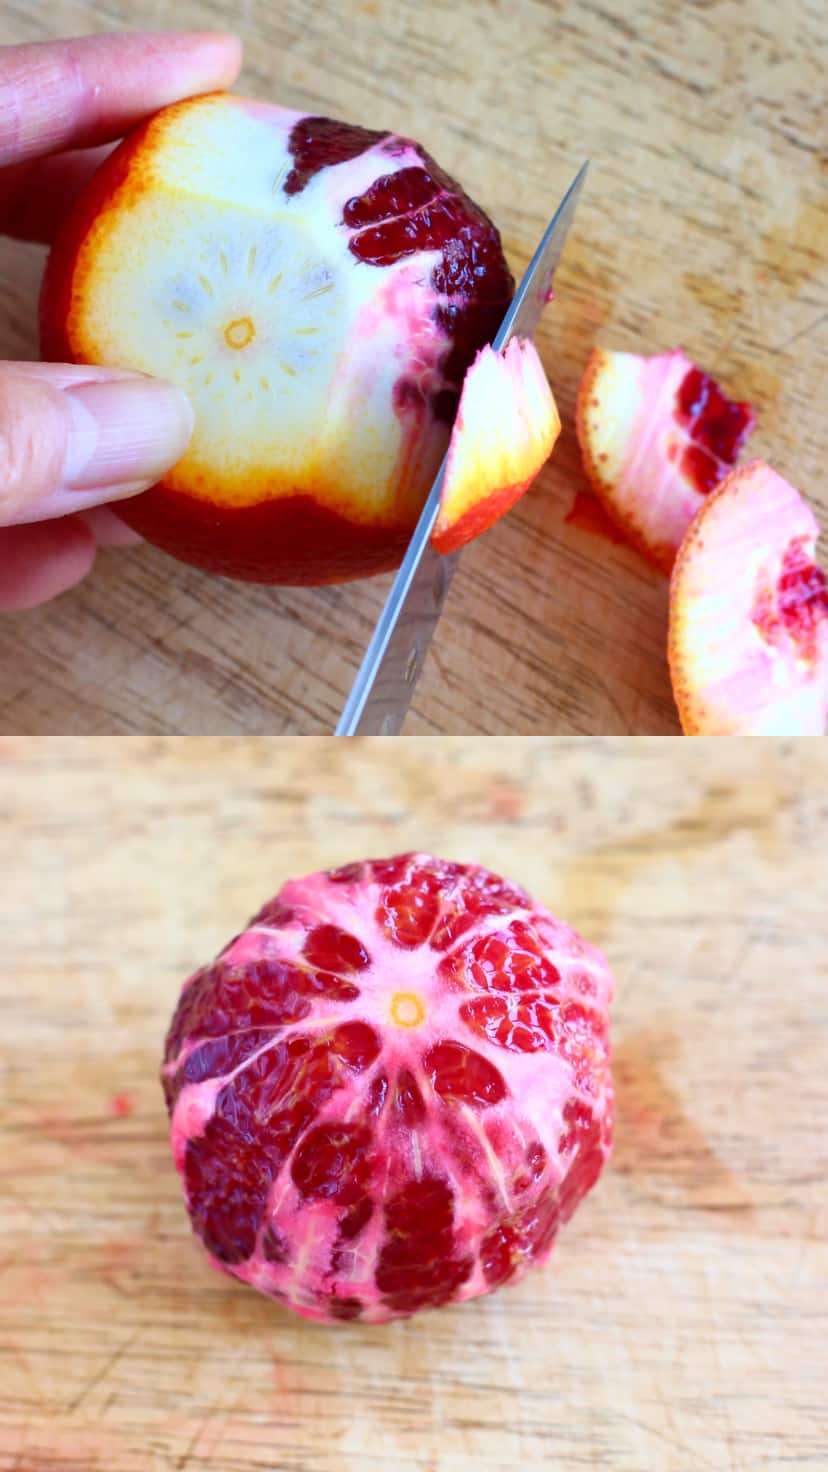
- When peeling the oranges, cut off all the skin, including the white pith, as keeping this will spoil the appearance and taste of the cake.
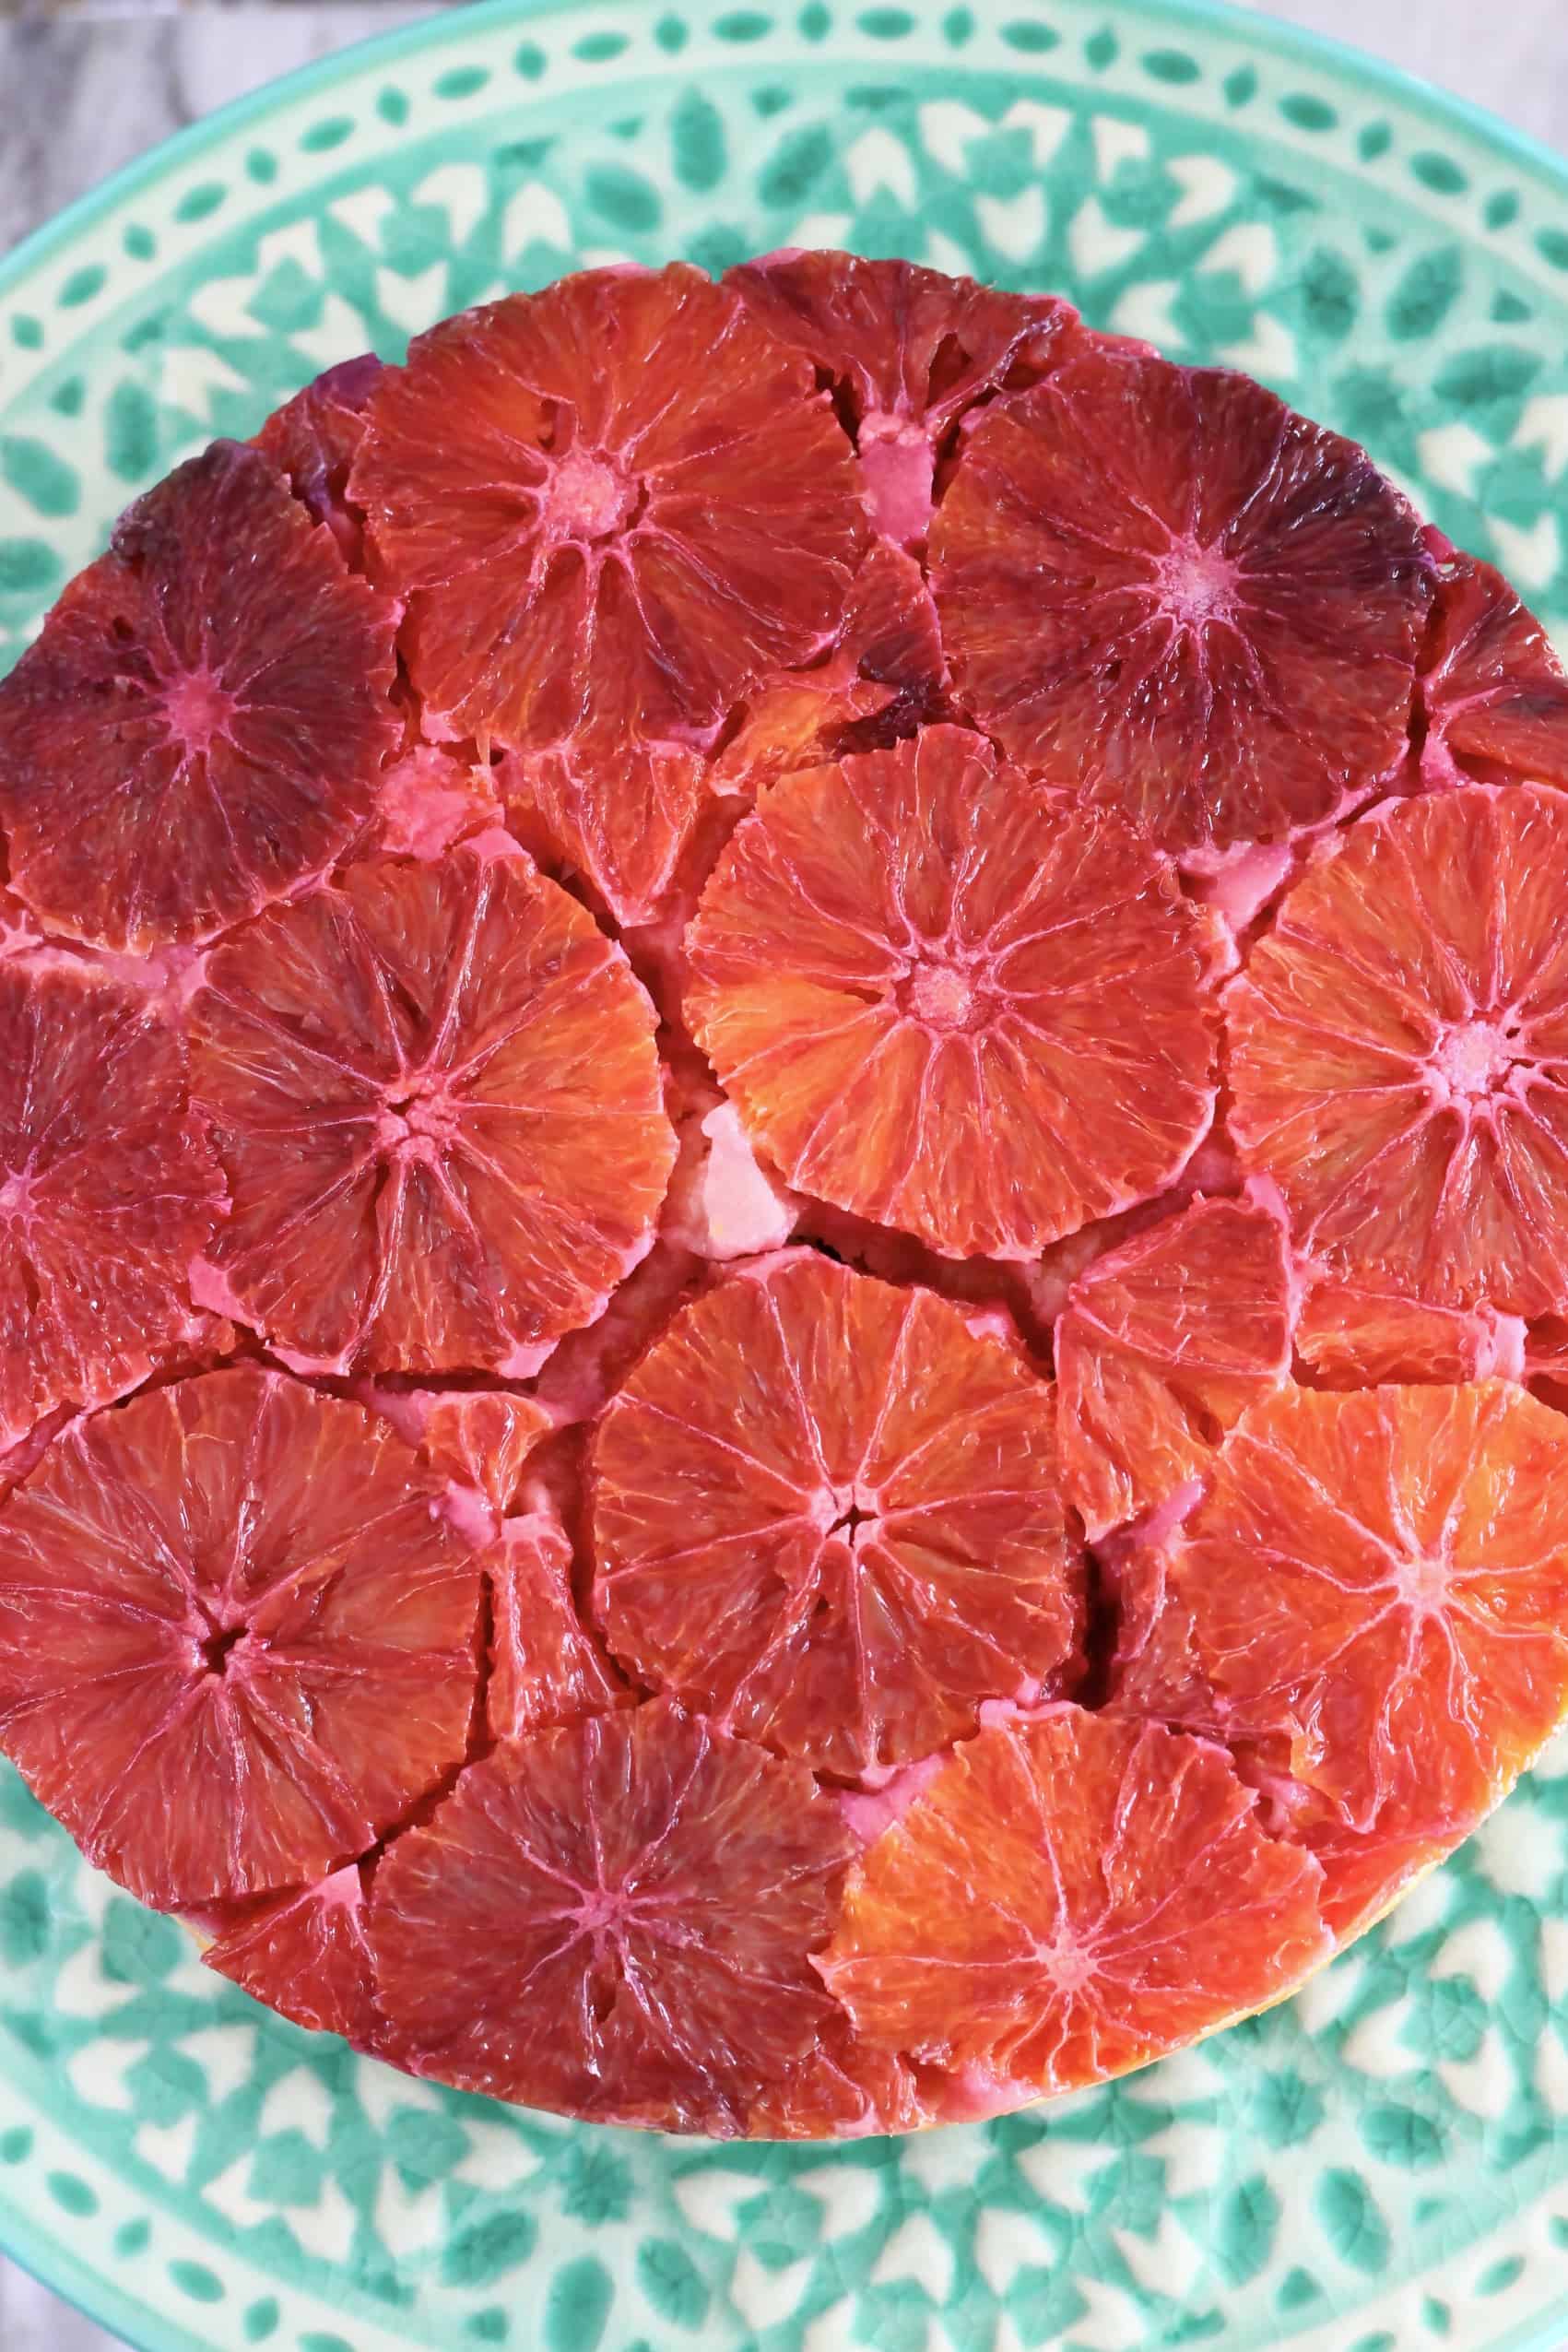
- Lay out the orange slices with the most aesthetically-pleasing side facing downwards, because this is an upside down cake, and so whatever you place facing downwards on the bottom of the tin will become the top-facing part of the cake.
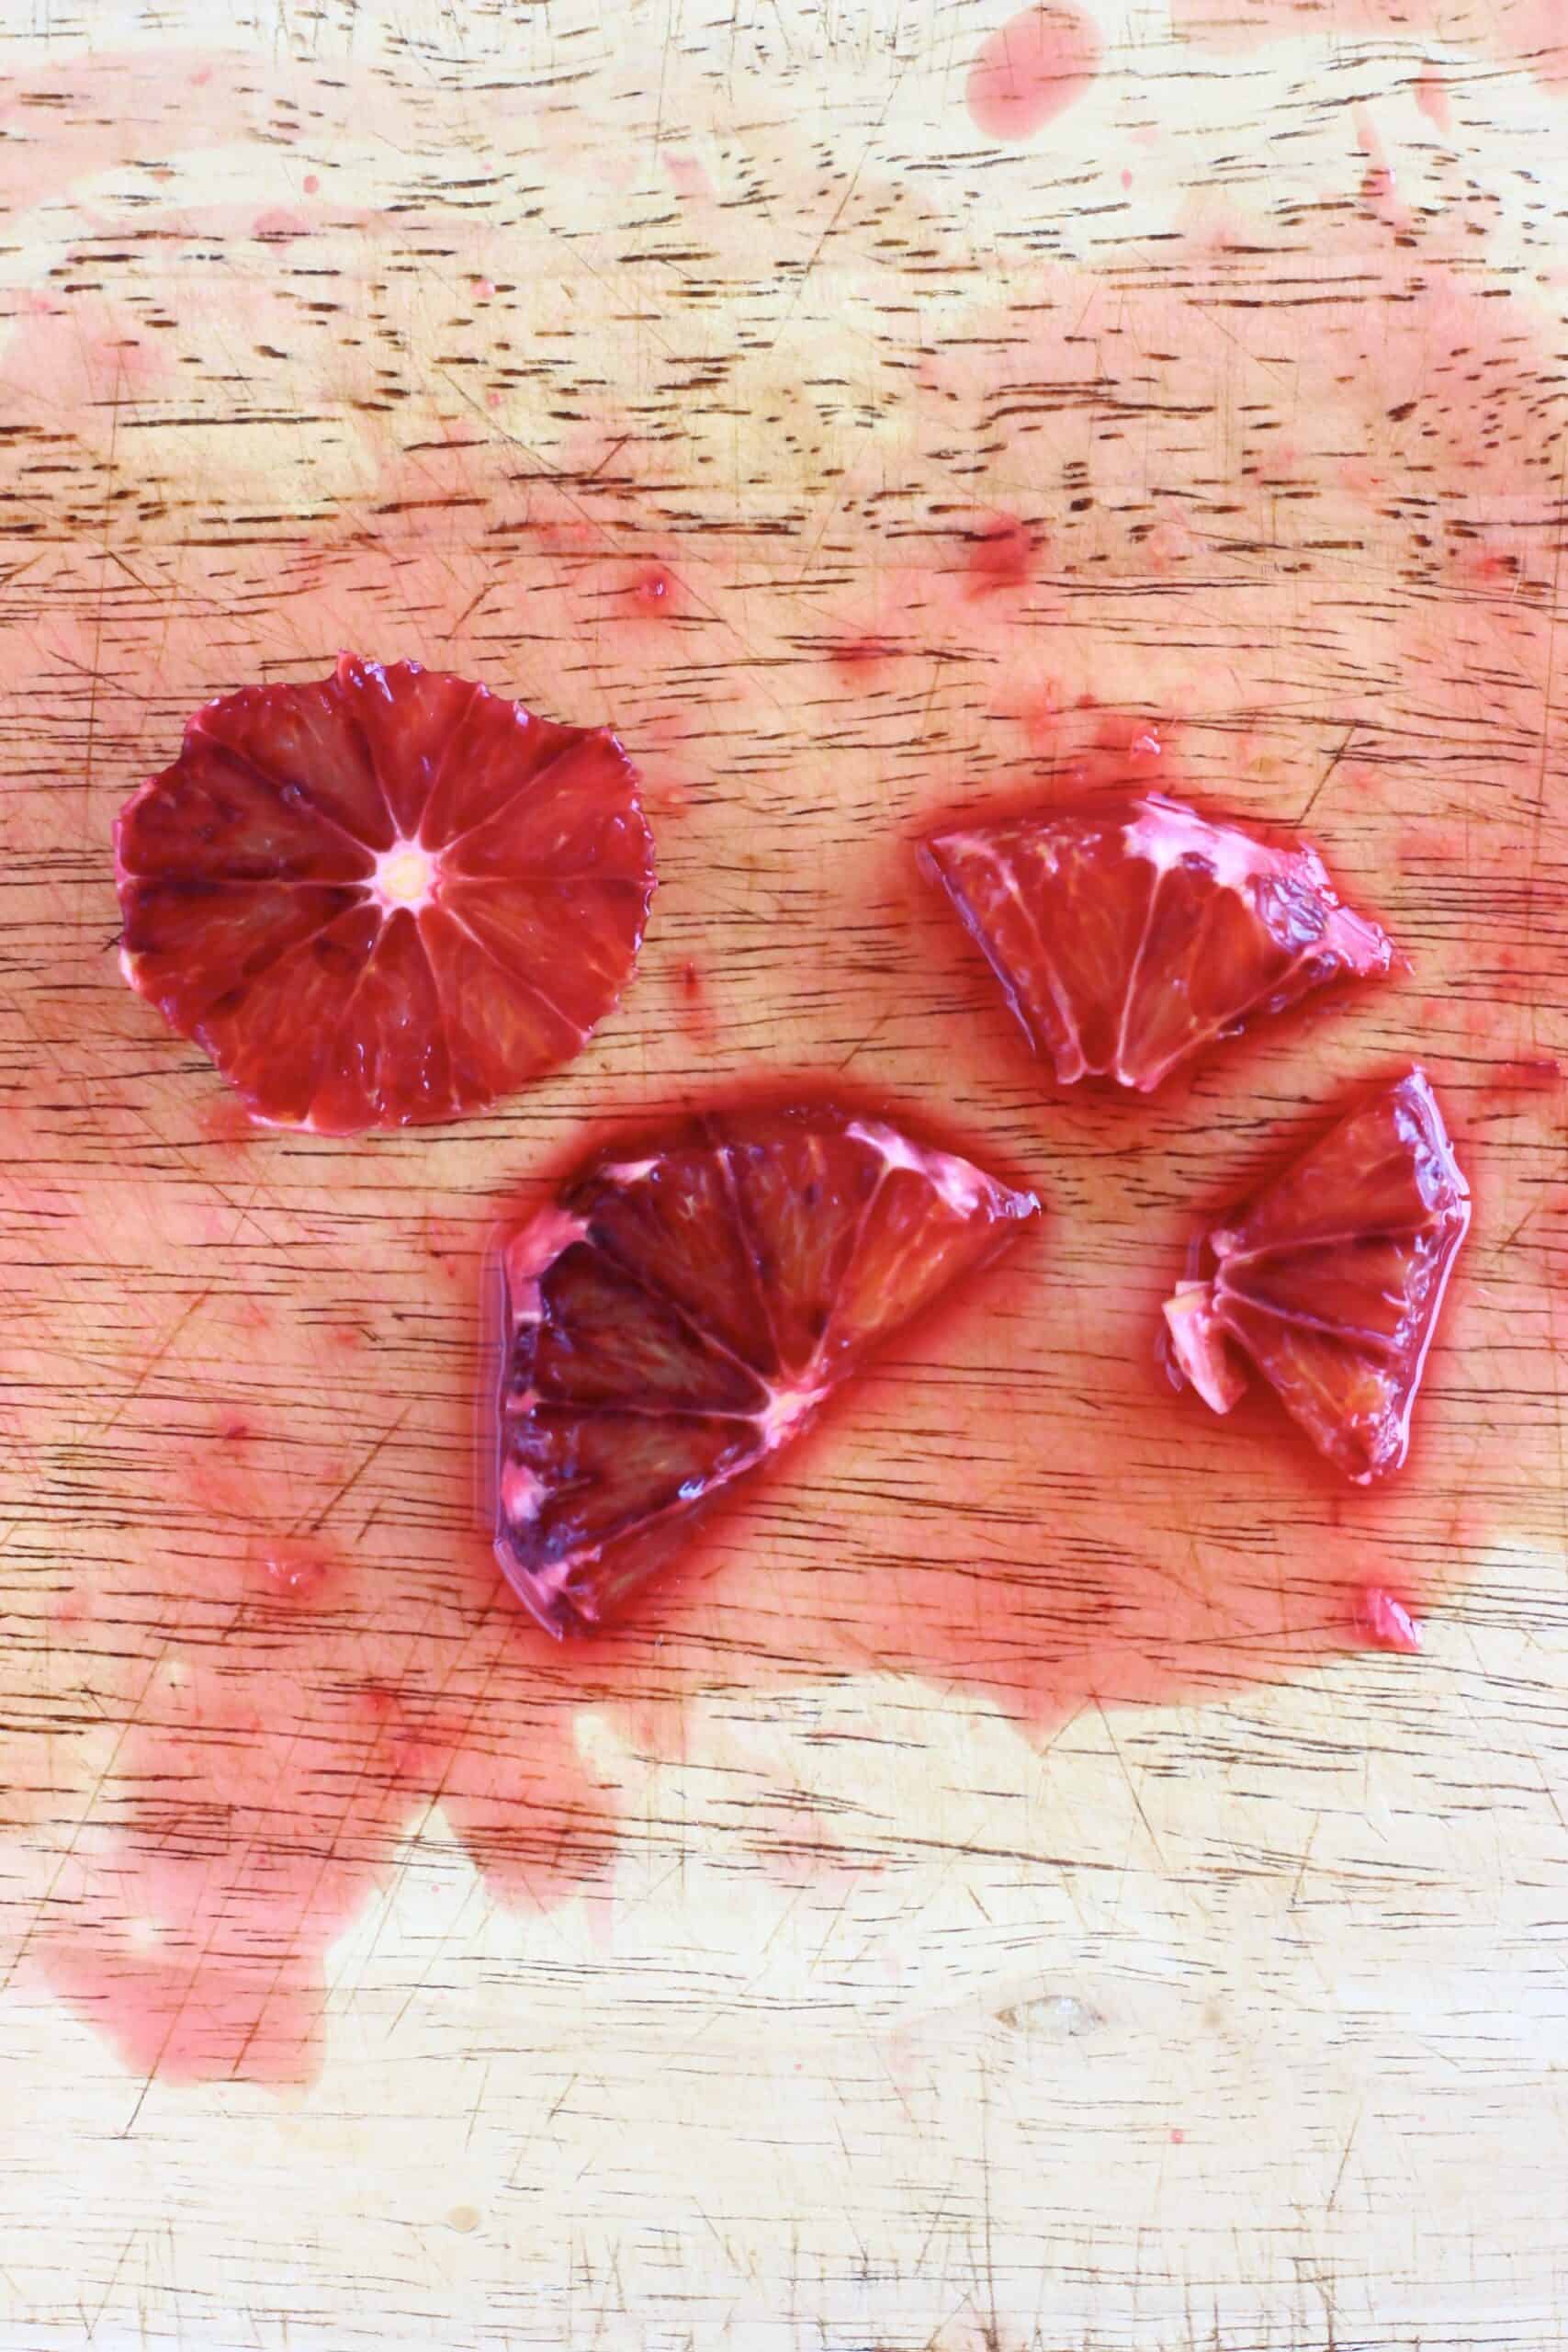
- Cut the remaining orange slices into smaller pieces (halves and quarters etc) and use them to fill any remaining gaps between the orange slices already laid out on the bottom of the baking tin.
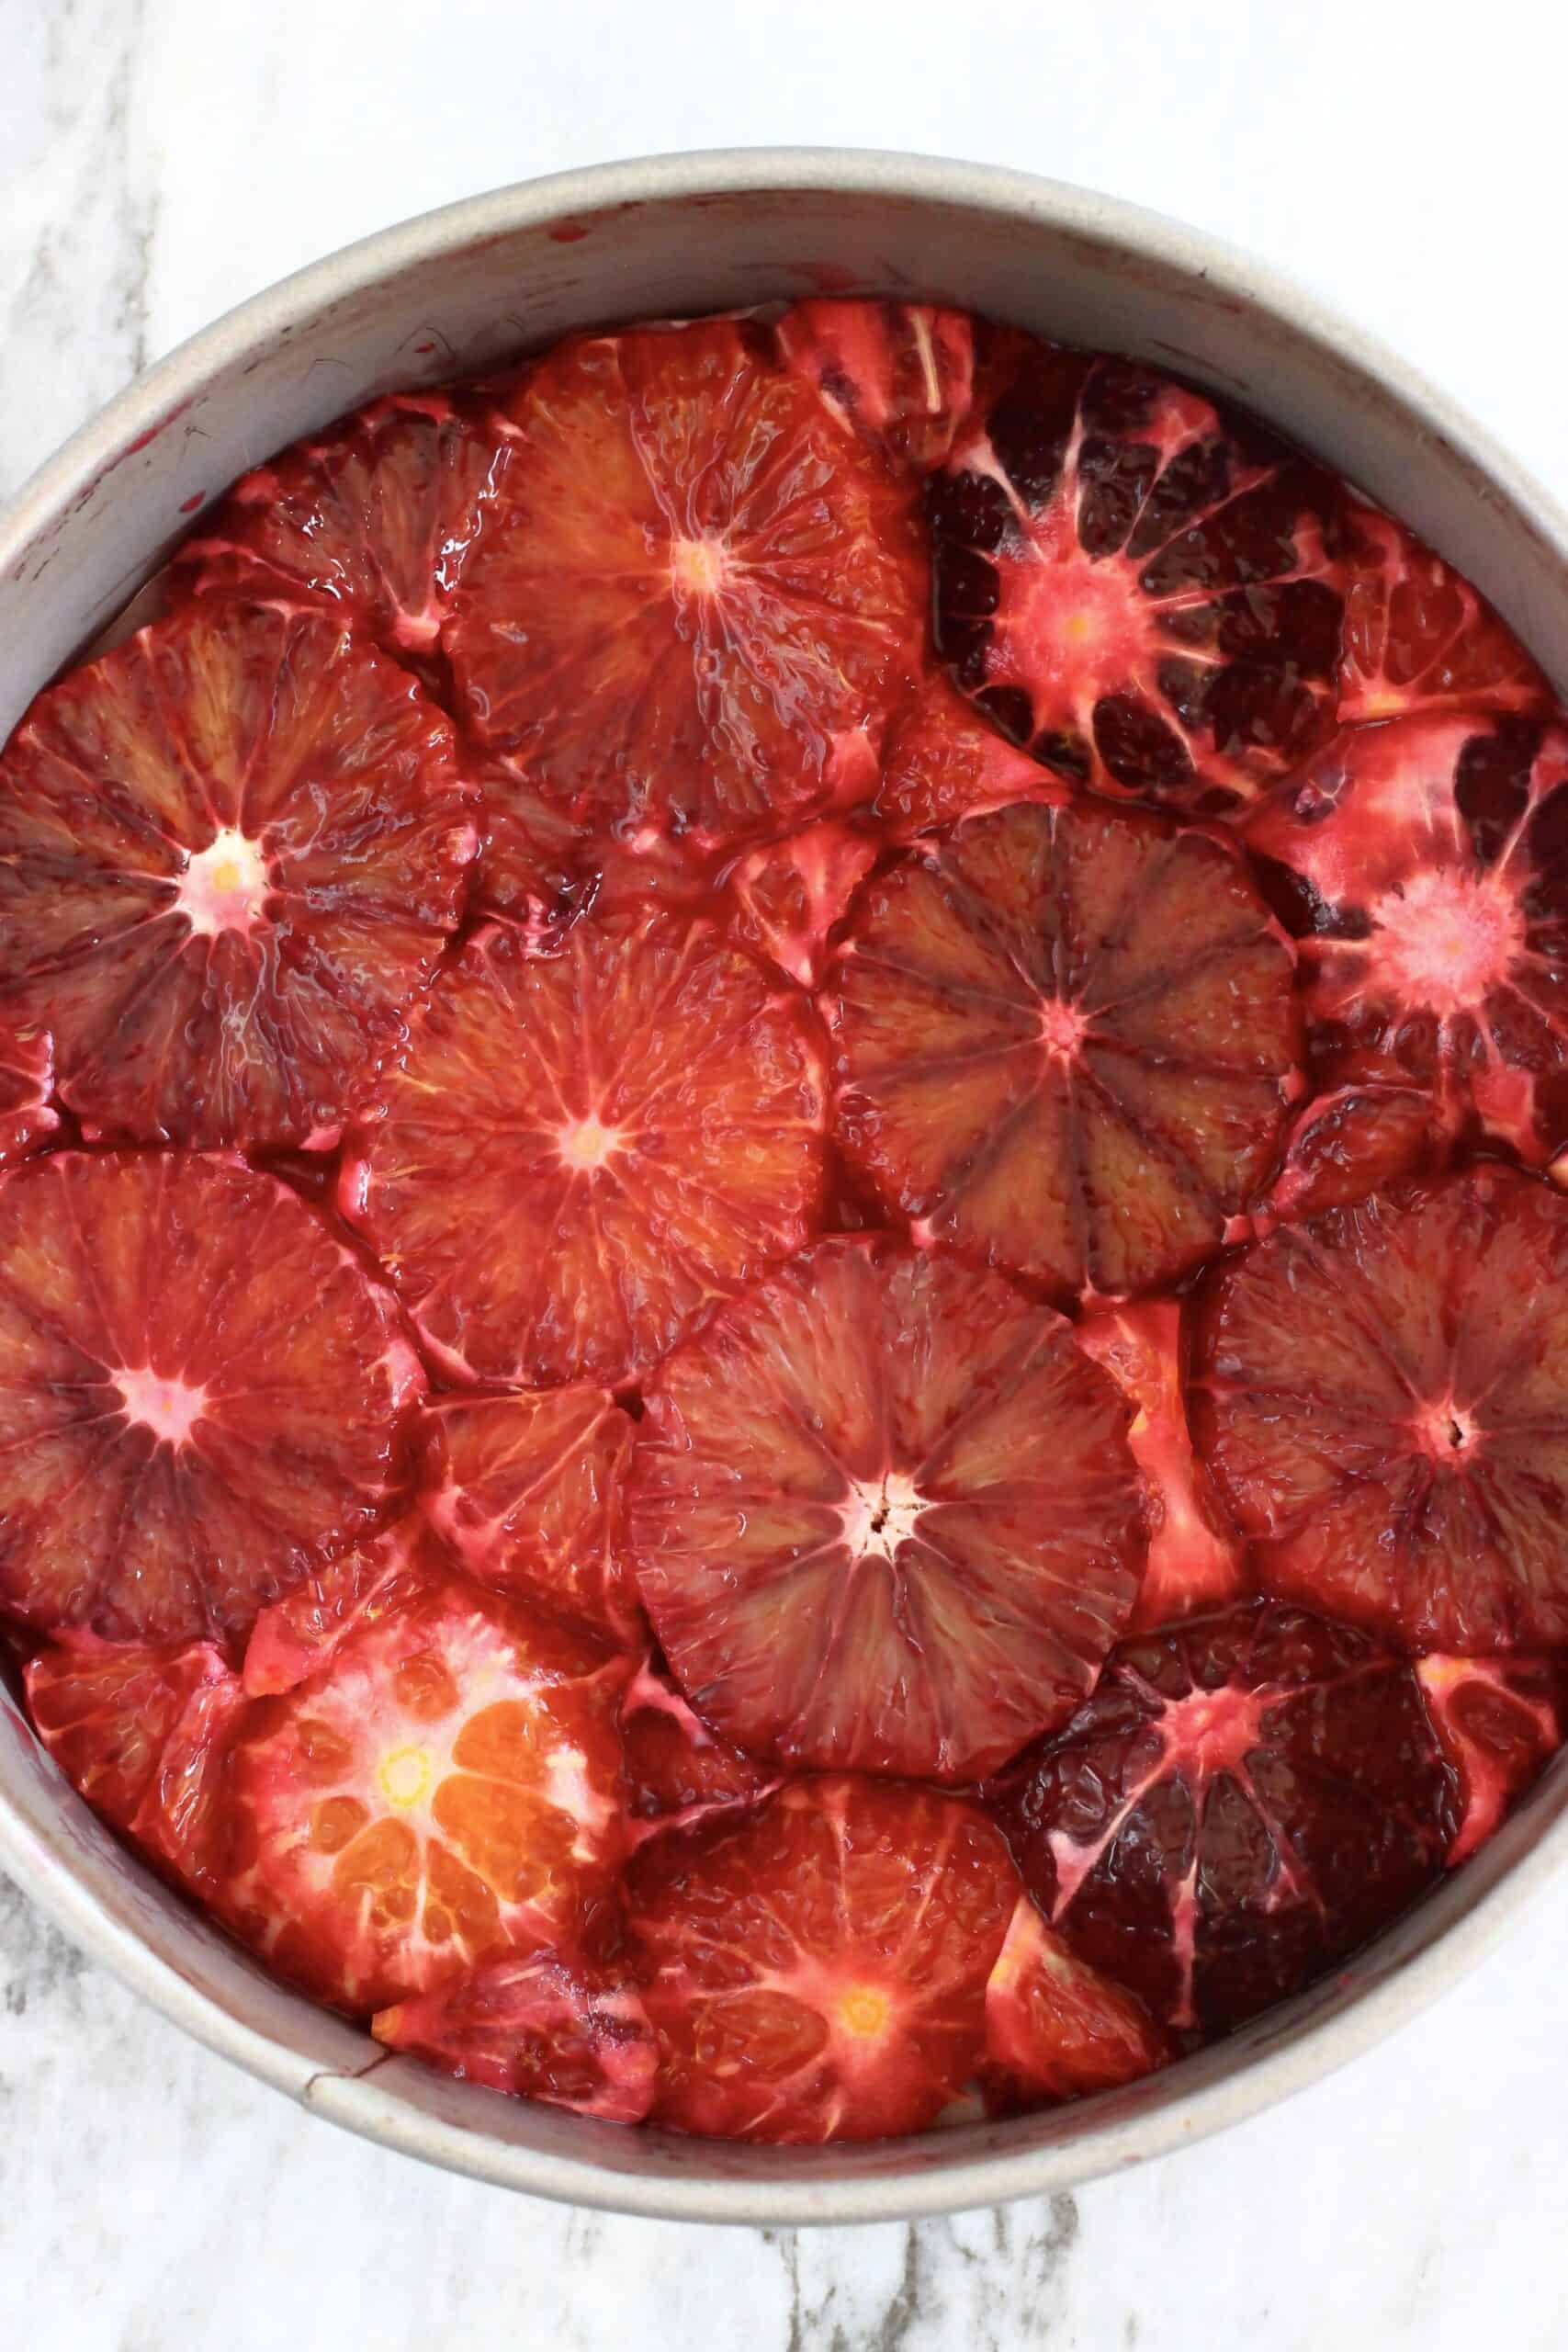
- Fill in all the gaps between orange slices completely, so that there won't be any gaps on the top of the cake when you turn it upside down after baking.
- Make sure that all the orange slices are completely covered up by the cake batter.
- If you are using a springform baking tin, place it onto a separate baking tray (or a larger square baking tin) before putting in the oven, because juice may leak out from the bottom of the baking tin as the oranges cook, which will make a mess in your oven!
- Once out the oven, leave the cake to cool in the tin.
- Once the cake is completely cool, turn it out onto a plate or cake stand - place the plate or cake stand upside down on top of the baking tin, and then quickly flip it over.
How to make this recipe
Scroll down to the bottom of the post for the full recipe.
- Prepare a 18cm / 7 inch springform baking tin lined with greased baking paper.
Tip: Make sure that the baking paper is covering both the bottom and the sides of the tin, to prevent the sides of the cake from getting burnt.
- Evenly sprinkle the coconut sugar across the bottom of the tin.
- Peel the blood oranges - using a kitchen knife and chopping board, slice off both ends, then make vertically slices to cut off all the skin, including the white pith.
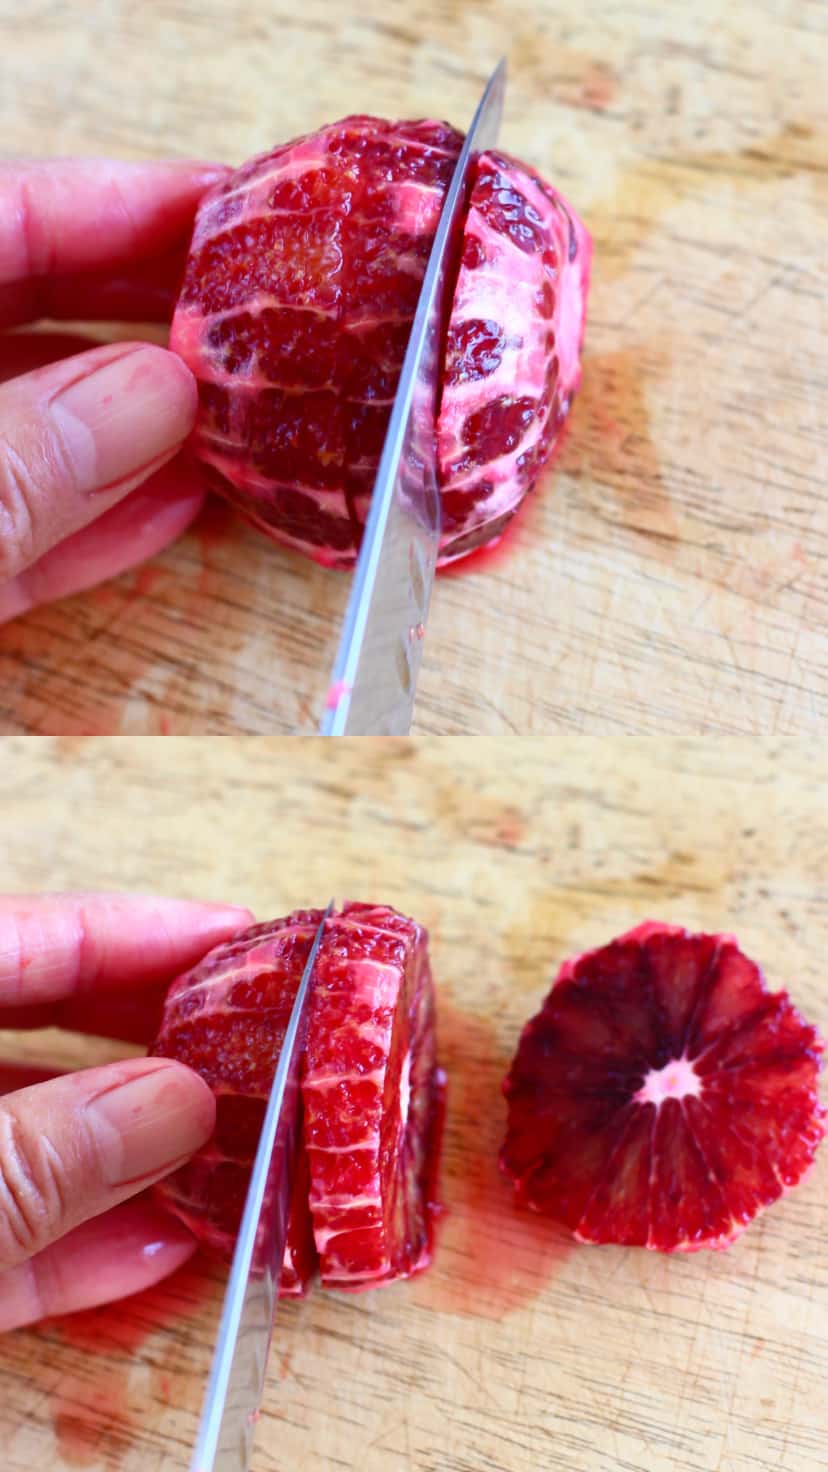
- Lay the peeled oranges on their side so that you can horizontally cut the oranges into slices with a thickness of 1cm (½ inch).
- Lay out the slices along the bottom of the baking tin.
Tip: Make sure to lay the orange slices with the most aesthetically-pleasing side facing downwards, because this is an upside down cake, and so whatever you place facing downwards on the bottom of the tin will become the top-facing part of the cake.
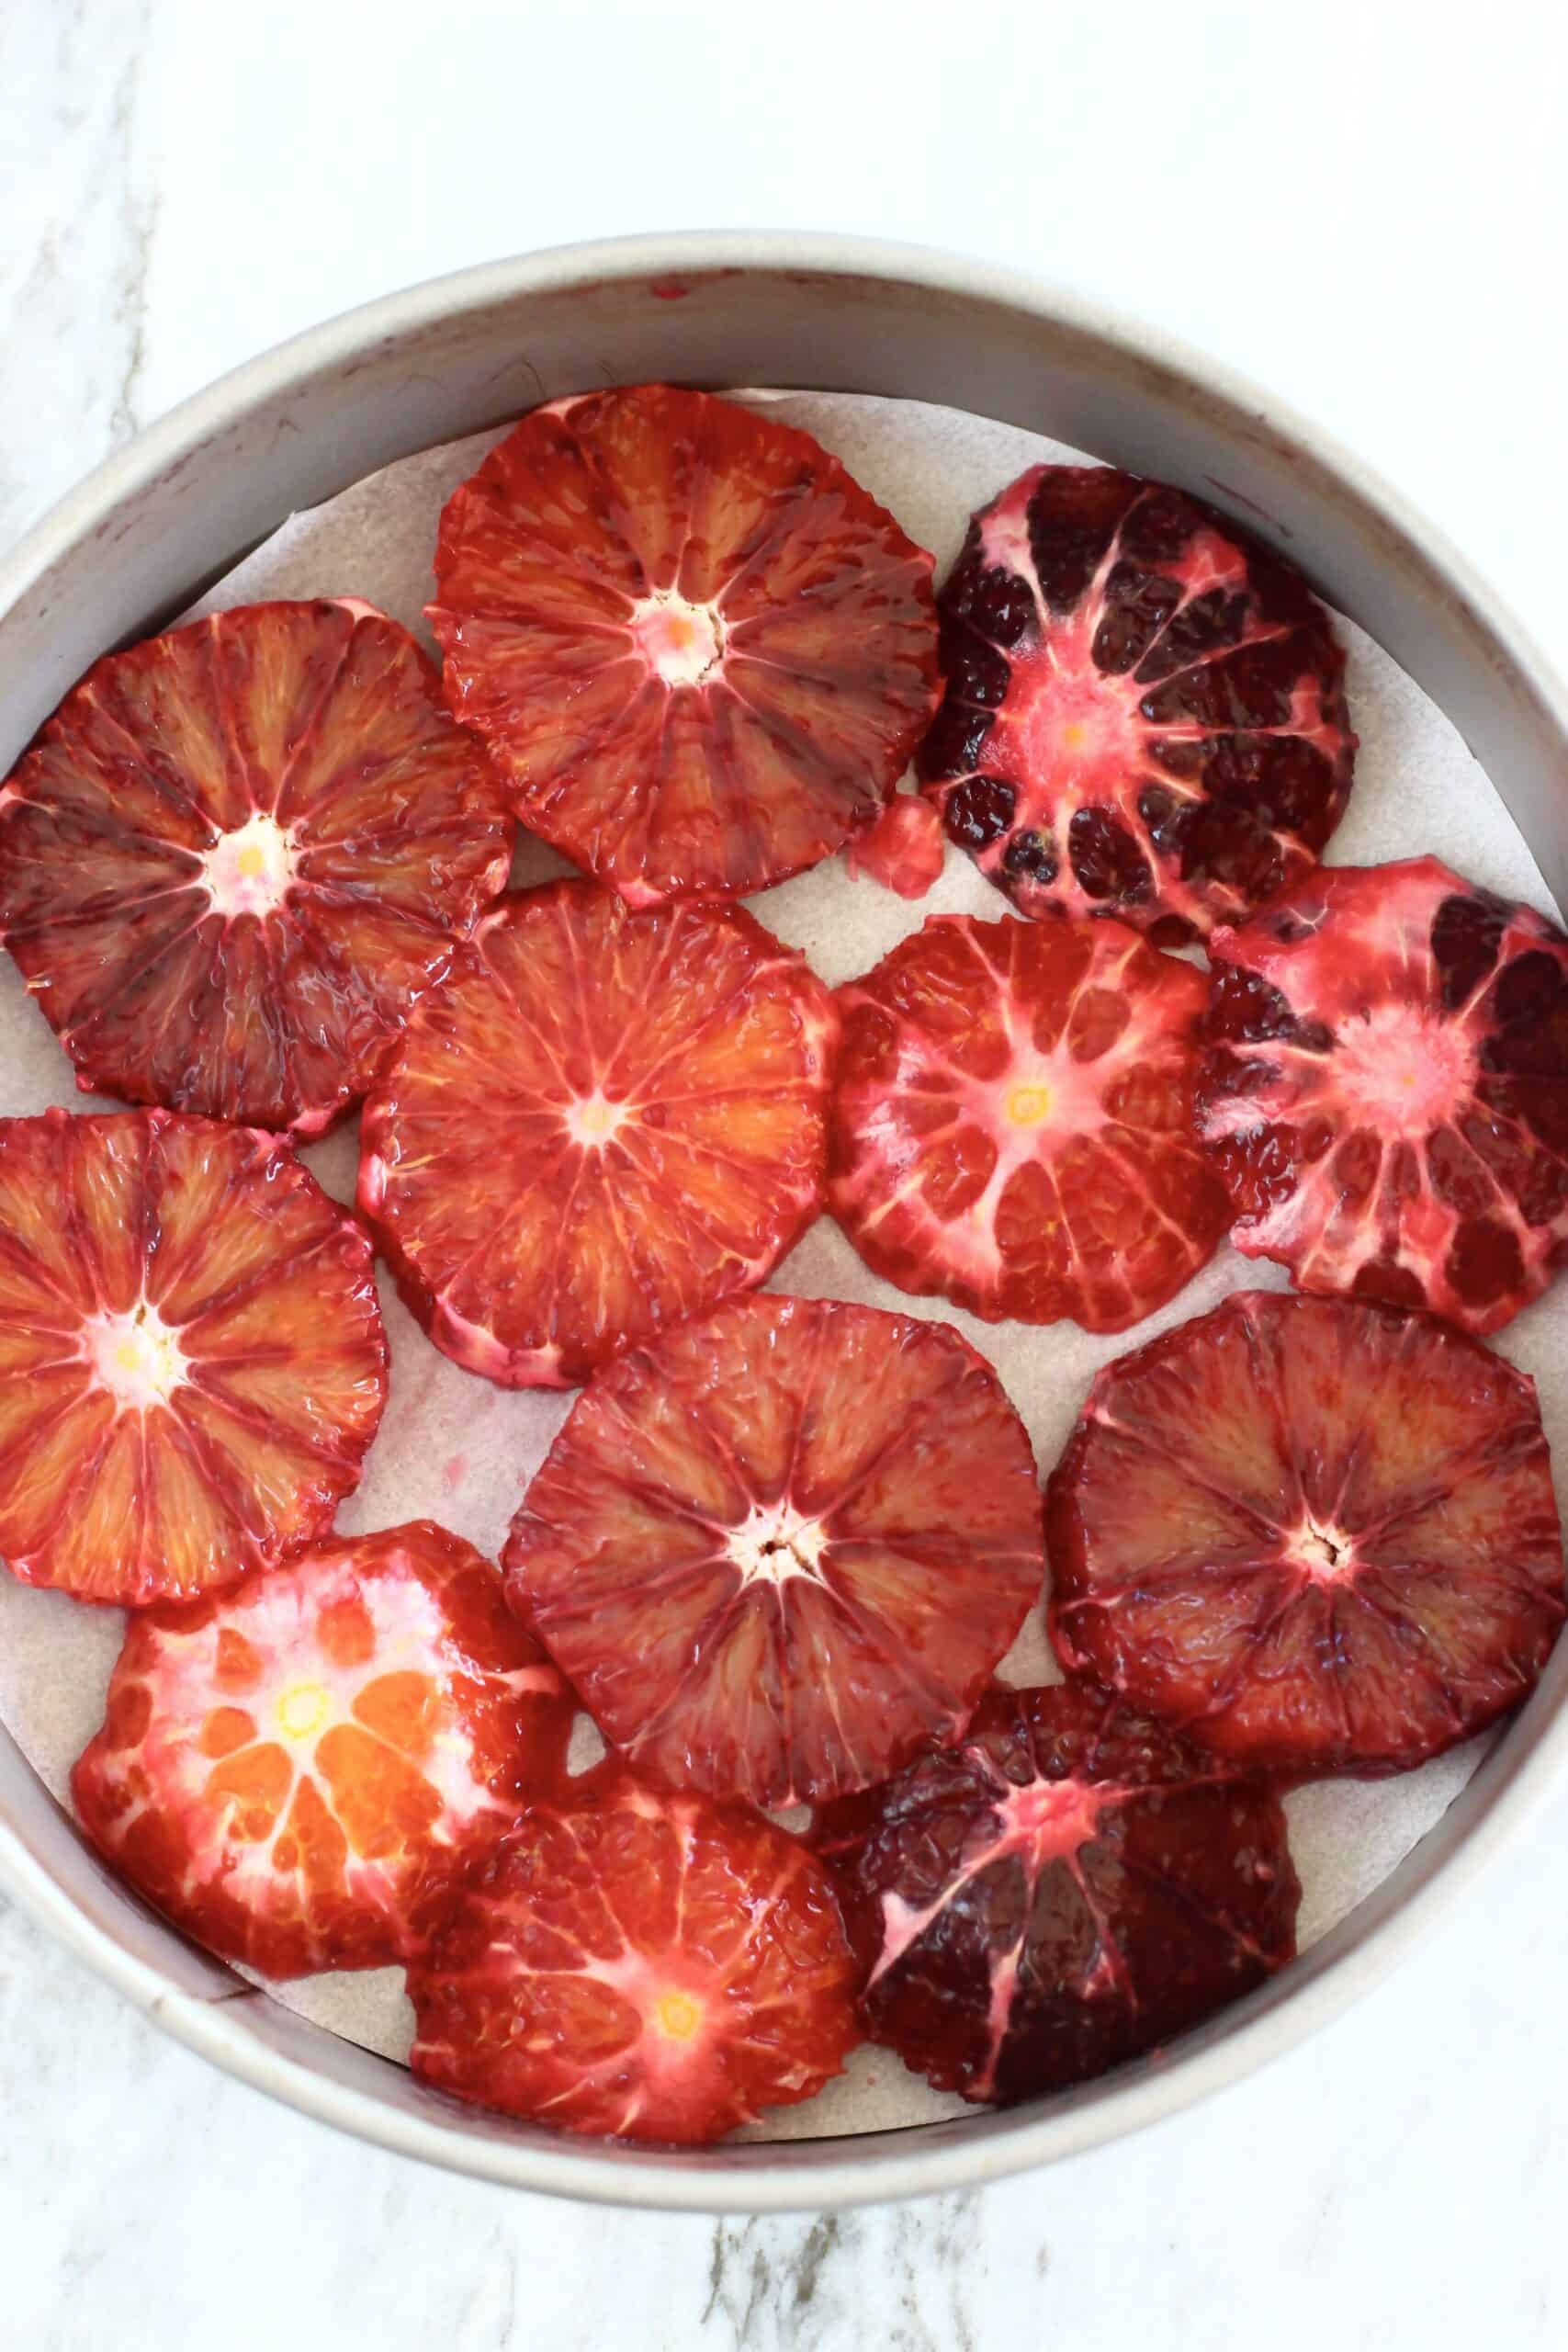
- Cut the remaining orange slices into smaller pieces (halves and quarters etc) and use them to fill any remaining gaps between the orange slices on the bottom of the baking tin.
- Be careful to fill in all the gaps completely, so that there won't be any gaps on the top of the cake when you turn it upside down after baking.
- Mix together all the ingredients for the cake batter in a mixing bowl.
Tip: Make sure to use a measuring jug to measure out the exact amount of plant-based milk!
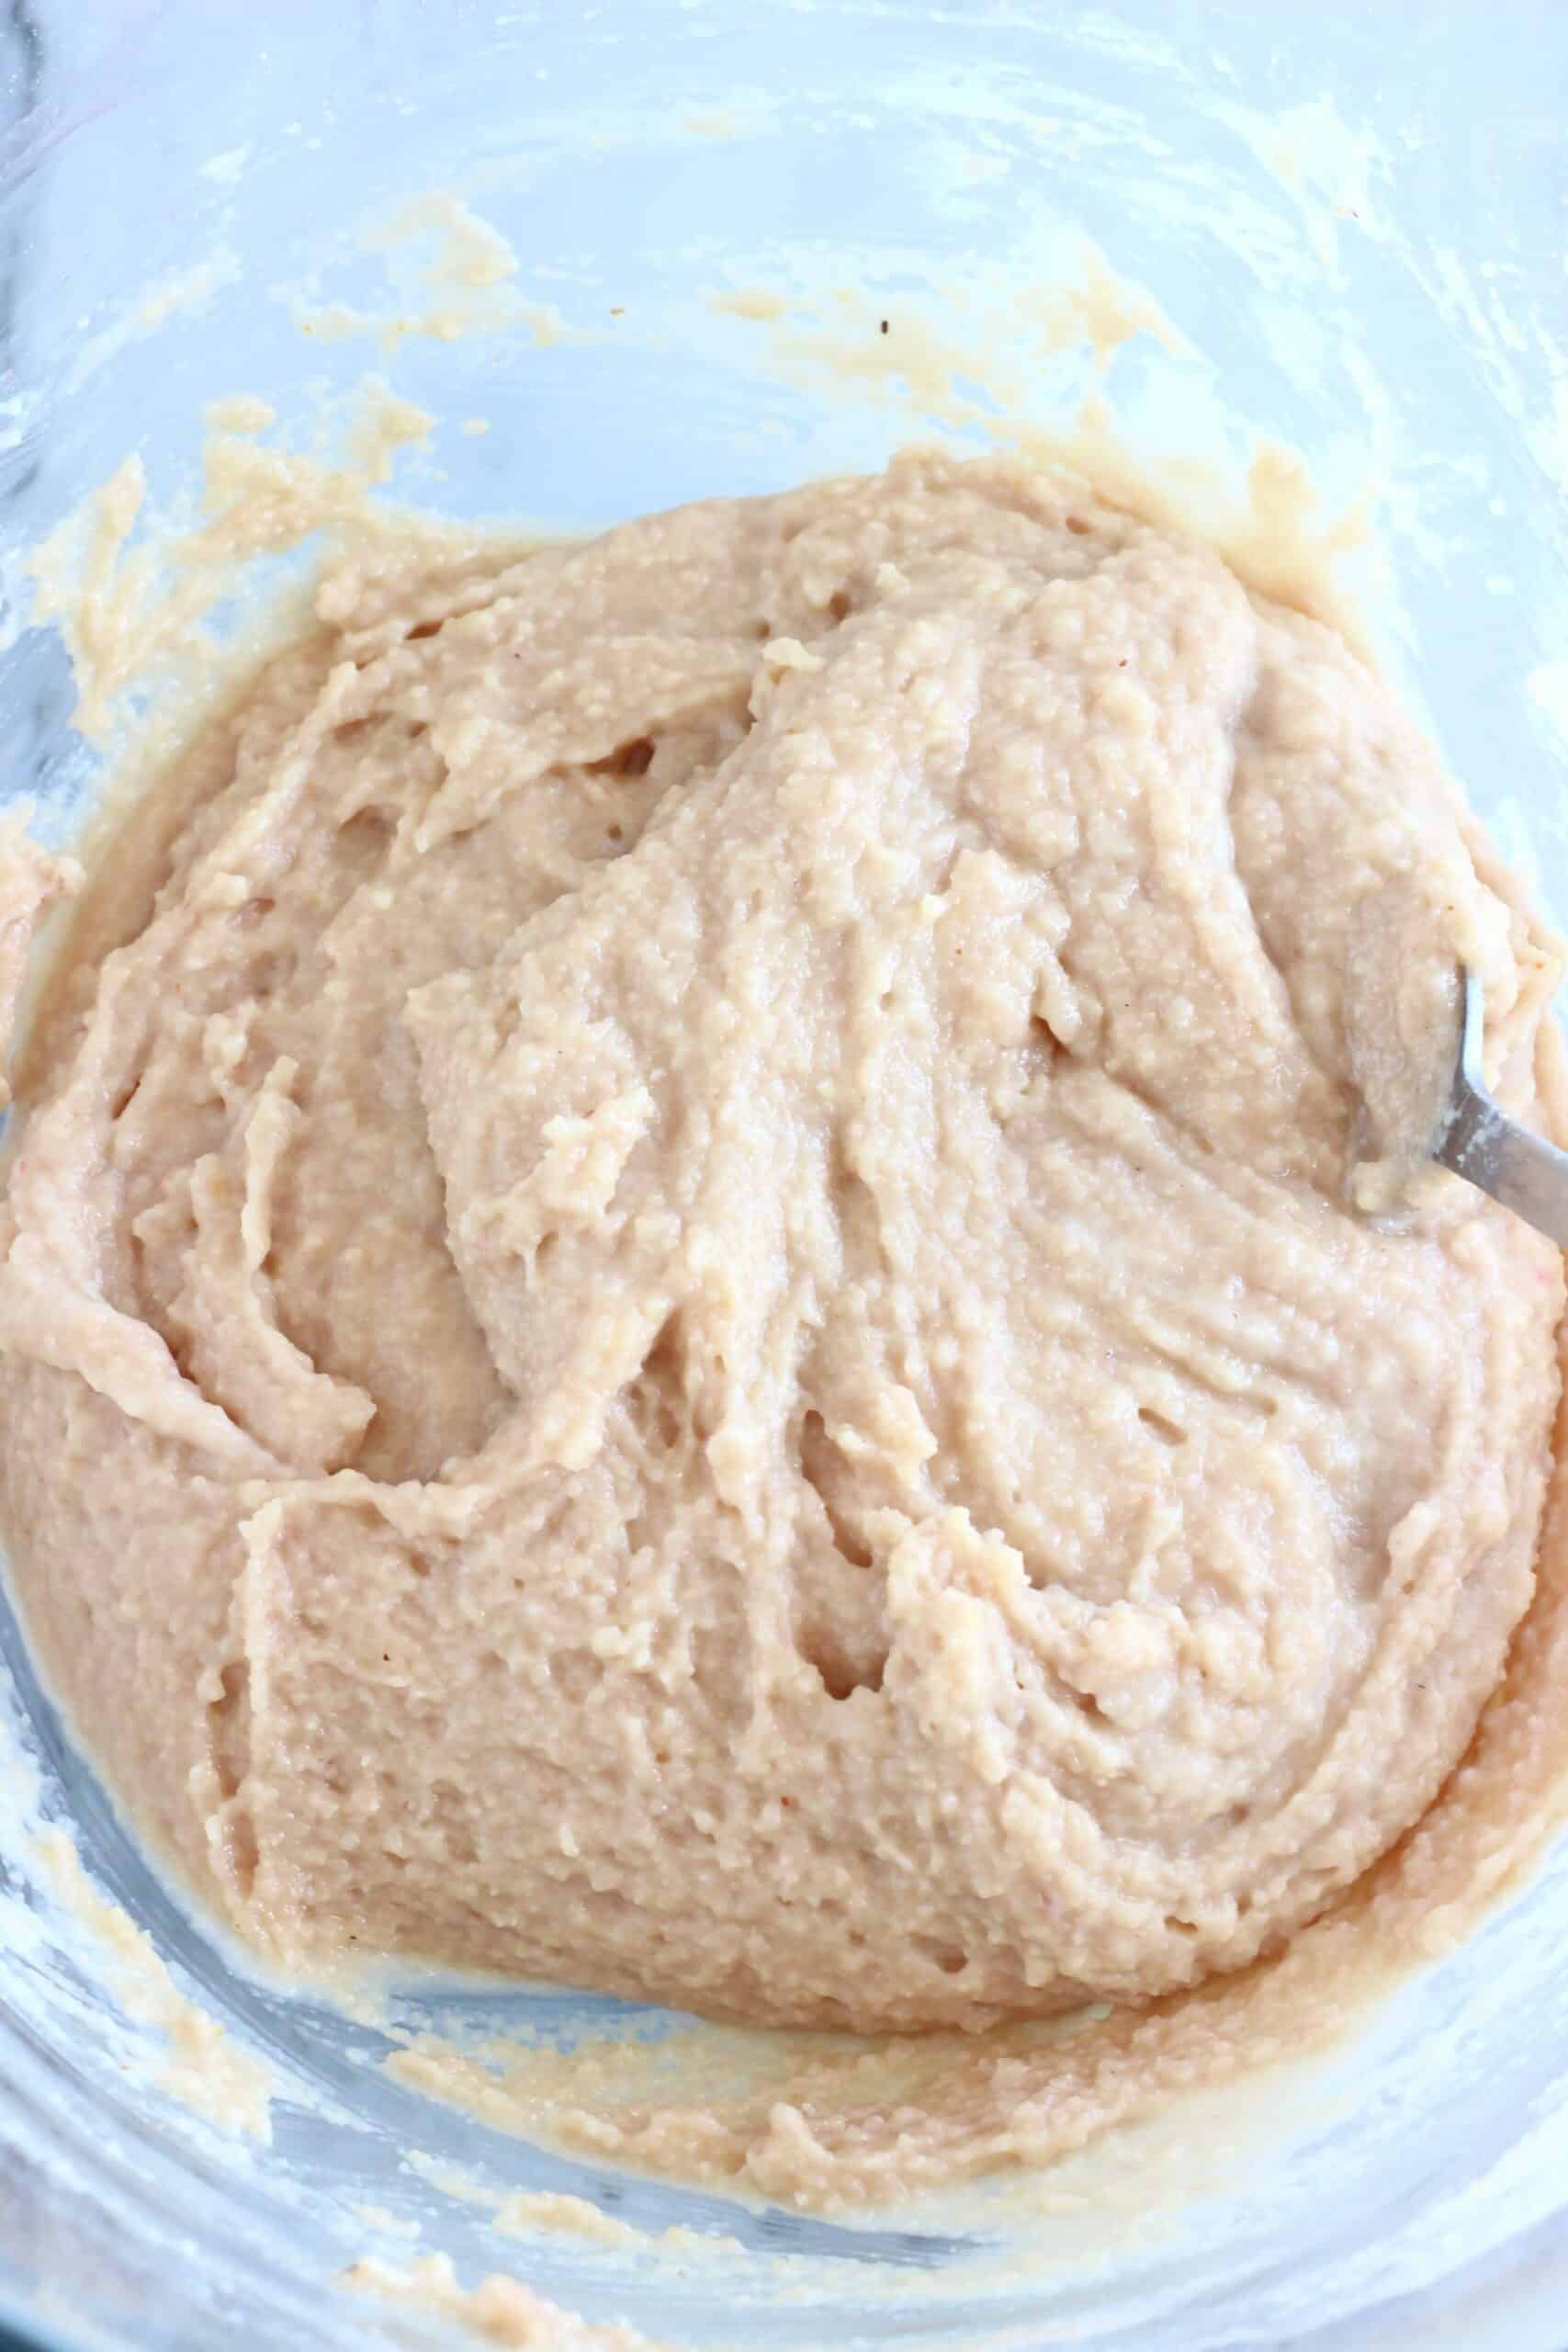
- Transfer the batter into the baking tin.
Tip: Make sure that all the orange slices are completely covered up by the cake batter.

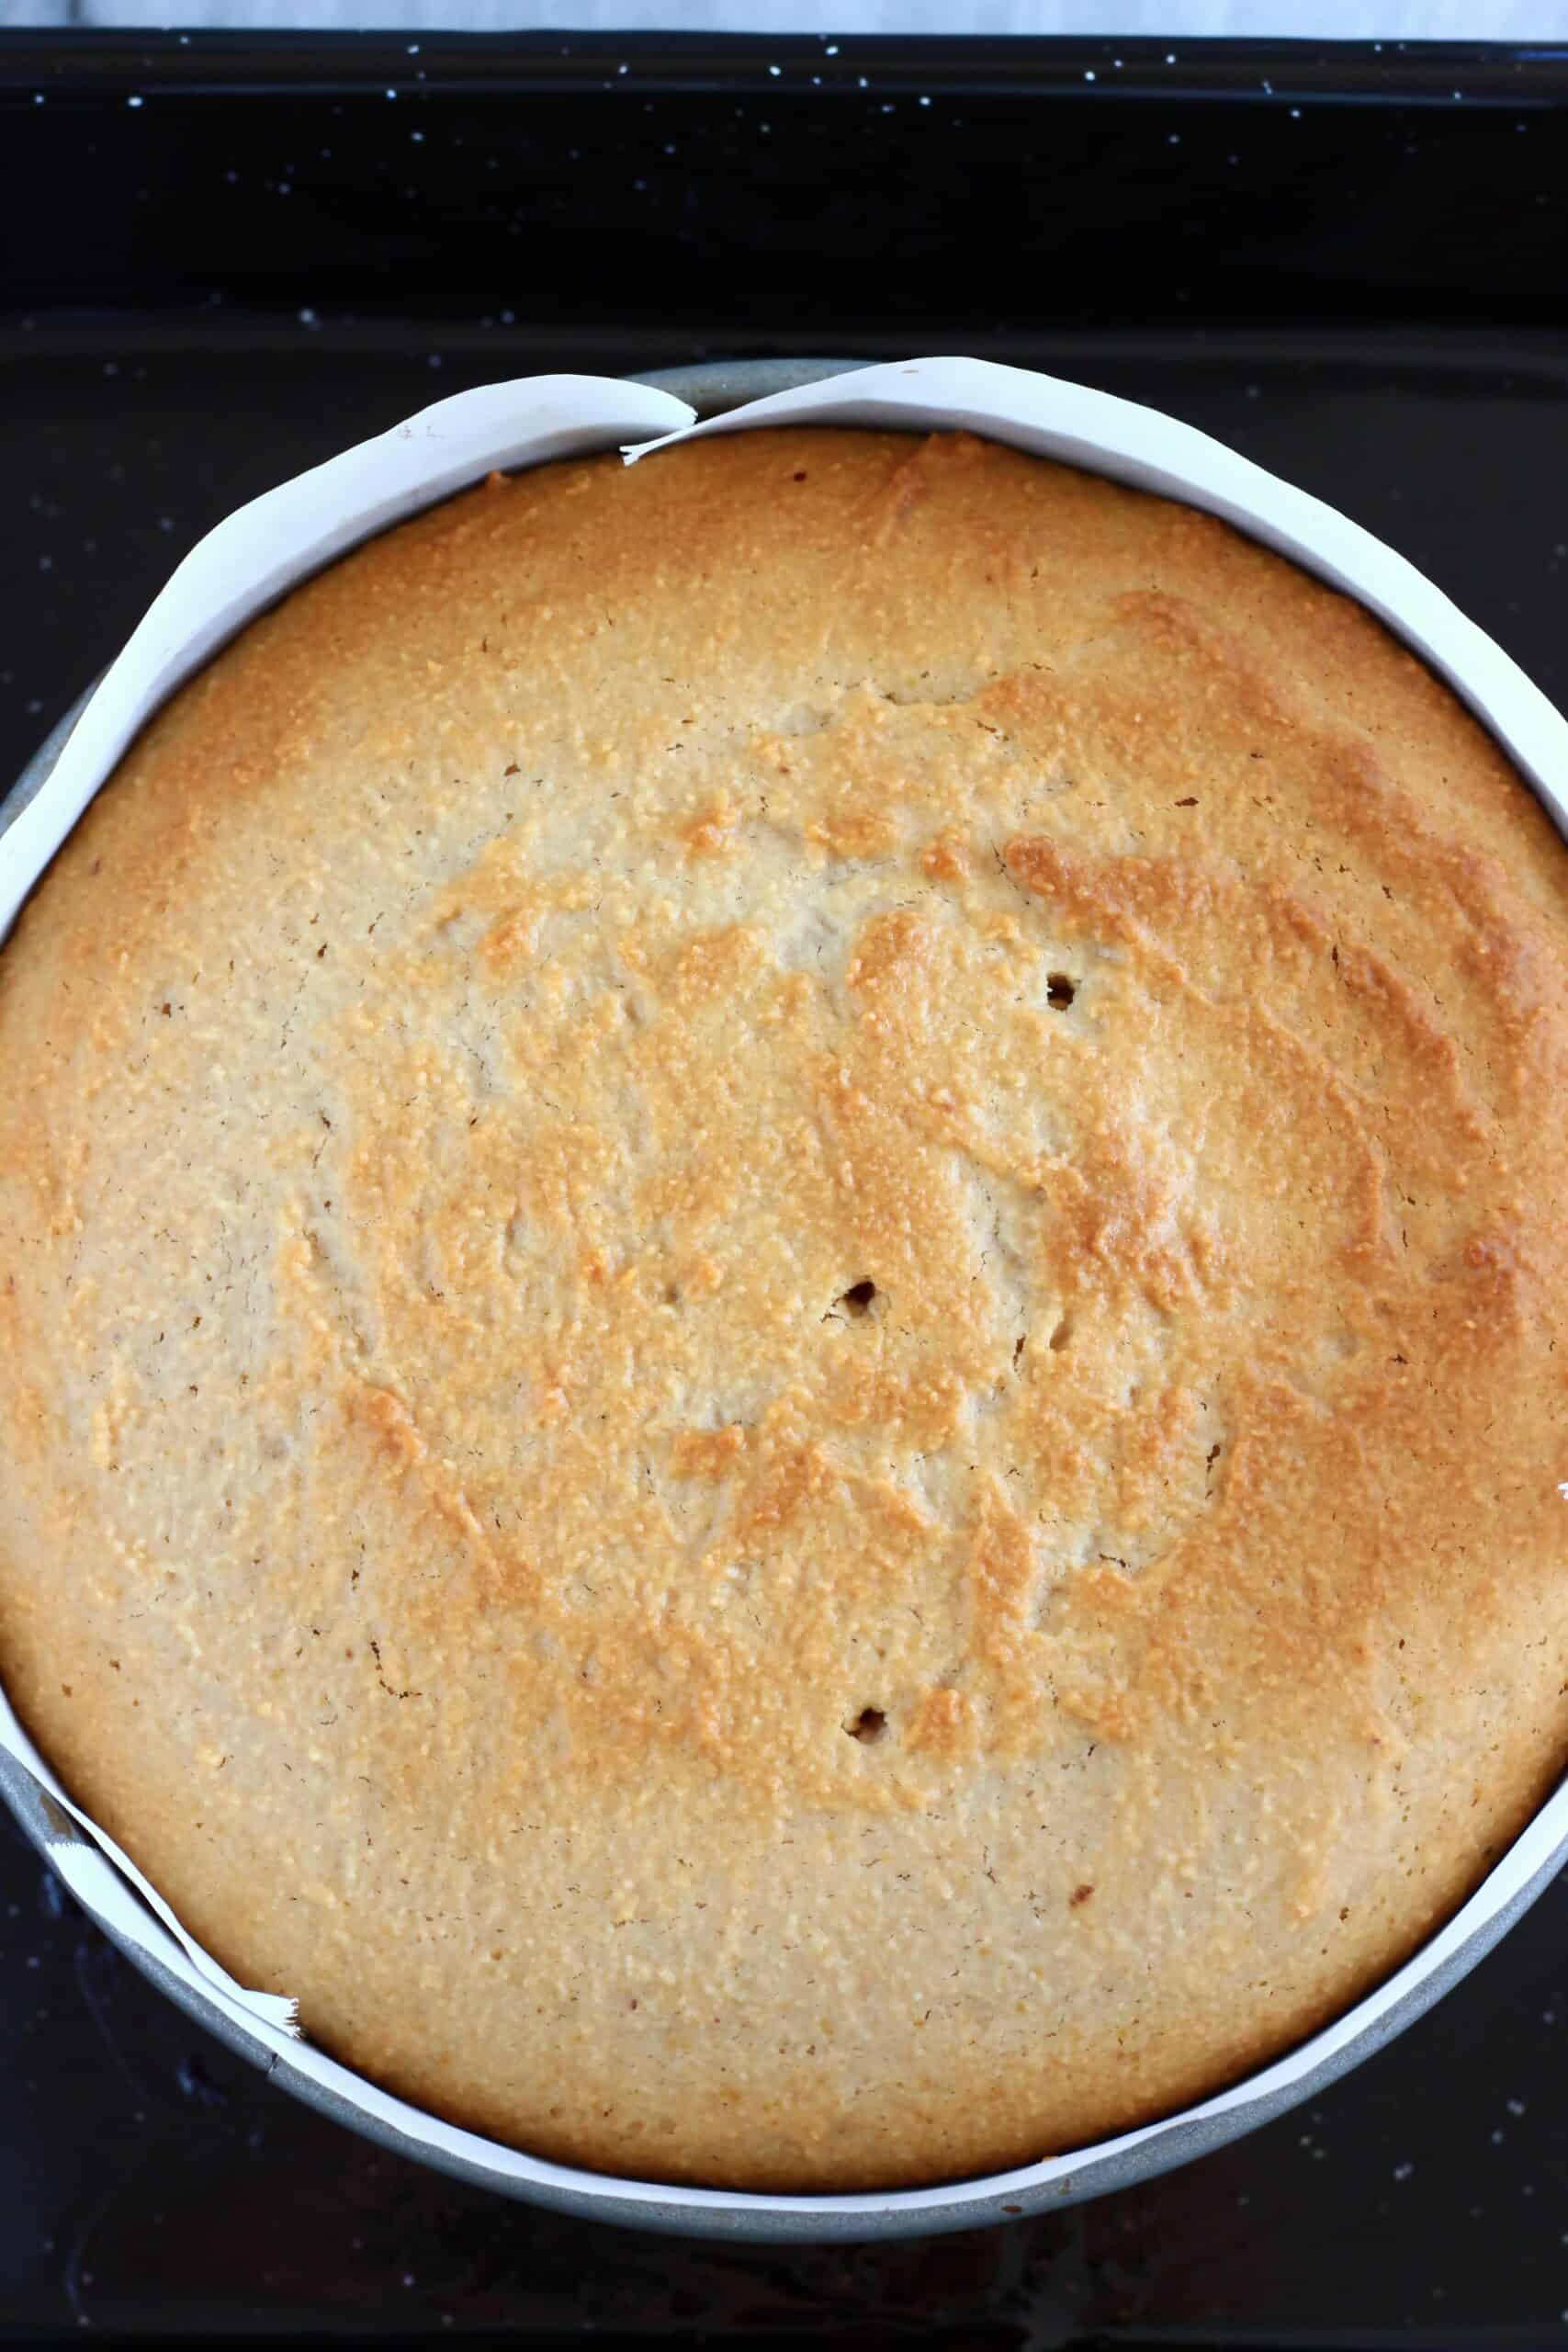
- Bake in the oven for 30 minutes, until an inserted skewer comes out clean.
Tip: If you are using a springform baking tin, make sure to place it onto a separate baking tray (or a larger square baking tin) before putting in the oven, because juice may leak out from the bottom of the baking tin as the oranges cook, which will make a mess in your oven!
- Once out the oven, leave the cake to cool in the tin.
- Once the cake is completely cool, turn it out onto a plate or cake stand - place the plate or cake stand upside down on top of the baking tin, and then quickly flip it over.
Substitutions you can make to this recipe
- You can use any type of oil: coconut oil, olive oil or vegetable oil.
- You can use any type of plant-based milk: almond milk, rice milk, soy milk, cashew milk, oat milk etc.
- You can use any type of liquid sweetener: maple syrup, agave syrup, brown rice syrup etc.
- You can replace the ground almonds (almond meal/almond flour) with ground walnuts.
- For a nut-free version: replace the ground almonds (almond meal/almond flour) with ground sunflower seeds or use 30g (¼ cup) coconut flour instead of 150g (1 ¼ cup) ground almonds.
- You can use plain flour, wholemeal (whole wheat) flour or spelt flour instead of the gluten-free flour if you're not gluten-free.
- You can replace the coconut sugar with regular cane sugar.
- You can replace the blood oranges with regular oranges.
- You can replace the freshly squeezed blood orange juice with regular orange juice, either freshly squeezed or from a carton.
Serving suggestions
- Coconut whipped cream.
- Vanilla (or chocolate) ice cream.
How long does this cake keep for?
It tastes best eaten on the day it's made, but keeps covered in the fridge for up to a few days.

More gluten-free vegan cake recipes
- Lemon Blueberry Cake
- Matcha Strawberry Cake
- Chocolate Cake
- Orange Cake
- Strawberry Cake
- Black Forest Cake
- Red Velvet Cake
- Lemon Yogurt Cake
- Ginger Cake
- Matcha Cake
If you try out this recipe or anything else from my blog, I'd really love to hear any feedback! Please give it a rating, leave a comment, or tag a photo @rhiansrecipes #rhiansrecipes on Instagram! Thank you.

Gluten-Free Vegan Blood Orange Cake
Ingredients
For the oranges:
- 1 tablespoon coconut sugar * (or sub normal sugar)
- 4-5 blood oranges ** (I used 4 blood oranges with a circumference of 6 cm/2 ½ inches)
For the cake:
- 60 g (¼ cup) coconut oil (or sub olive or vegetable oil)
- 60 ml (¼ cups) blood orange juice (freshly squeezed - can also sub normal orange juice, either freshly squeezed or from a carton)
- 150 ml (⅔ cup) unsweetened almond milk (or any other plant-based milk)
- 8 tablespoons maple syrup (or sub any other sweetener)
- 1 teaspoon vanilla extract
- Pinch salt
- 150 g (1 ¼ cup) ground almonds (almond meal) ***
- 150 g (1 ¼ cup) gluten-free flour blend (or sub plain flour if not gluten-free)
- 2 heaped teaspoons baking powder (ensure gluten-free if necessary)
- ¼ teaspoon bicarbonate of soda (baking soda)
Instructions
For the oranges:
- Prepare a 7 inch/18 cm springform baking tin lined with greased baking paper. Make sure that the baking paper is covering both the bottom and the sides of the tin, to prevent the sides of the cake from getting burnt.
- Evenly sprinkle the coconut sugar across the bottom of the tin.
- Peel the blood oranges - using a kitchen knife and chopping board, slice off both ends, then make vertically slices to cut off all the skin. Make sure to cut off all of the skin, including the white pith, as keeping this will spoil the appearance and taste of the cake.
- Lay the peeled oranges on their side so that you can horizontally cut the oranges into slices with a thickness of 1cm (½ inch).
- Lay out the slices along the bottom of the baking tin. Make sure to lay the orange slices with the most aesthetically-pleasing side facing downwards, because this is an upside down cake, and so whatever you place facing downwards on the bottom of the tin will become the top-facing part of the cake.
- Cut the remaining orange slices into smaller pieces (halves and quarters etc) and use them to fill any remaining gaps between the orange slices already laid out on the bottom of the baking tin. Be careful to fill in all the gaps completely, so that there won't be any gaps on the top of the cake when you turn it upside down after baking.
For the cake:
- Preheat the oven to 180 degrees Celsius (350 degrees Fahrenheit).
- Place the coconut oil in a large bowl and melt over a saucepan of boiling water or in the microwave (skip this step if using any other oil).
- Once melted, add the orange juice to the same bowl along with the milk, maple syrup, vanilla, salt and ground almonds.
- Sift in the flour, baking powder and bicarbonate of soda.
- Mix well, adding a tiny splash more milk if it's looking too dry.
- Transfer the mixture into the baking tin, making sure that all the orange slices are completely covered up by the cake batter.
- If you are using a springform baking tin, place it onto a separate baking tray (or a larger square baking tin) before putting in the oven, because juice may leak out from the bottom of the baking tin as the oranges cook, which will make a mess in your oven!
- Bake in oven for around 30 minutes, until risen and golden brown and an inserted skewer comes out clean.
- Once out the oven, leave the cake to cool in the tin.
- Once the cake is completely cool, turn it out onto a plate or cake stand - place the plate or cake stand upside down on top of the baking tin, and then quickly flip it over.
- Tastes best when fresh, but keeps covered in the fridge for up to a few days
Notes
Disclosure: This posts contains affiliate links to Amazon. If you purchase any of these products, a small percentage will come to me with no extra cost to you! This income will go towards the running of this blog - thank you.


Leave a Reply