


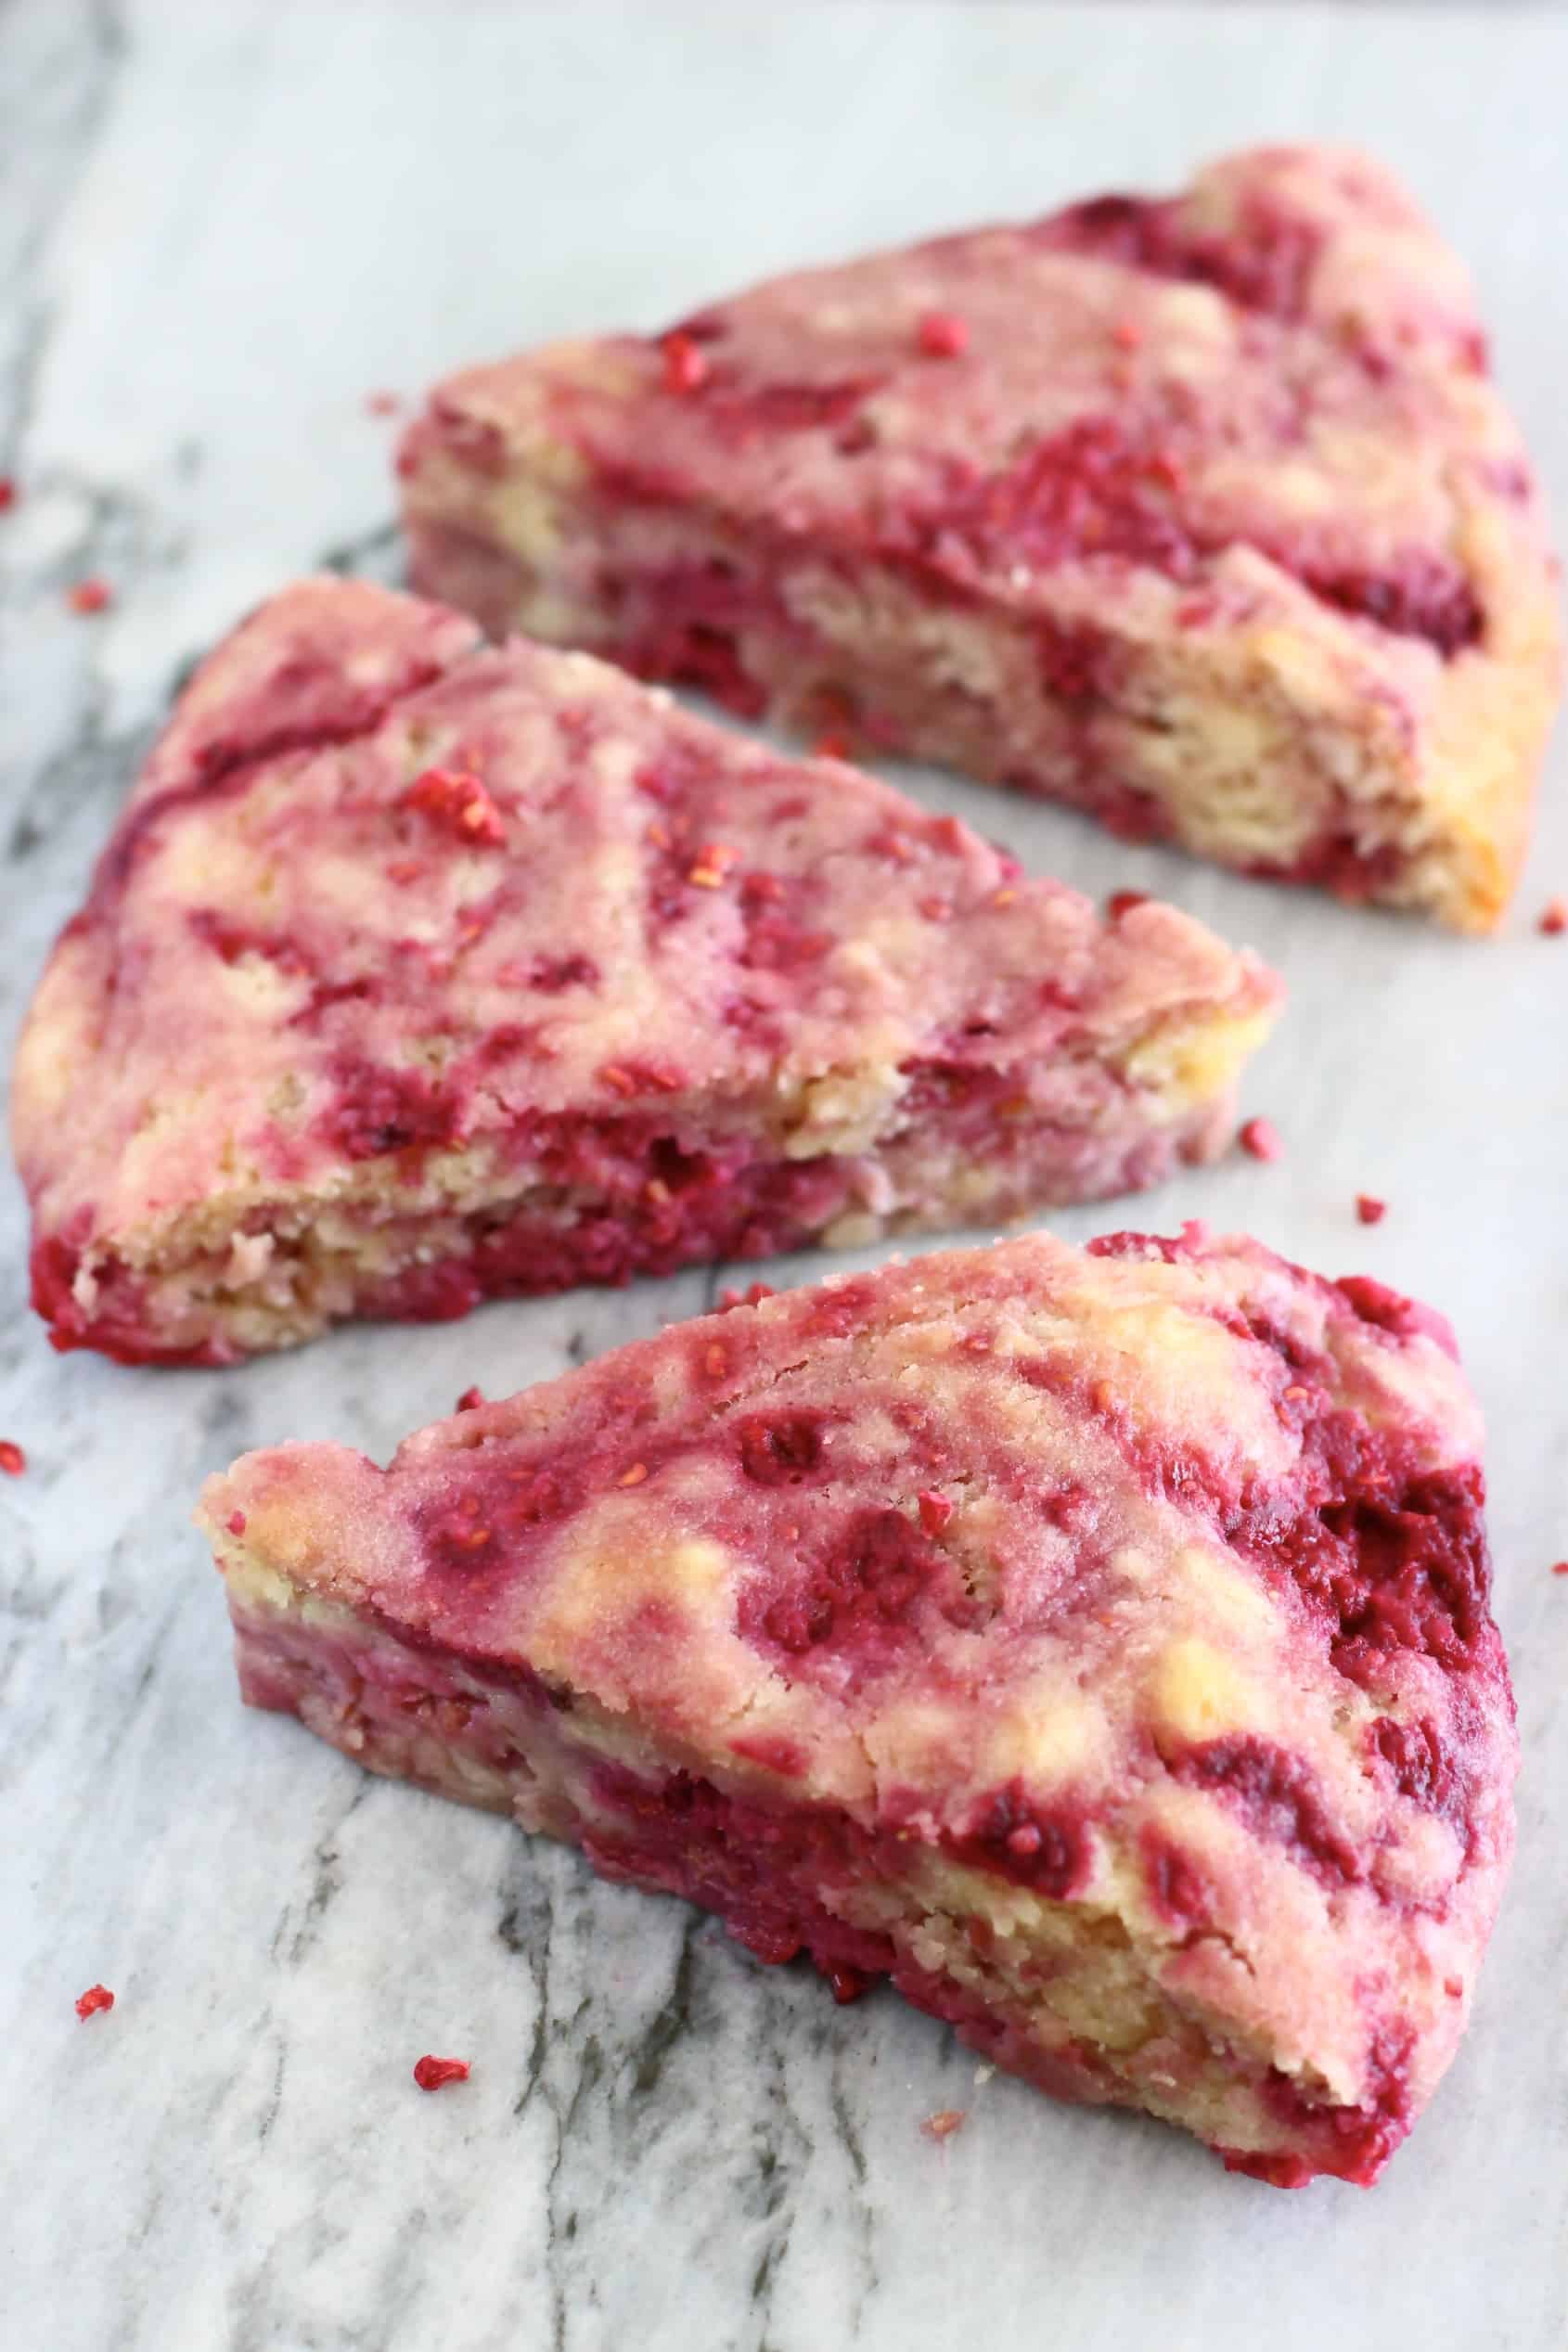
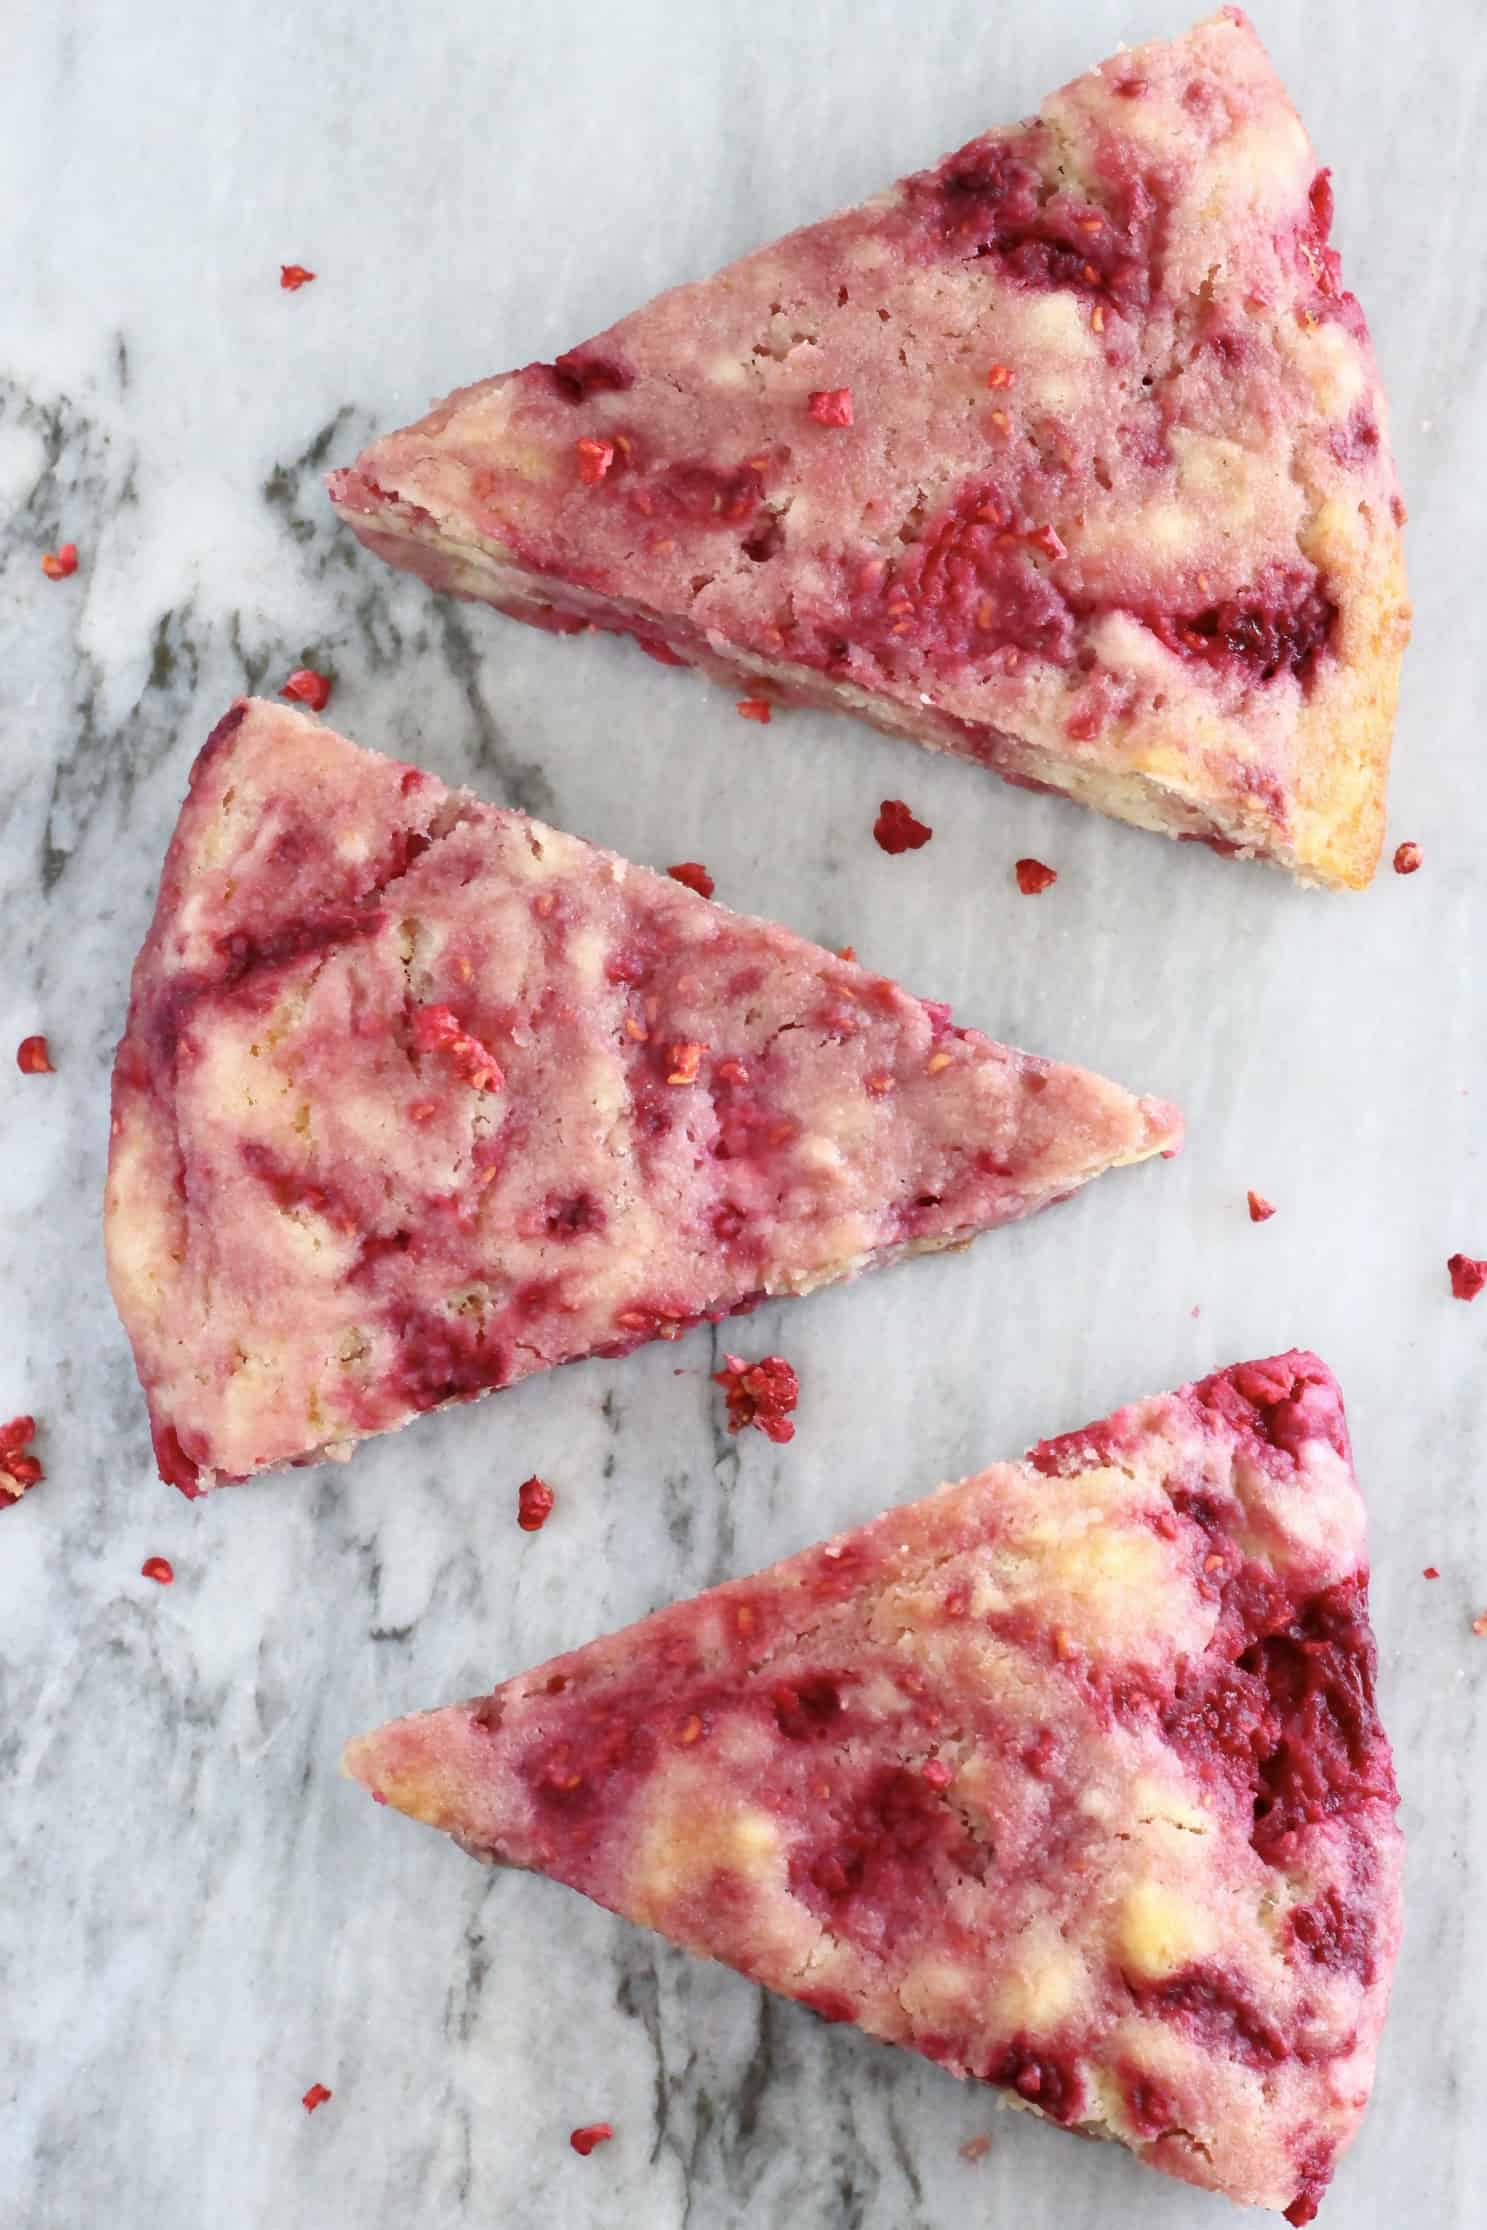
These Gluten-Free Vegan Raspberry Scones are moist, "buttery" and filled with jammy, tart-sweet raspberries! They come together in one bowl and are refined sugar free too. They're great for dessert, breakfast, brunch or a snack. Perfect for occasions like Easter, Mother's Day, baby showers or bridal showers!
These Raspberry Scones are American scones, which are quite different from British scones.
Differences between American and British scones:
1. The shape: American scones are triangular, British scones are circular.
2. The way they're baked: American scones are made by making a round shape with the dough and cutting before baking, whereas British scones are made by cutting out individual circles from the dough.
3. Add-ins: American scones usually include add-ins like fresh fruit, whereas British scones are usually plain or contain a small amount of dried fruit such as currants.
4. The way they're eaten: British scones are sliced in half and eaten with clotted cream and jam.
Tips for making scones
- Make sure the dough isn't too firm, as that will make the scones too dry.
- But also make sure the dough isn't too wet, as that will make it hard to shape.
- I'd recommend adding the plant-based milk a little at a time until you get a soft dough that's still firm enough to easily mould into a shape - stop adding milk if the dough is already too soft.
- If the dough is too dry to combine or very hard after you've added all the milk, add a little extra plant-based milk, as otherwise the scones won't rise as much and won't be fluffy.
- Be careful not to over-bake them, as this will make them too dry!
Tips for making Raspberry Scones
- You can use either fresh or frozen raspberries.
- If using frozen raspberries, leave them to thaw out first, so they are easier to break up and mix into the dough.
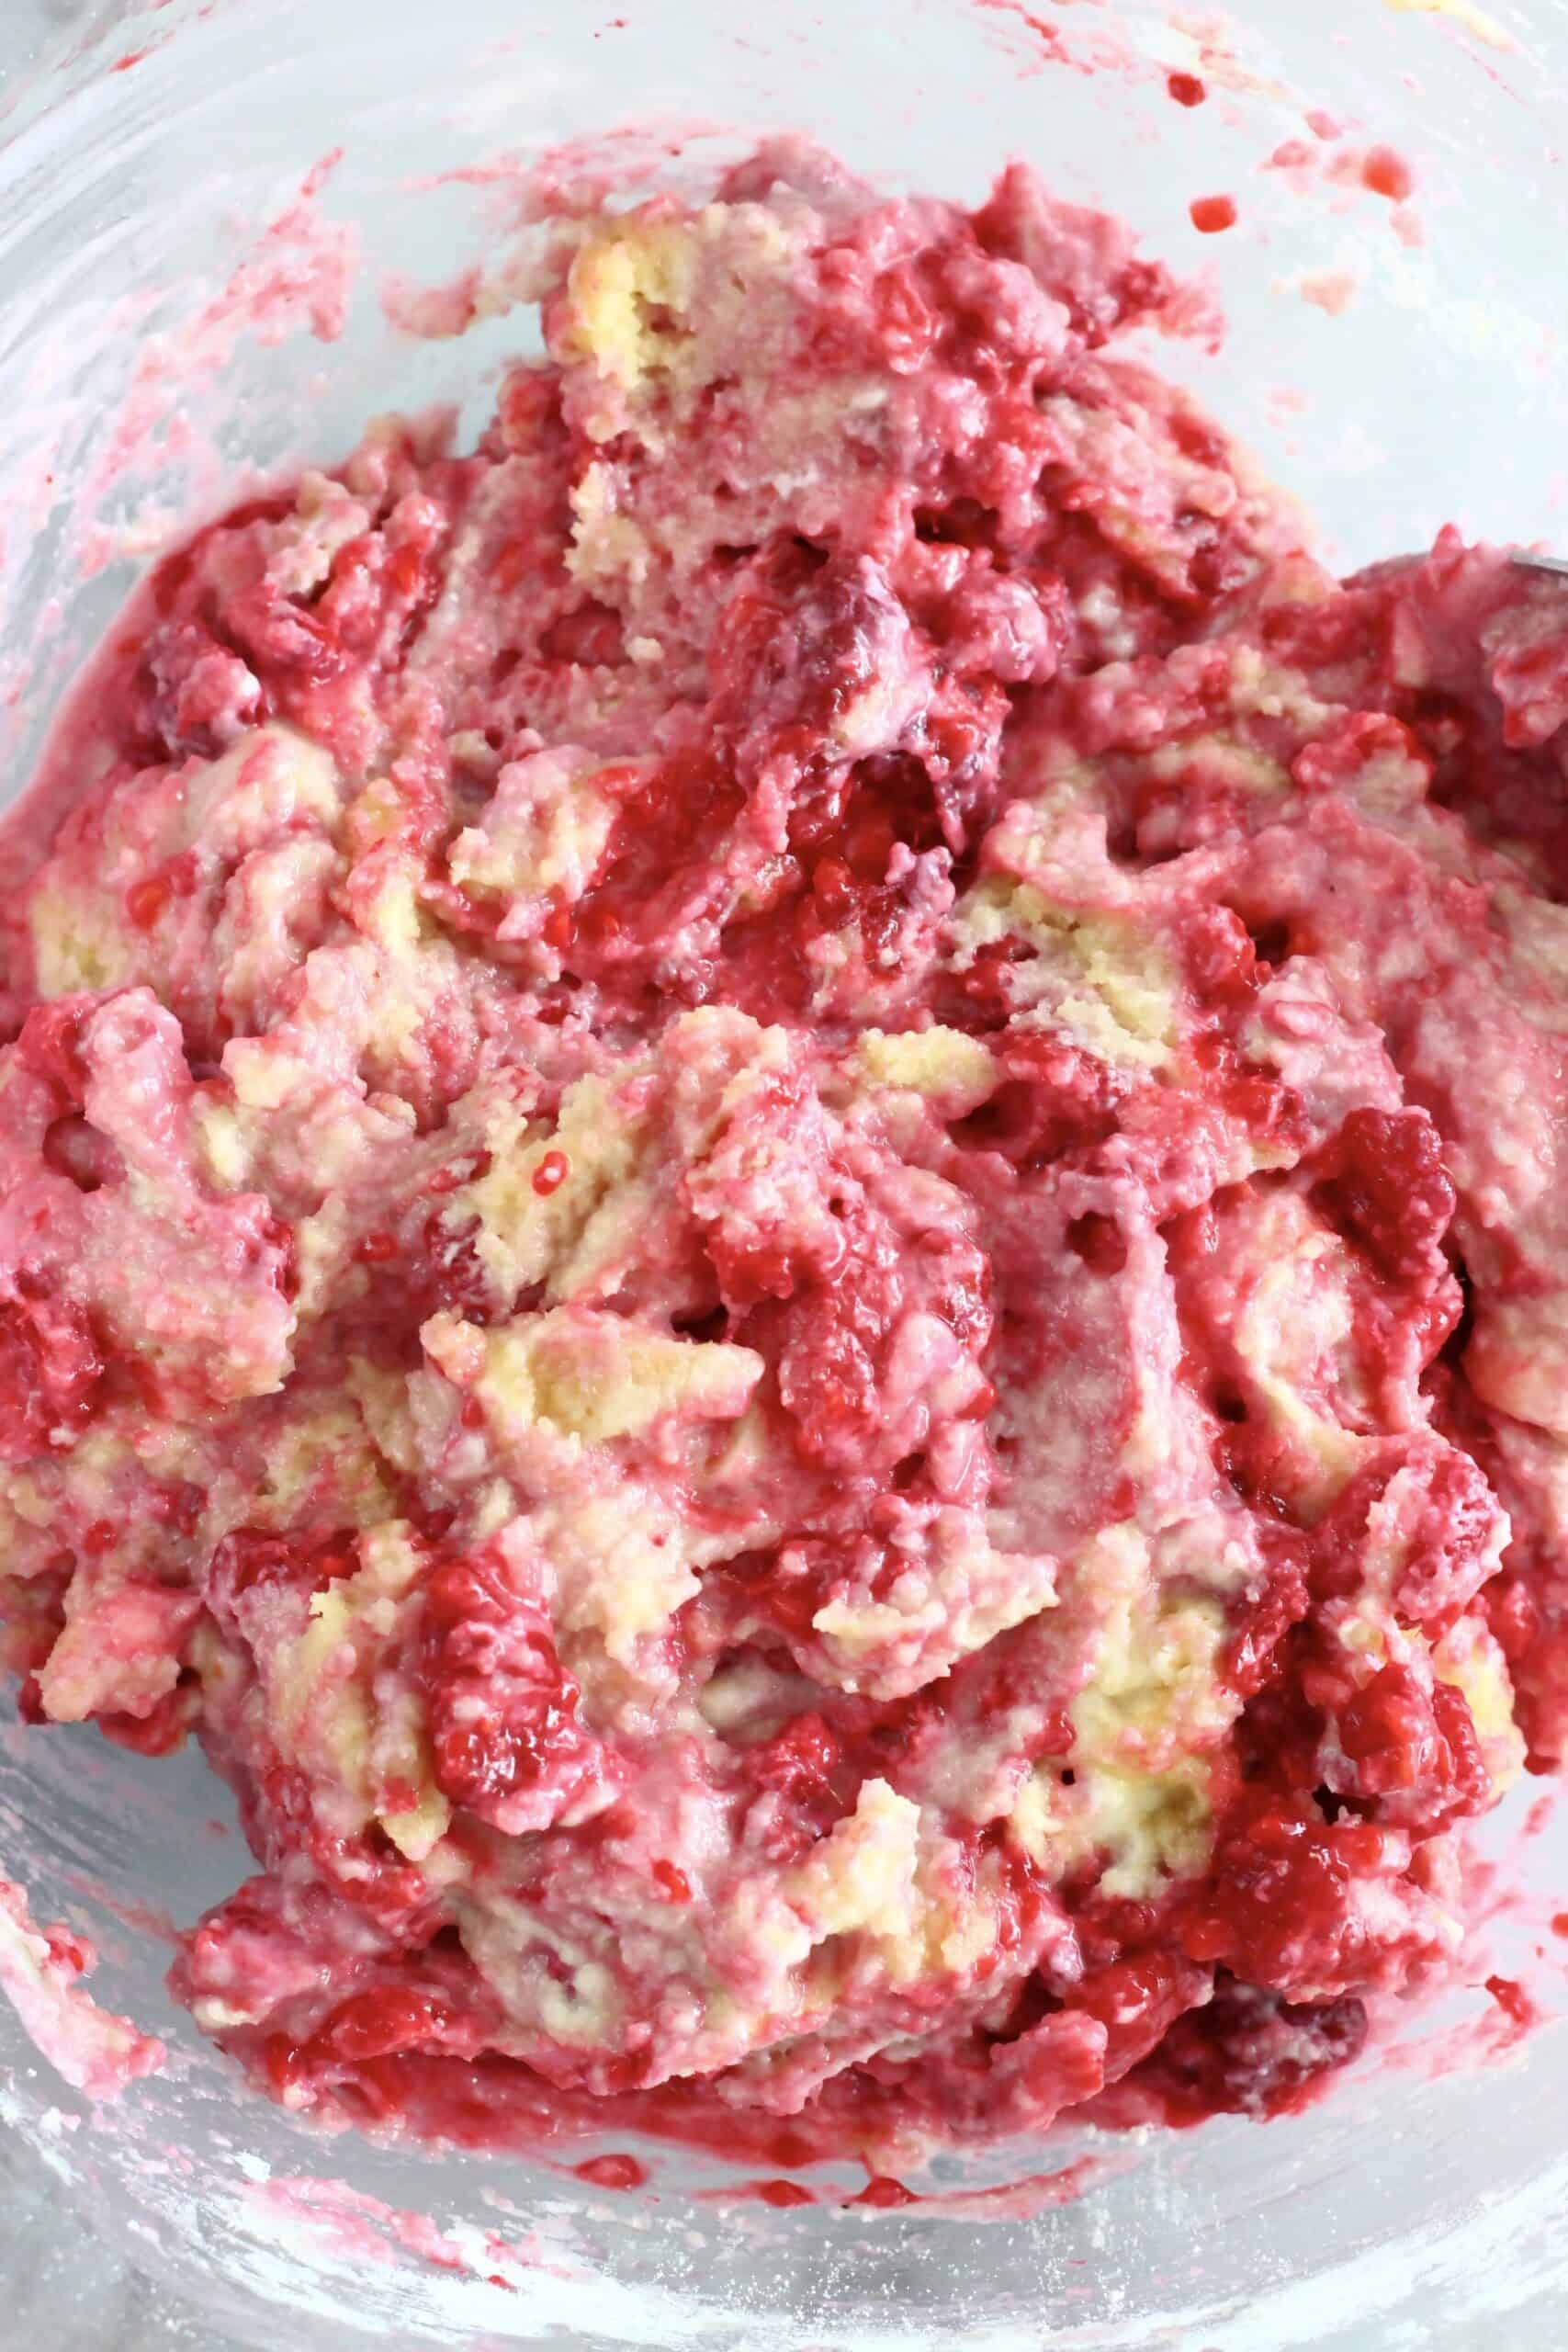
- It's better if you crush the raspberries and break them up slightly when you mix them into the dough, otherwise if you mix in whole raspberries, there will be gaps in the dough and you will end up with holes in the baked scones.
How to make this recipe
Scroll down to the bottom of the post for the full recipe.
- Mix together all the ingredients for the dough in a mixing bowl.
Tip: Use a measuring jug to measure out the plant-based milk.
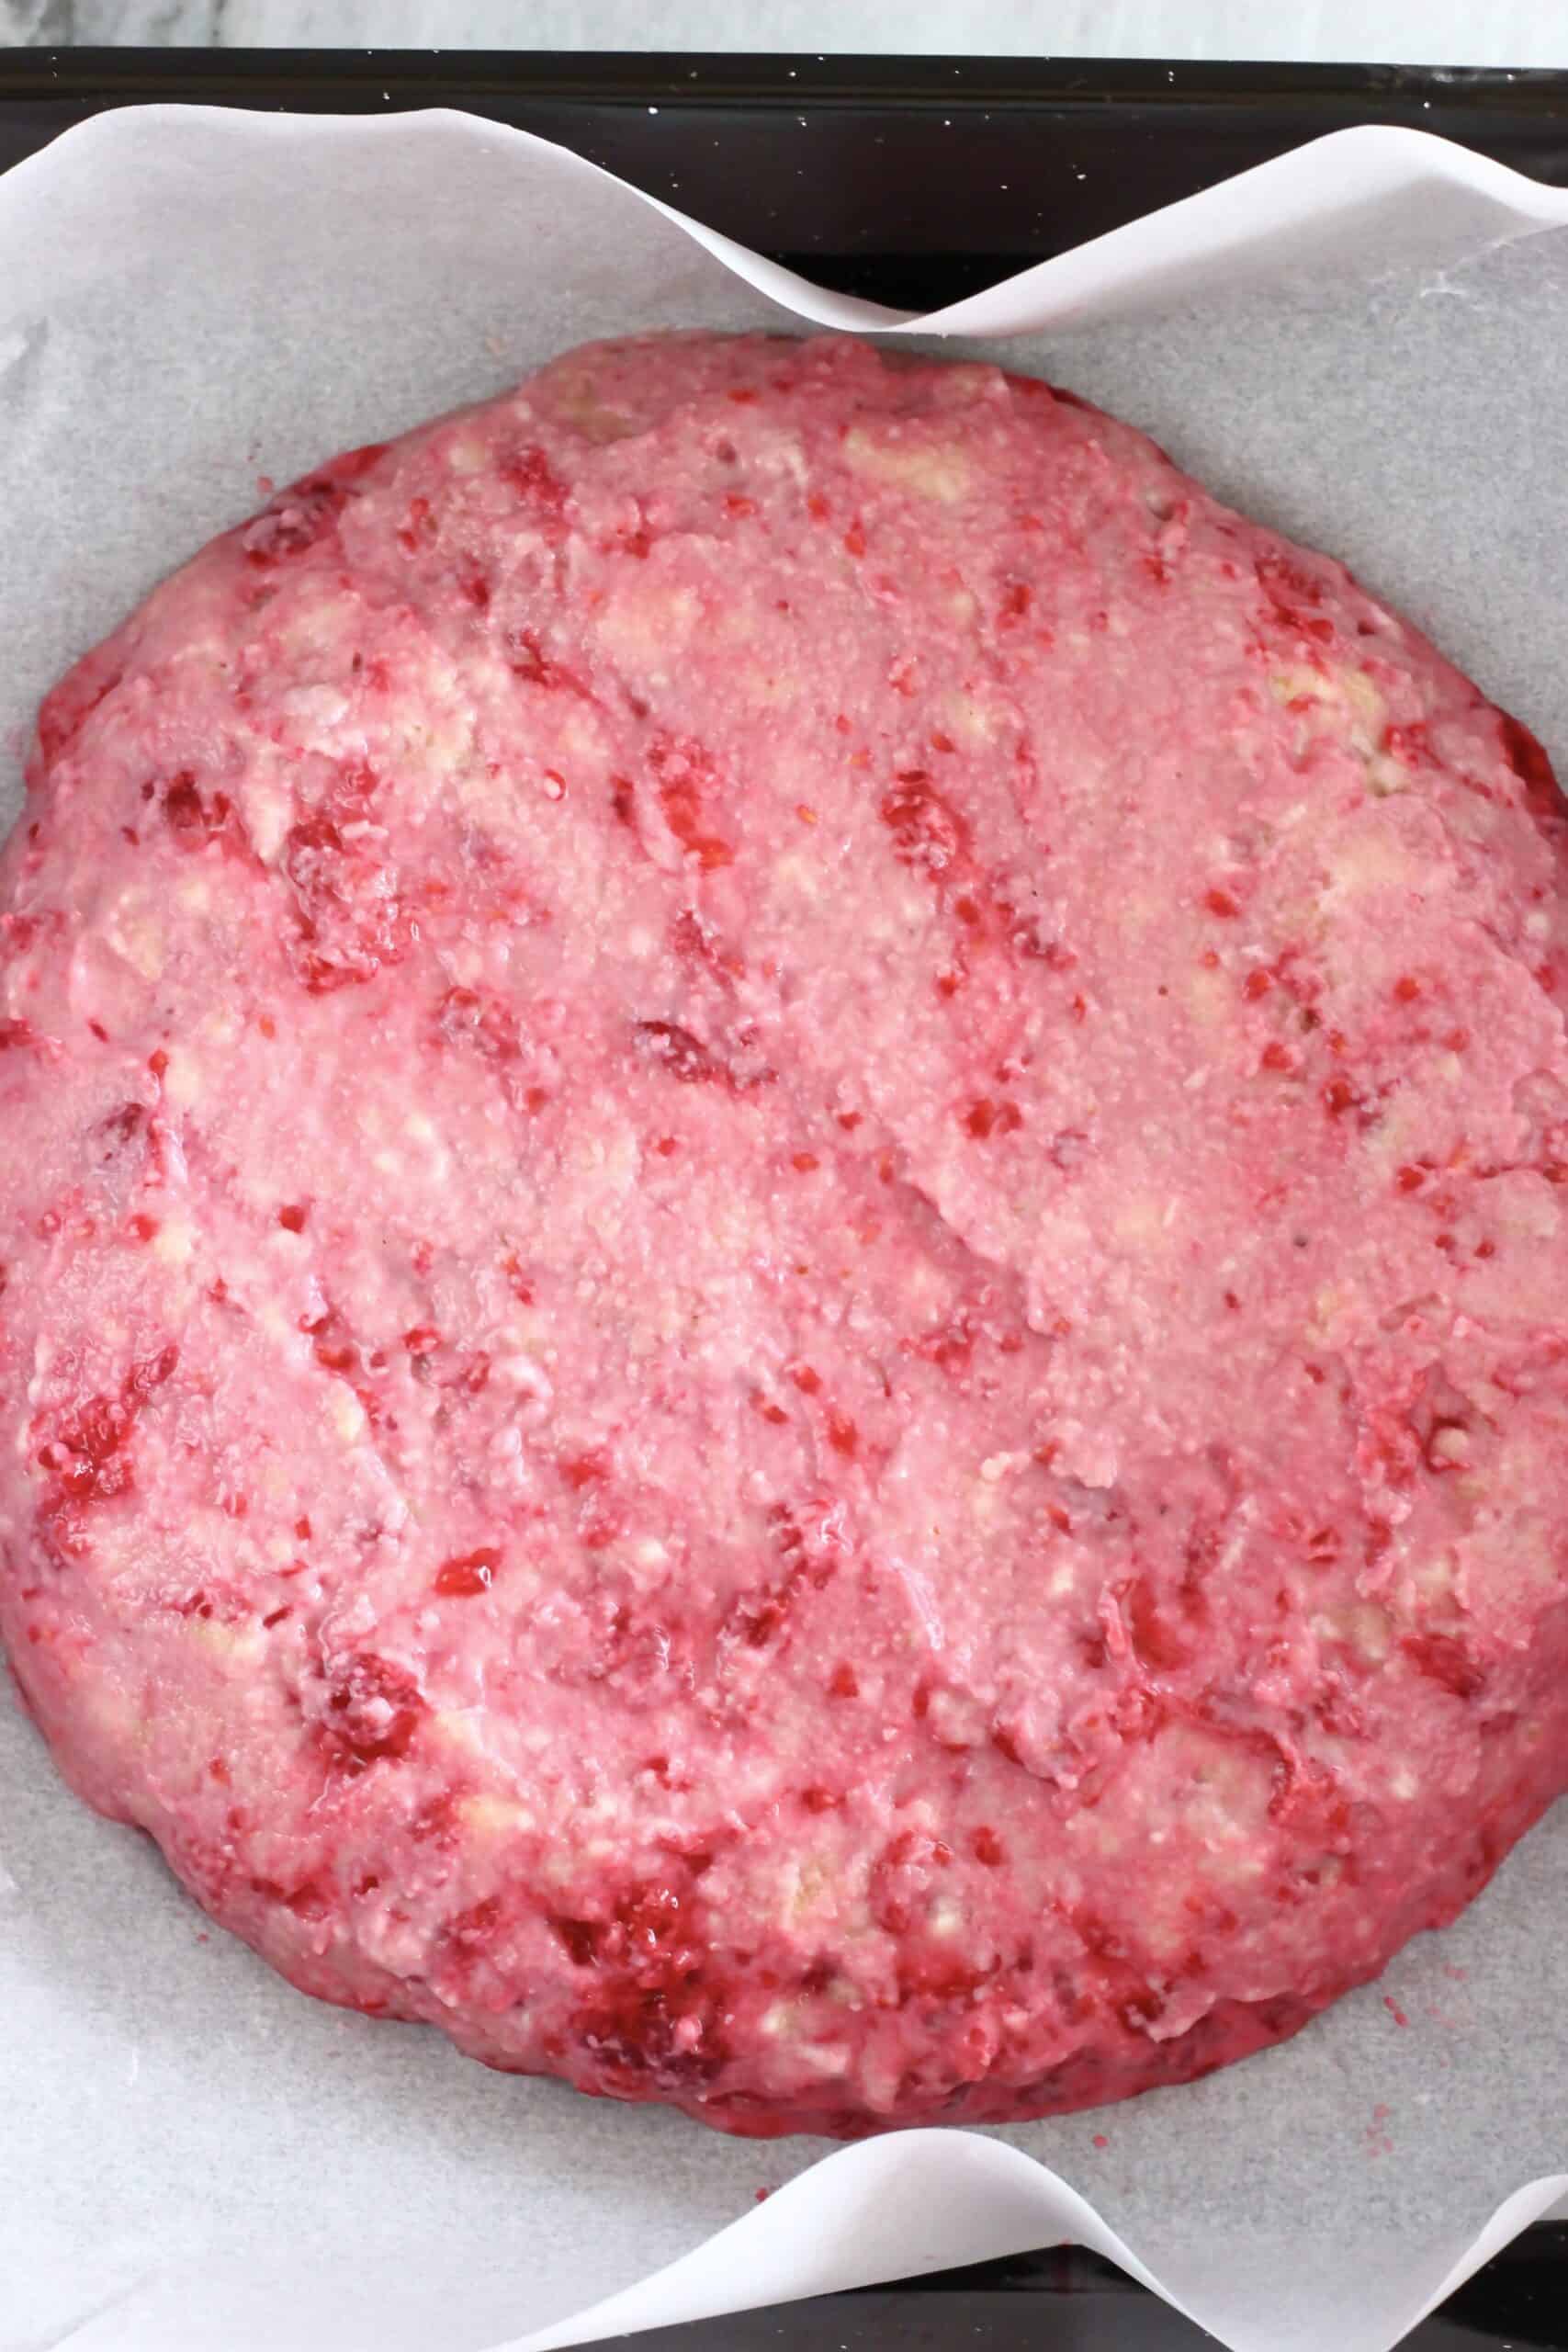
- Once you've made the dough, all you need to do is get a rectangular baking tray lined with greased baking paper, and use your hands to create an elongated circular shape.
Tip: You can use a rolling pin, but I like to avoid floured surfaces, so I prefer to just use my hands as it's easier. You can use a floured rolling pin if you like, but there's no need to use a floured surface as the baking paper works to stop the dough from sticking.
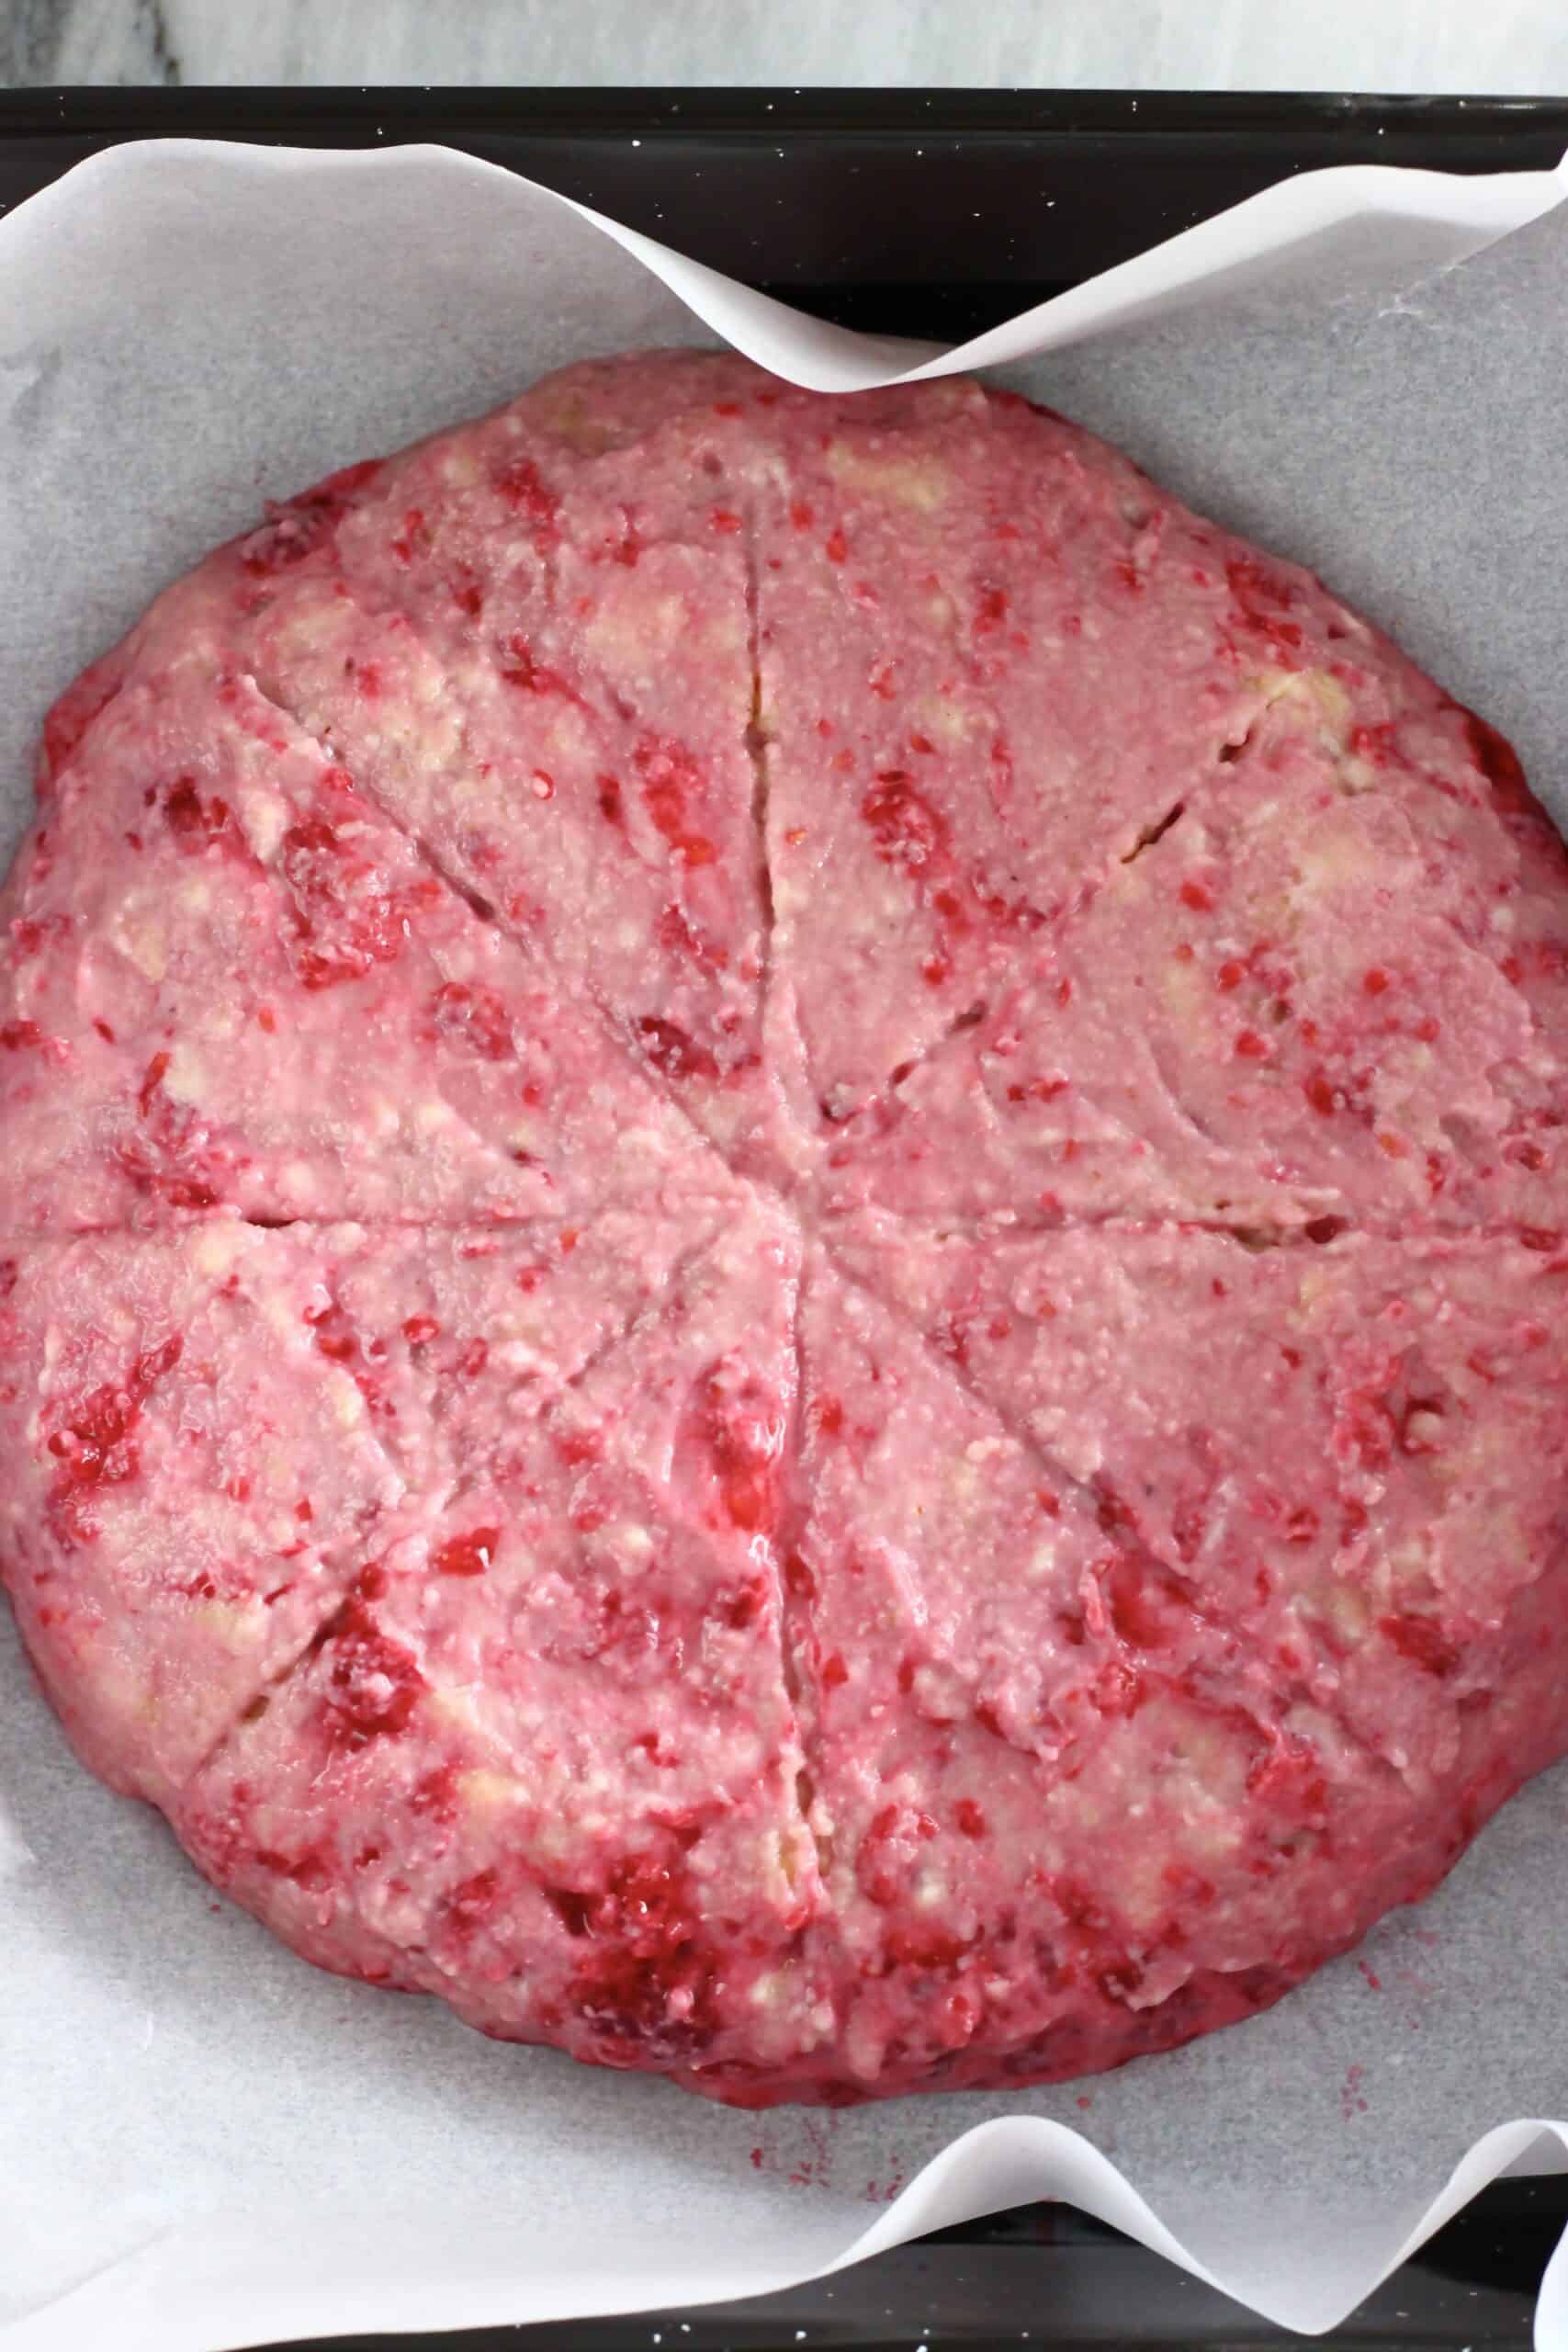
- Once you've got that circular shape, use a knife to carve lines into the surface of the dough - it's kind of like cutting a pizza, but don't cut it all the way through to the bottom!
Tip: This is because they come out fluffier when baked pressed together!
- Bake in the oven for 15-20 minutes.

- Leave to cool slightly, then slice them into separate pieces.
Substitutions you can make
- You can use any type of oil: coconut oil, olive oil or vegetable oil.
- You can use any type of plant-based milk: almond milk, rice milk, soy milk, cashew milk, oat milk etc.
- You can use any type of liquid sweetener: maple syrup, agave syrup, brown rice syrup etc.
- You can use plain flour, wholemeal (whole wheat) flour or spelt flour instead of the gluten-free flour if you're not gluten-free.
- You can replace the ground almonds (almond meal) with ground walnuts or ground sunflower seeds.
- For a nut-free version: use ground sunflower seeds instead of ground almonds and a nut-free plant-based milk.
- You can use either fresh or frozen raspberries.
Flavour substitutions you can make
- If you're not into raspberries, you can replace them with a similar fruit such as blueberries, blackberries, strawberries or cherries.
- You can replace the fresh fruit with dried fruit instead, such as dried cranberries, raisins or sultanas, chopped dates, dried mango, dried papaya or dried pineapple.
- You can make chocolate chip scones instead!
- You can make pumpkin scones instead!
How long do these scones keep for?
These scones do taste best on the day they're made, but can be stored covered in the fridge for up to a few days. They are delicious reheated in the toaster.
More gluten-free vegan raspberry recipes
If you try out this recipe or anything else from my blog, I'd really love to hear any feedback! Please give it a rating, leave a comment, or tag a photo @rhiansrecipes #rhiansrecipes on Instagram! Thank you.

Gluten-Free Vegan Raspberry Scones
Ingredients
- 60 g (¼ cup) coconut oil (or sub olive or vegetable oil)
- 2 tablespoons lemon juice *
- 8 tablespoons maple syrup (or sub any other sweetener)
- 1 teaspoon vanilla extract
- Pinch salt
- 150 g (1 ¼ cup) ground almonds (almond meal) **
- 150 g (1 ¼ cup) gluten-free flour blend (or sub plain flour if not gluten-free)
- 2 heaped teaspoons baking powder (ensure gluten-free if necessary)
- ¼ teaspoon bicarbonate of soda (baking soda)
- 80 ml (⅓ cup) unsweetened almond milk (or any other plant-based milk)
- 100 g (1 cup) raspberries (fresh or frozen) ***
Instructions
- Preheat oven to 180 degrees Celsius (350 degrees Fahrenheit).
- Place the coconut oil in a large bowl and melt over a saucepan of boiling water or in the microwave (skip this step if using any other oil).
- Once melted, add the lemon juice to the same bowl along with the maple syrup, vanilla, salt and ground almonds.
- Sift in the flour, baking powder and bicarbonate of soda.
- Mix well until a dough forms, adding the milk a little bit at a time to ensure you don't add too much - it should be soft, but firm enough to mould easily. You can add a tiny splash more milk if it's looking too dry.
- Add the raspberries and mix them into the dough - it's better if you crush them and break them up slightly when you mix them into the dough, otherwise if you mix in whole raspberries, there will be gaps in the dough and you will end up with holes in the baked scones.
- Line a baking tray with greased baking paper.
- Use your hands to shape the dough into a slightly elongated circular shape about 2 cm (1 inch) thick - you can also use a floured rolling pin for this, but I prefer to do it with my hands because it's easier. There's no need to use a floured surface as the baking paper works to stop the dough from sticking.
- Keeping the dough in that shape, use a knife to carve the surface of the dough into eight - cut in half first, then each half into half, and each quarter into half again until you end up with eight even triangles. It's a bit like cutting up a pizza, but make sure not to cut all the way down through the dough - this is because they come out fluffier when baked pressed together!
- Bake in the oven for 15-20 minutes until browned and an inserted skewer comes out clean.
- Leave to cool slightly, then slice them into separate pieces.
- Tastes best when fresh, but keeps covered in the fridge for up to a few days - delicious reheated in the toaster!
Notes
Disclosure: This posts contains affiliate links to Amazon. If you purchase any of these products, a small percentage will come to me with no extra cost to you! This income will go towards the running of this blog - thank you.


Leave a Reply