


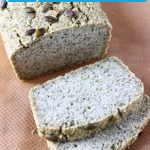
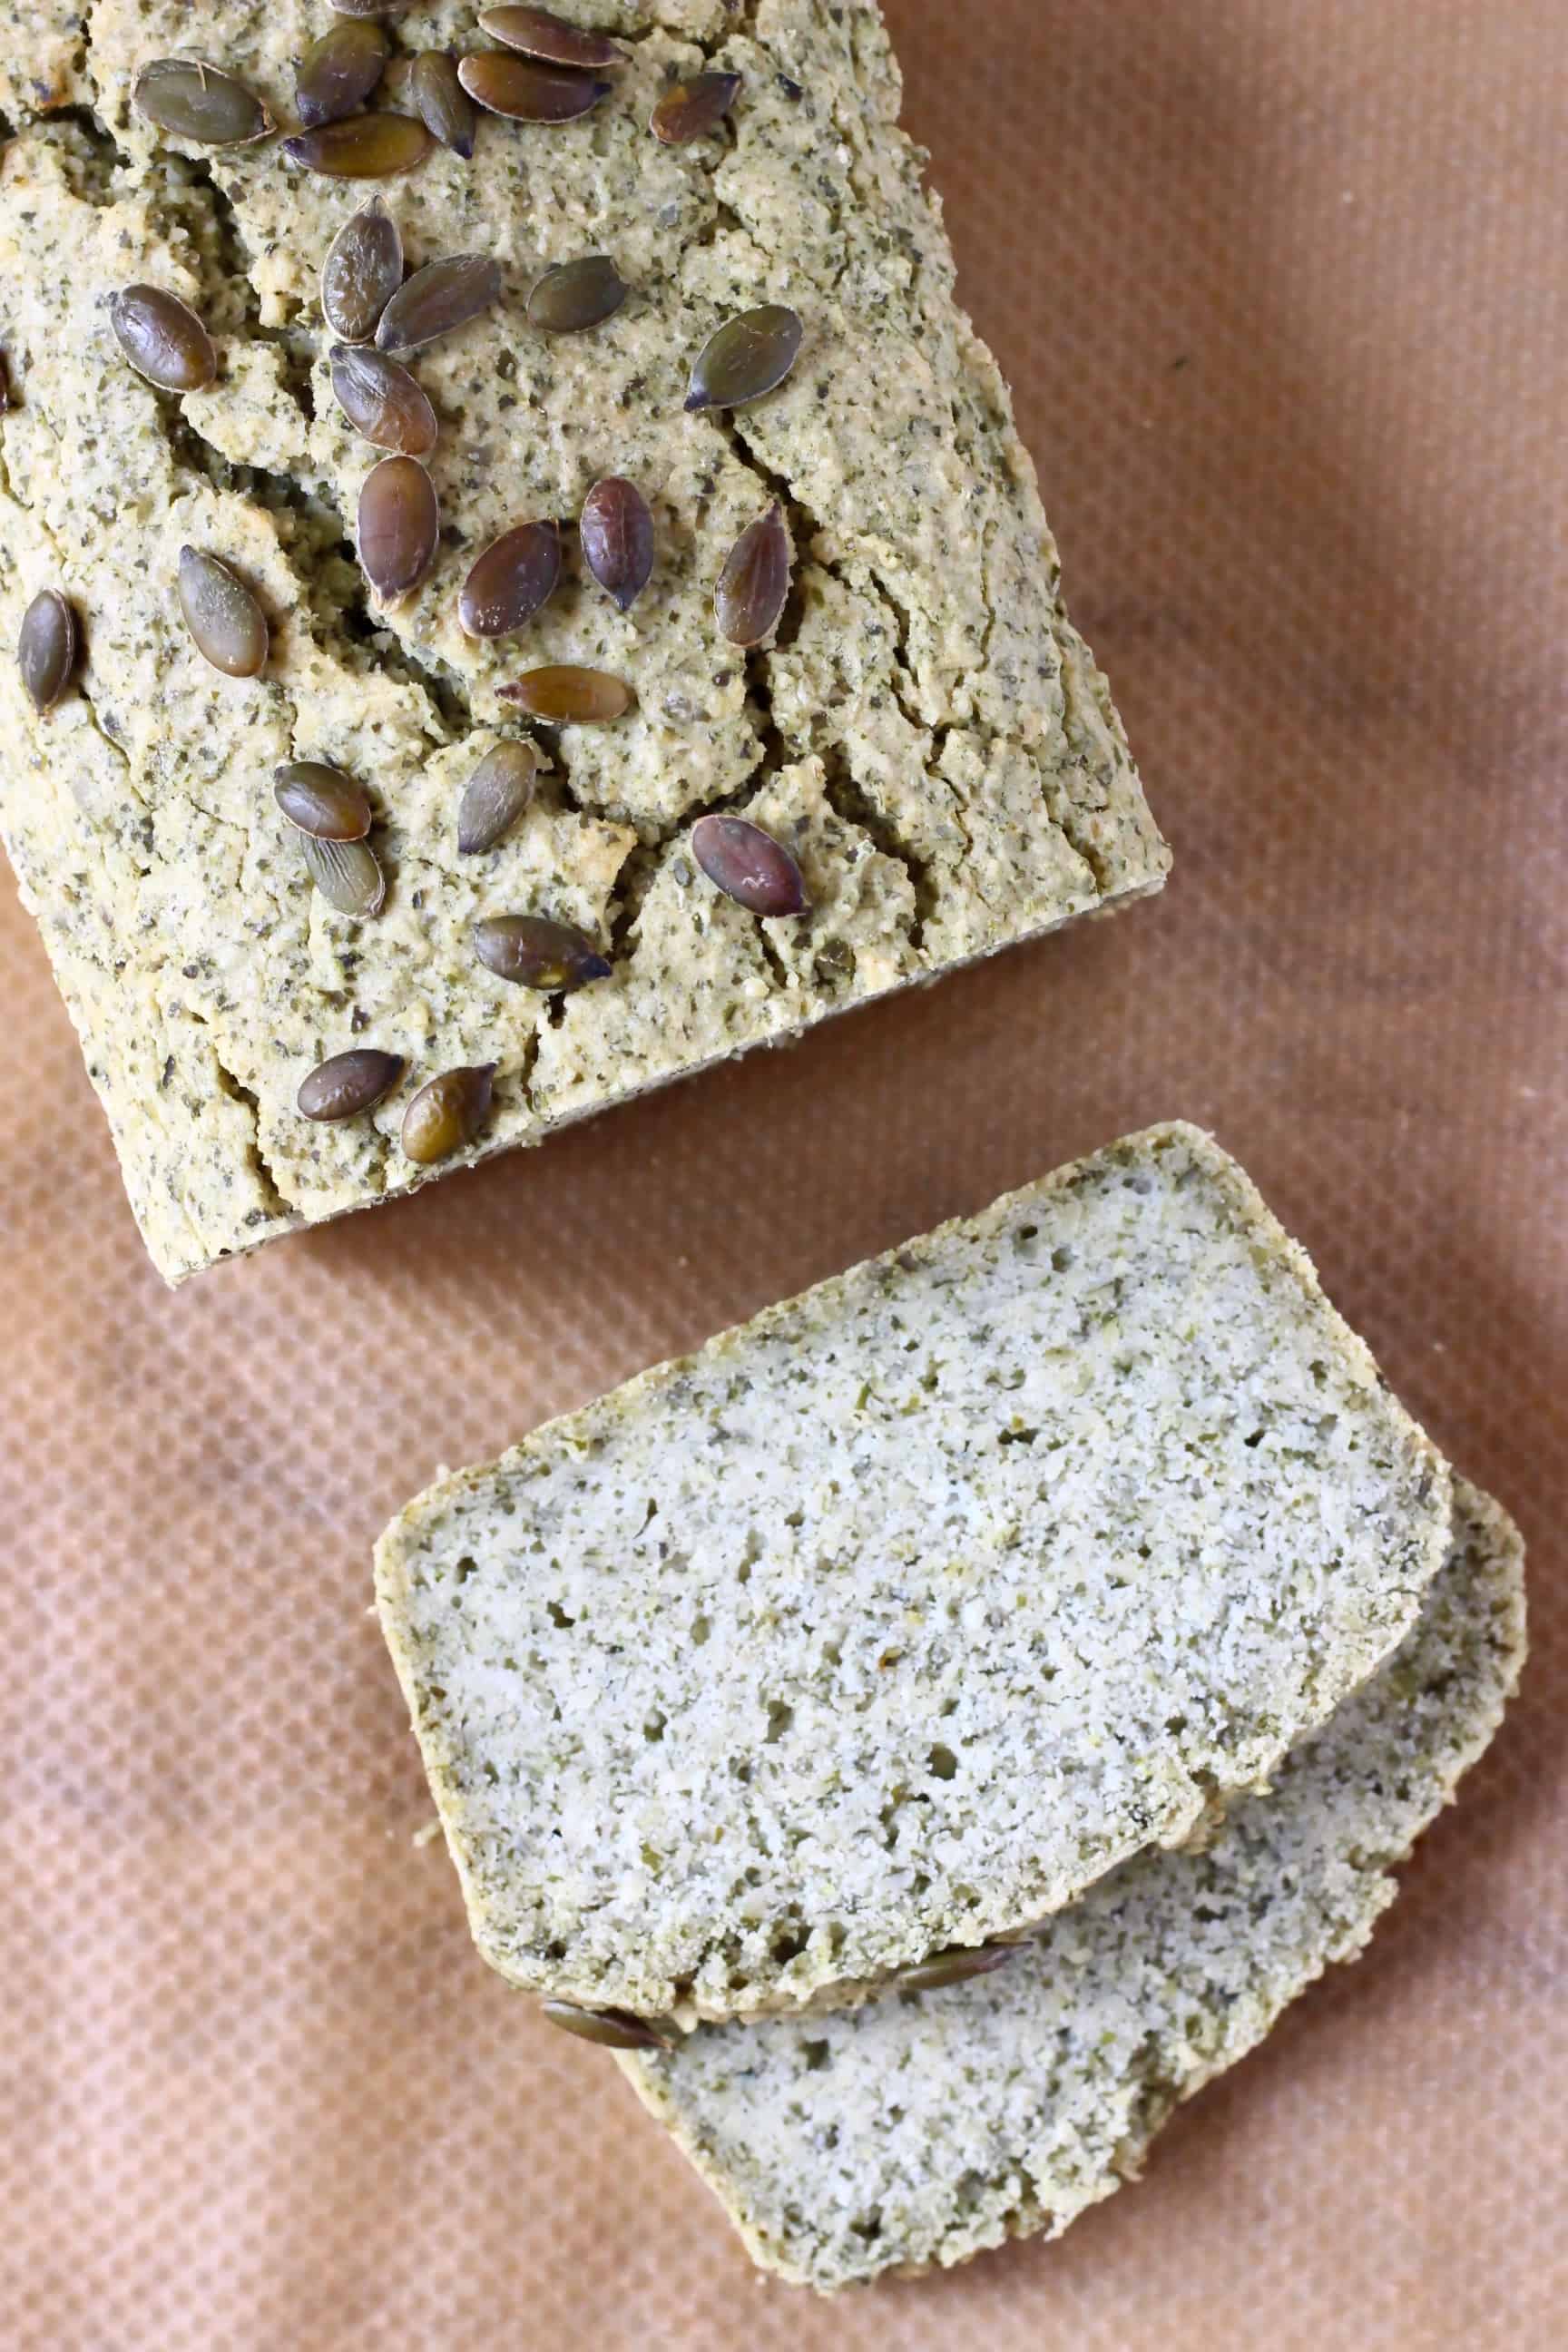
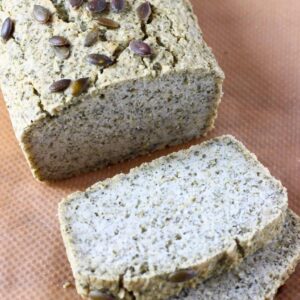
This Pumpkin Seed Bread is crusty, perfectly dense, and has a lovely earthy and nutty flavour! It's vegan, gluten-free, no-knead, yeast-free, free from sugar, oil-free, nut-free, and a great source of iron, protein and fibre. It's filling and nutritious, and perfect for toast! It's super easy to make as it comes together in one bowl, requires just 15 minutes to put together before baking, and there's no proving time needed!

I've made many different gluten-free vegan bread recipes using ground nuts and seeds such as almonds, walnuts and sunflower seeds. This time I've decided to make a similar recipe using pumpkin seeds!
How to make this recipe
Scroll down to the bottom of the post to see the full recipe.
- Place the pumpkin seeds in a food processor.
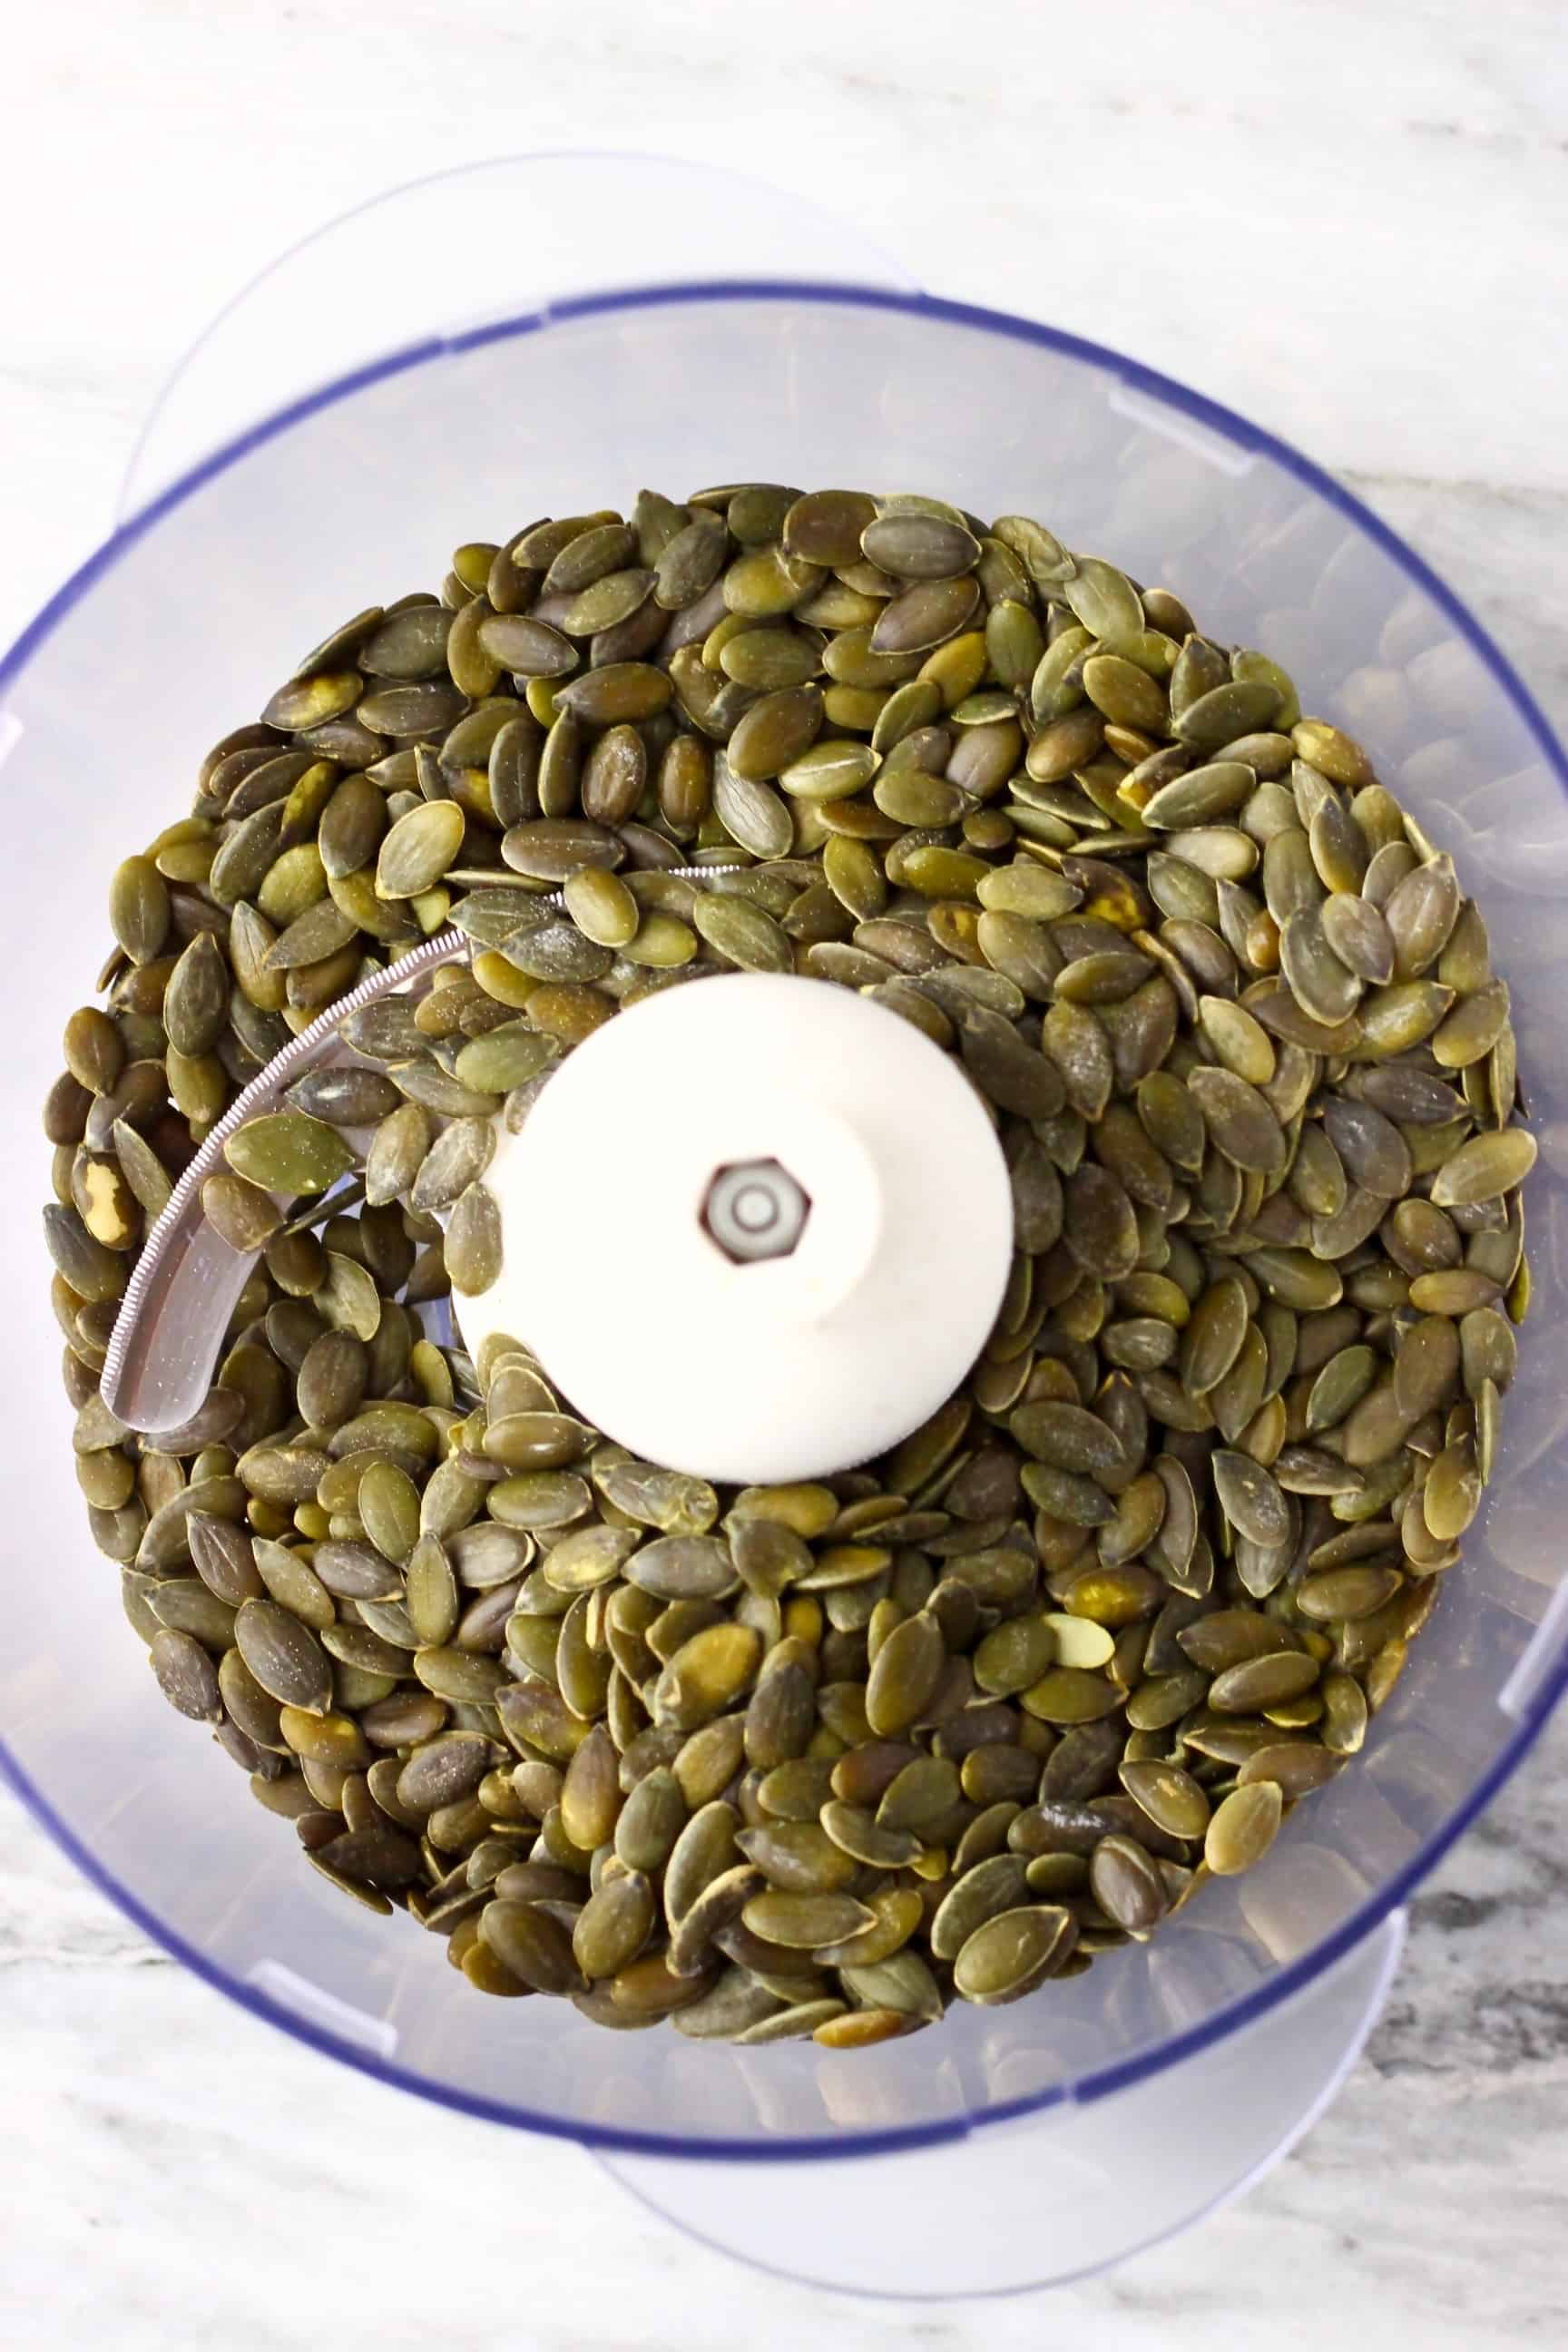
- Pulse briefly until you get a fine powder.
Tip: Be careful not to blend too much, otherwise you'll end up making pumpkin seed butter!
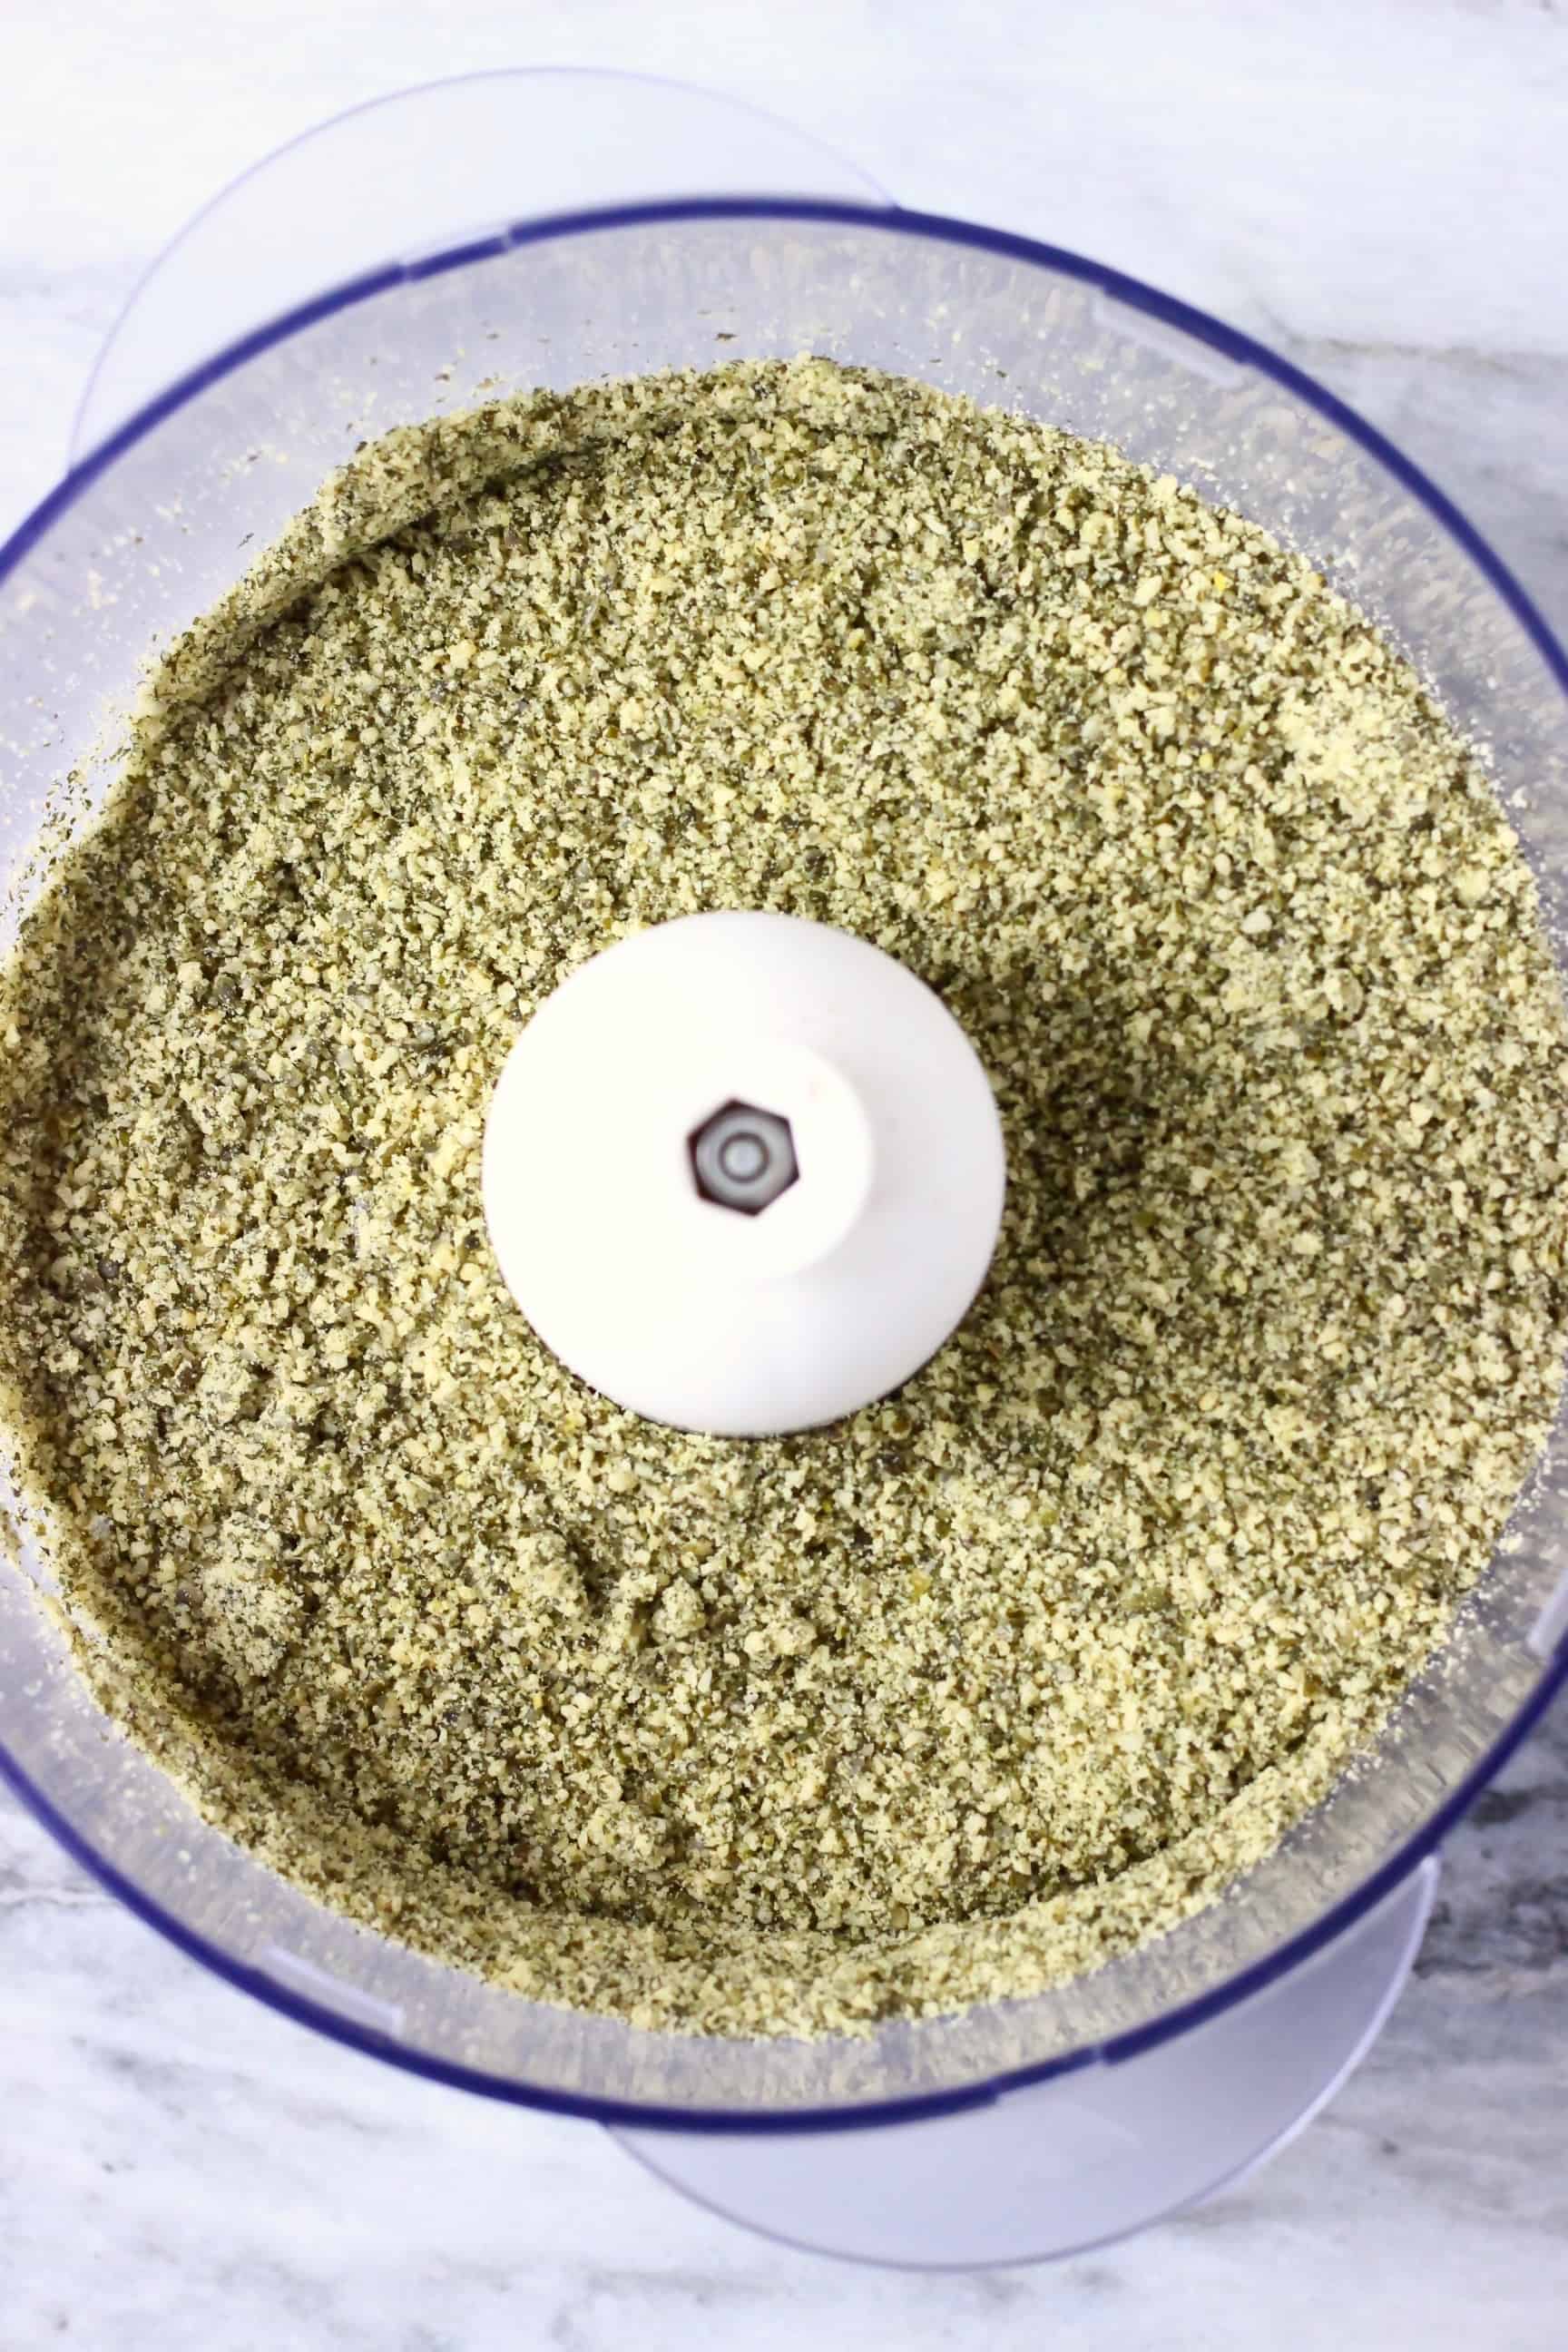
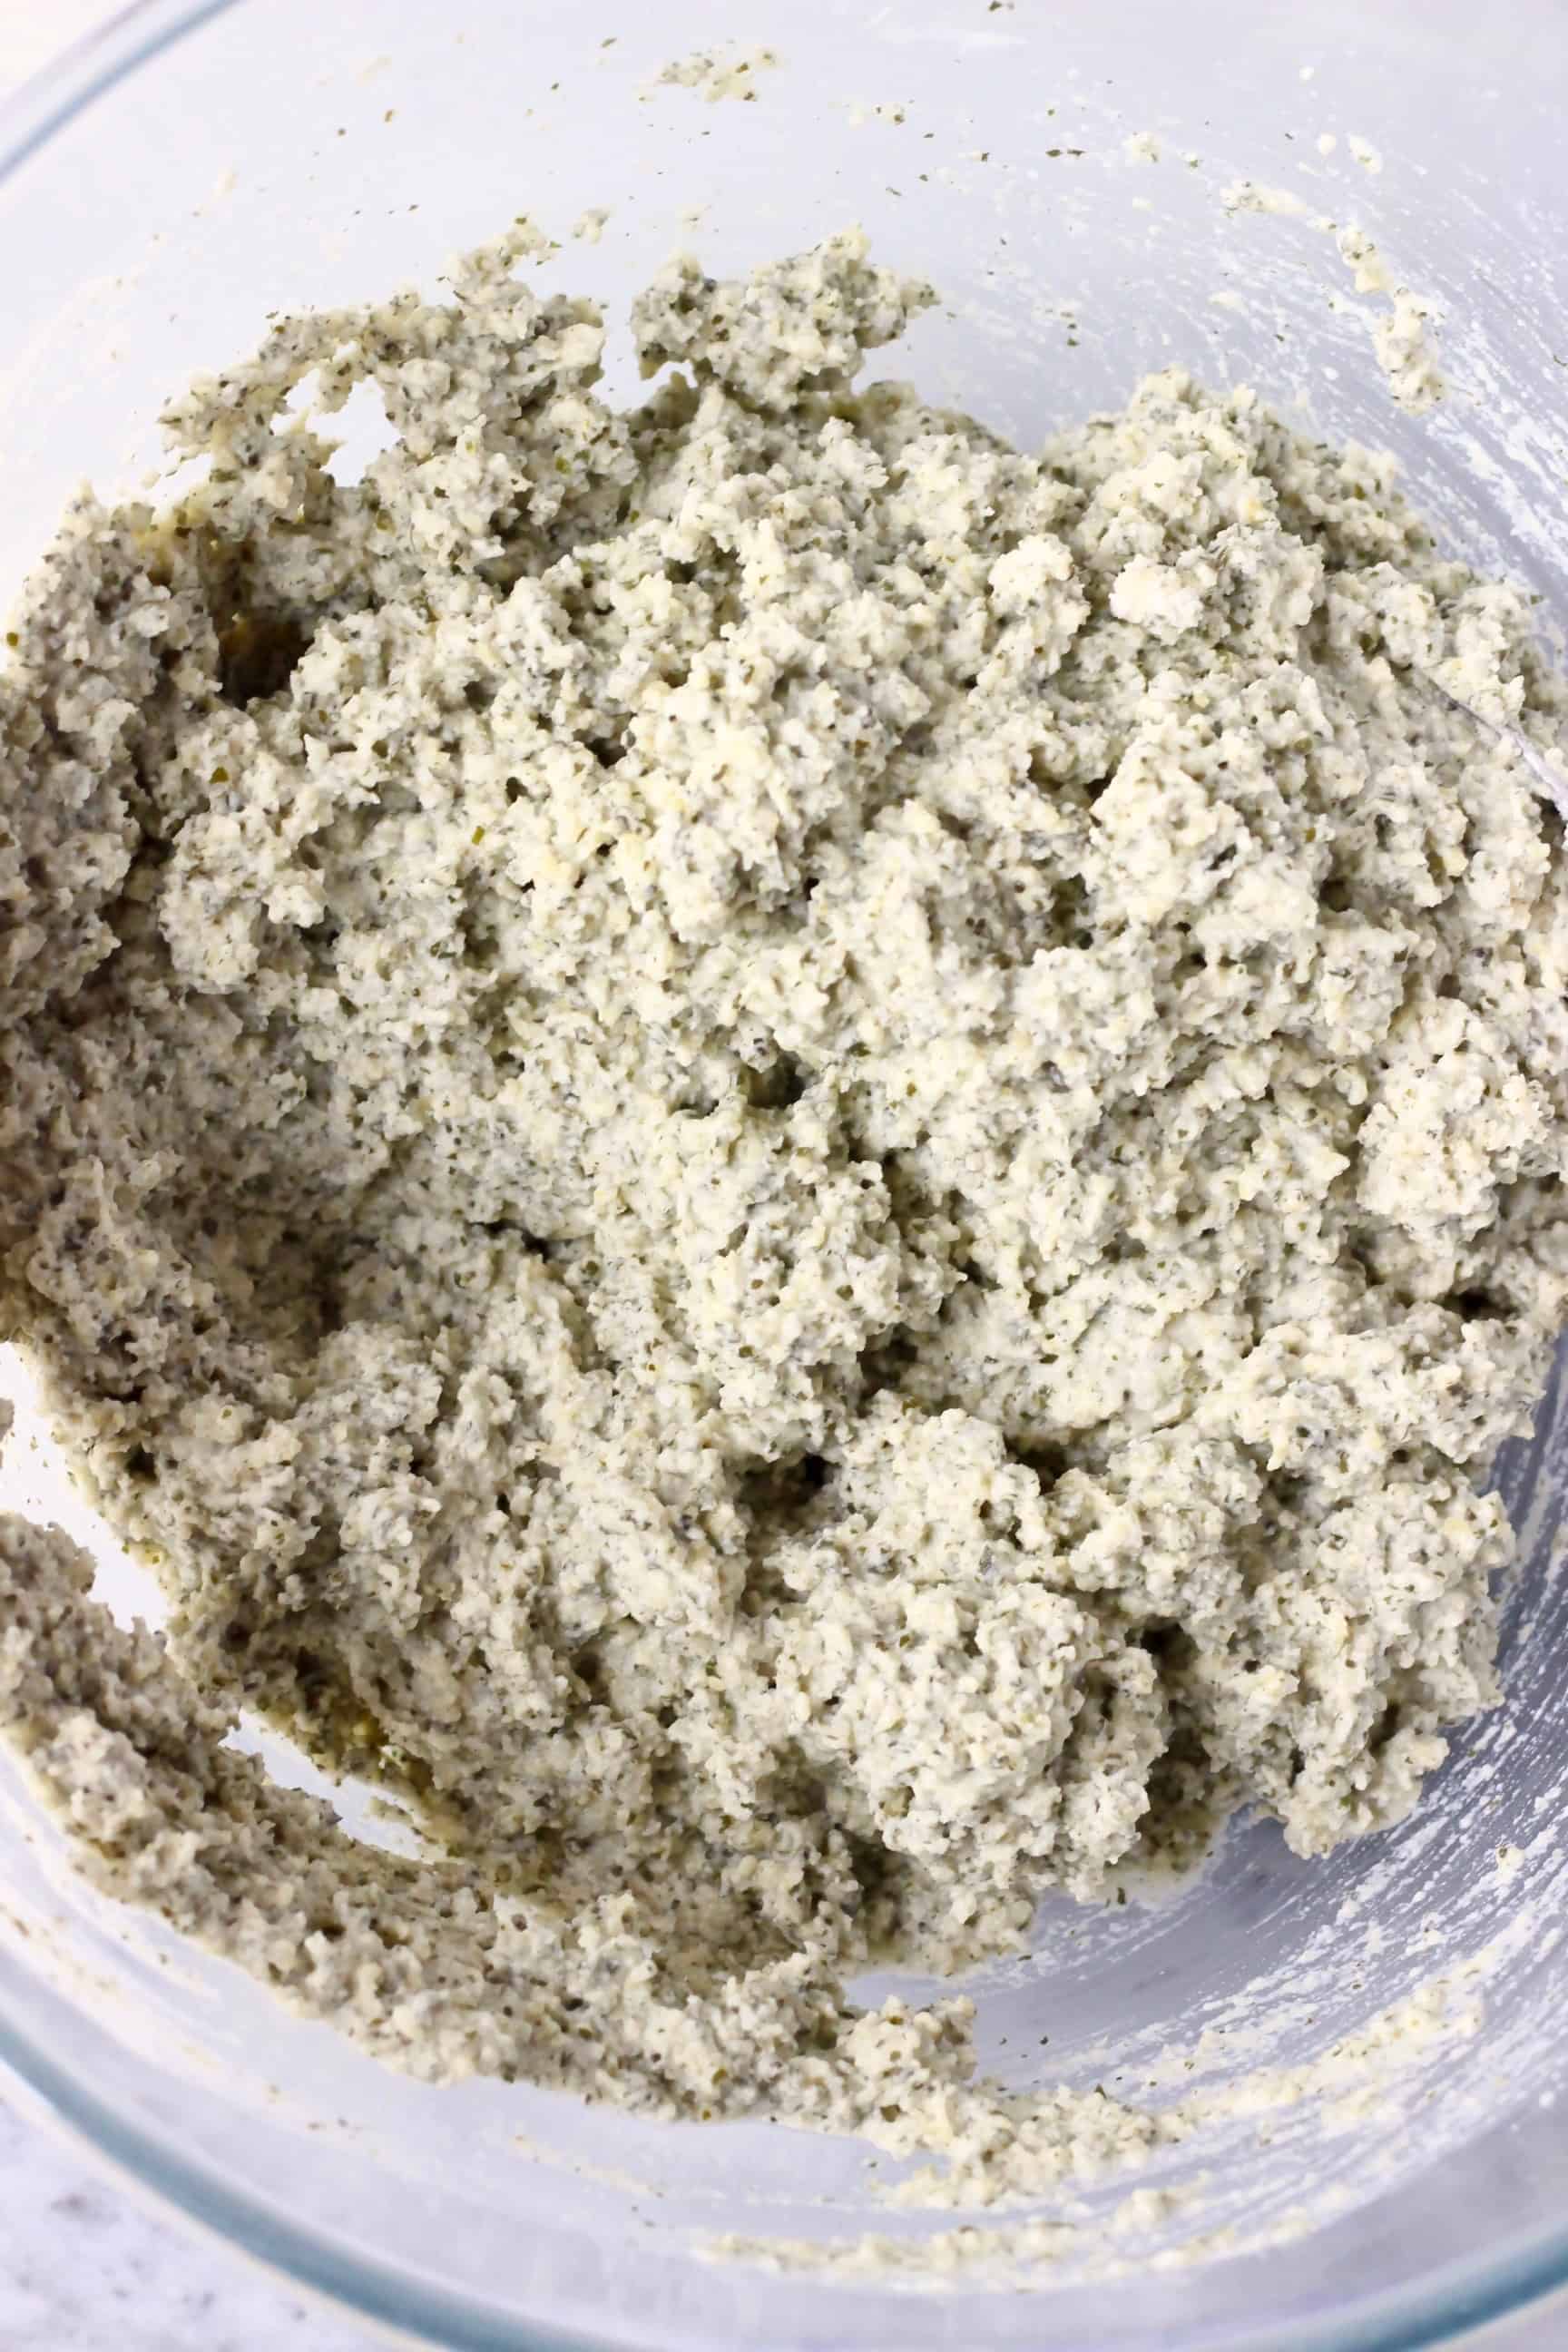
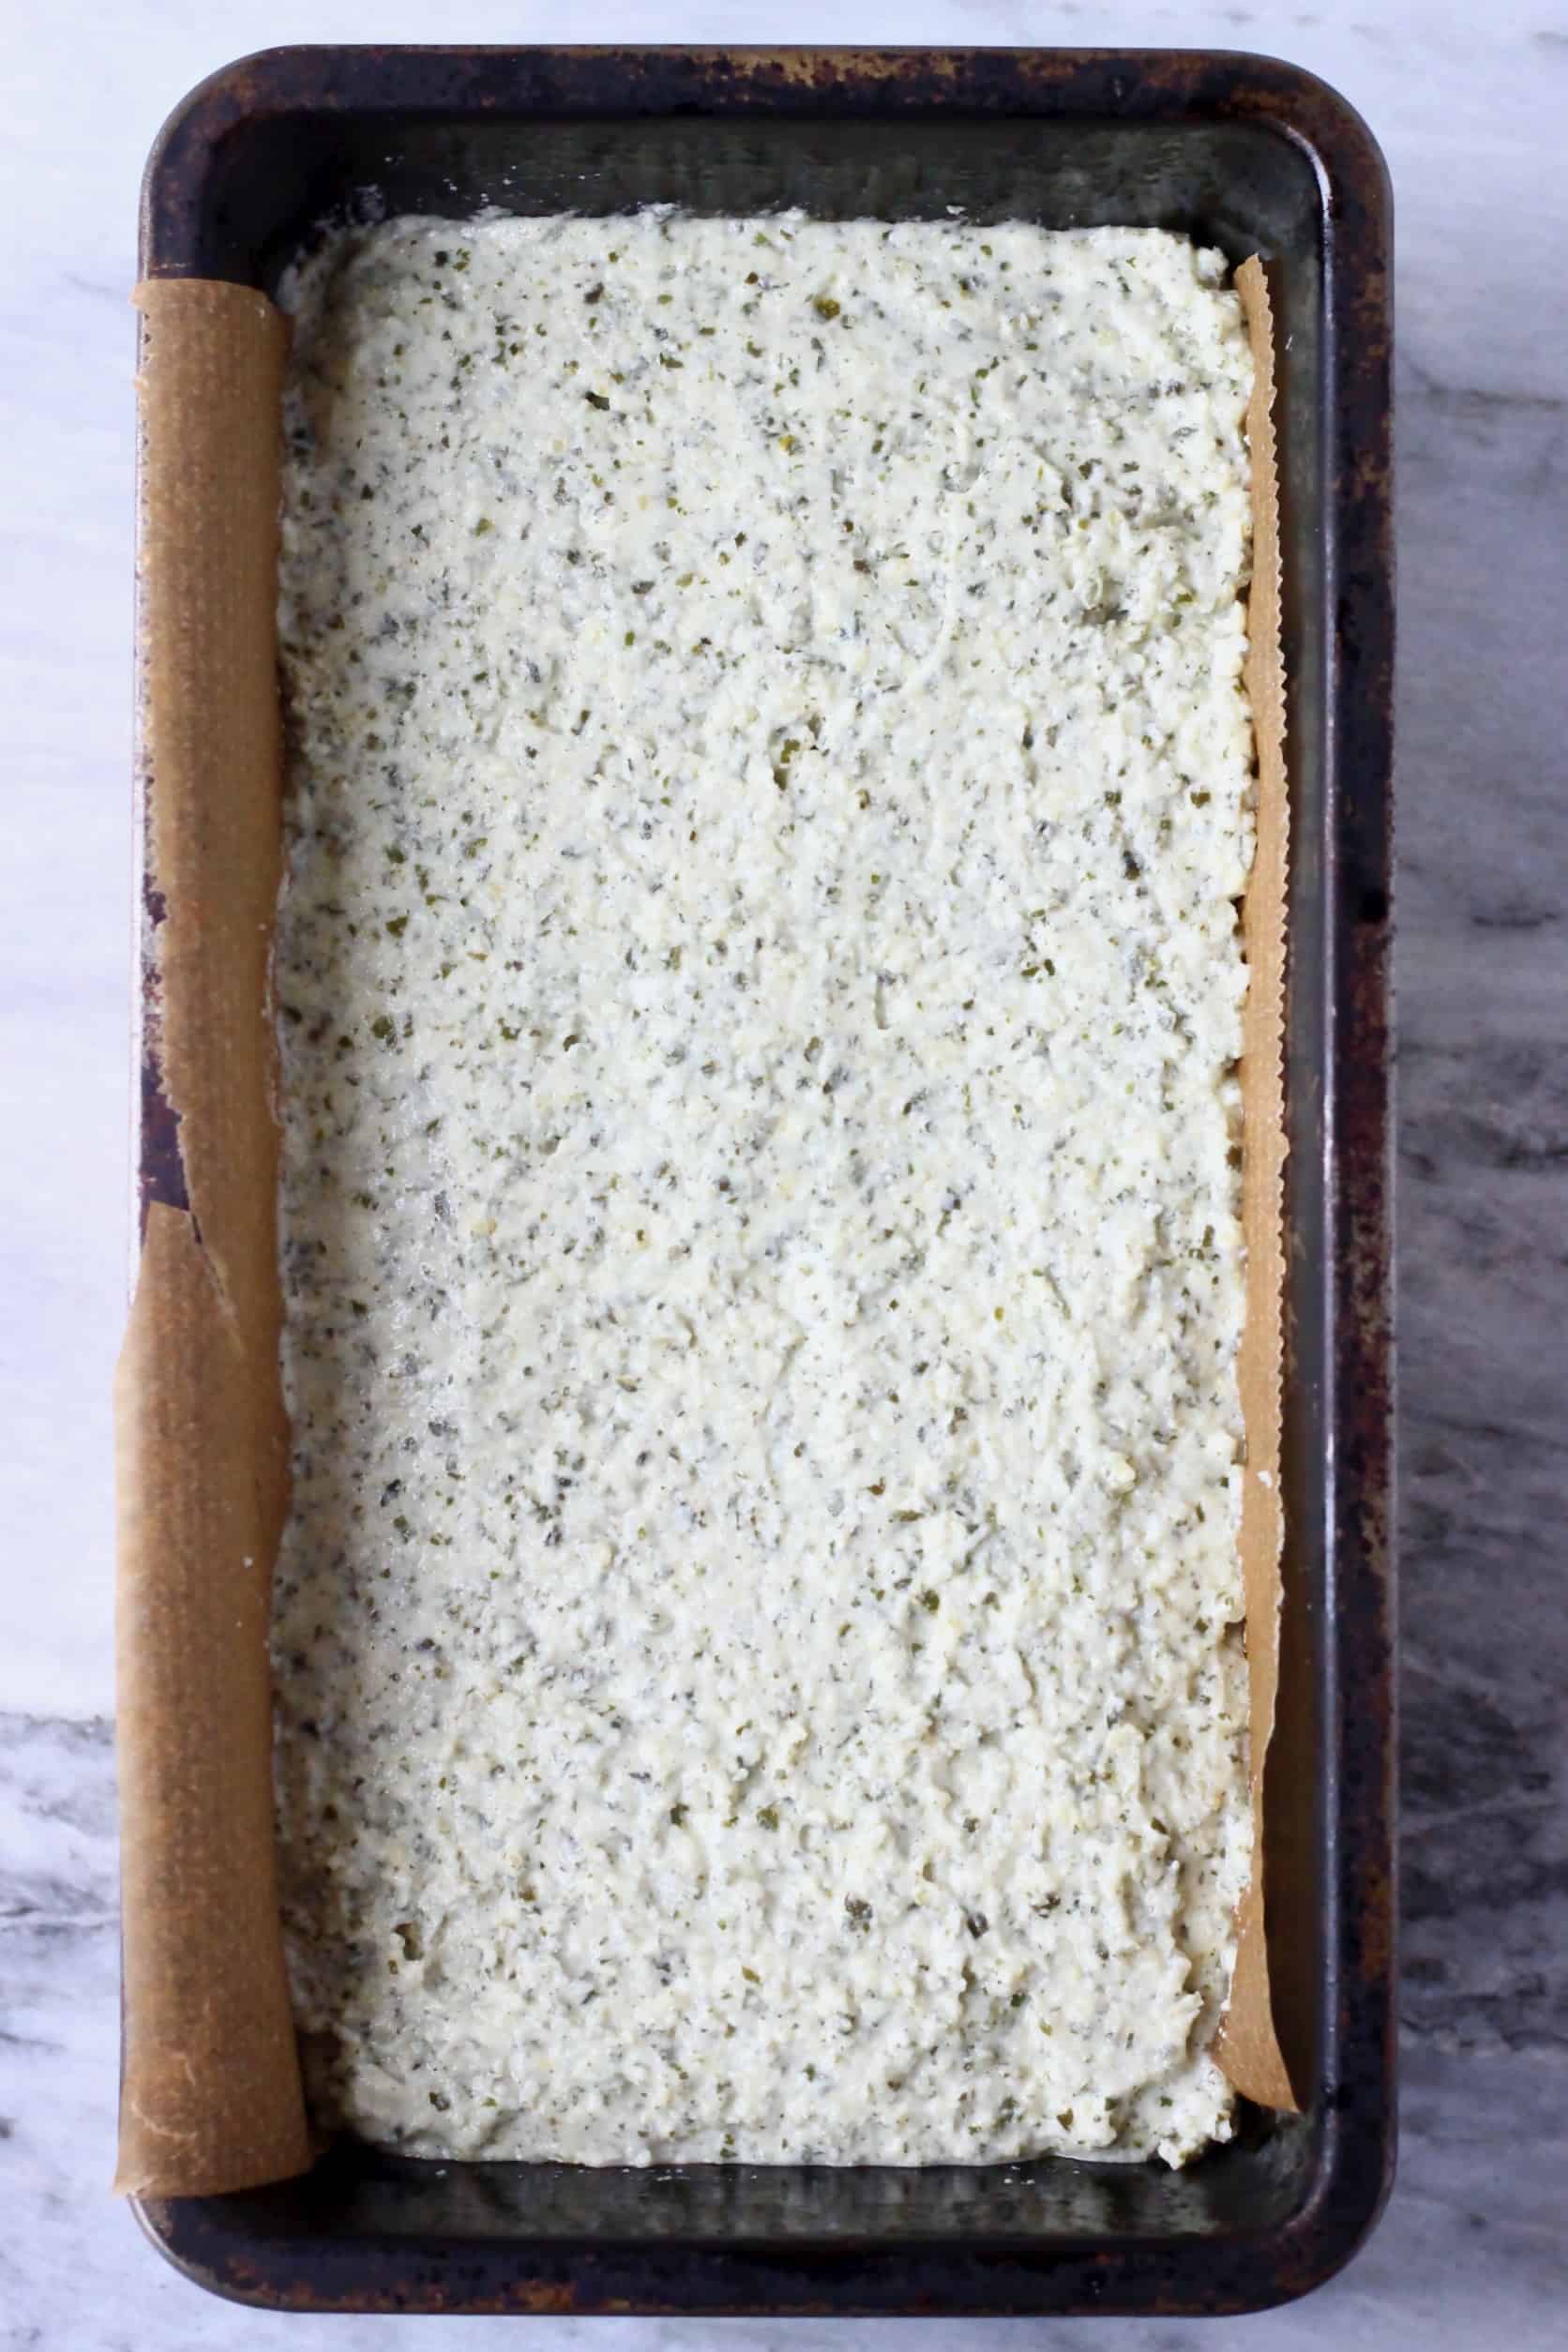
- Transfer the ground pumpkin seeds into a glass mixing bowl and mix together with all other ingredients.
Tip: Use a measuring jug to measure out the plant-based milk.
- Transfer the batter into a one-pound loaf tin.
Tip: Line the tin with greased baking paper to make the bread easier to remove after.
- Sprinkle over more pumpkin seeds to decorate, if desired.
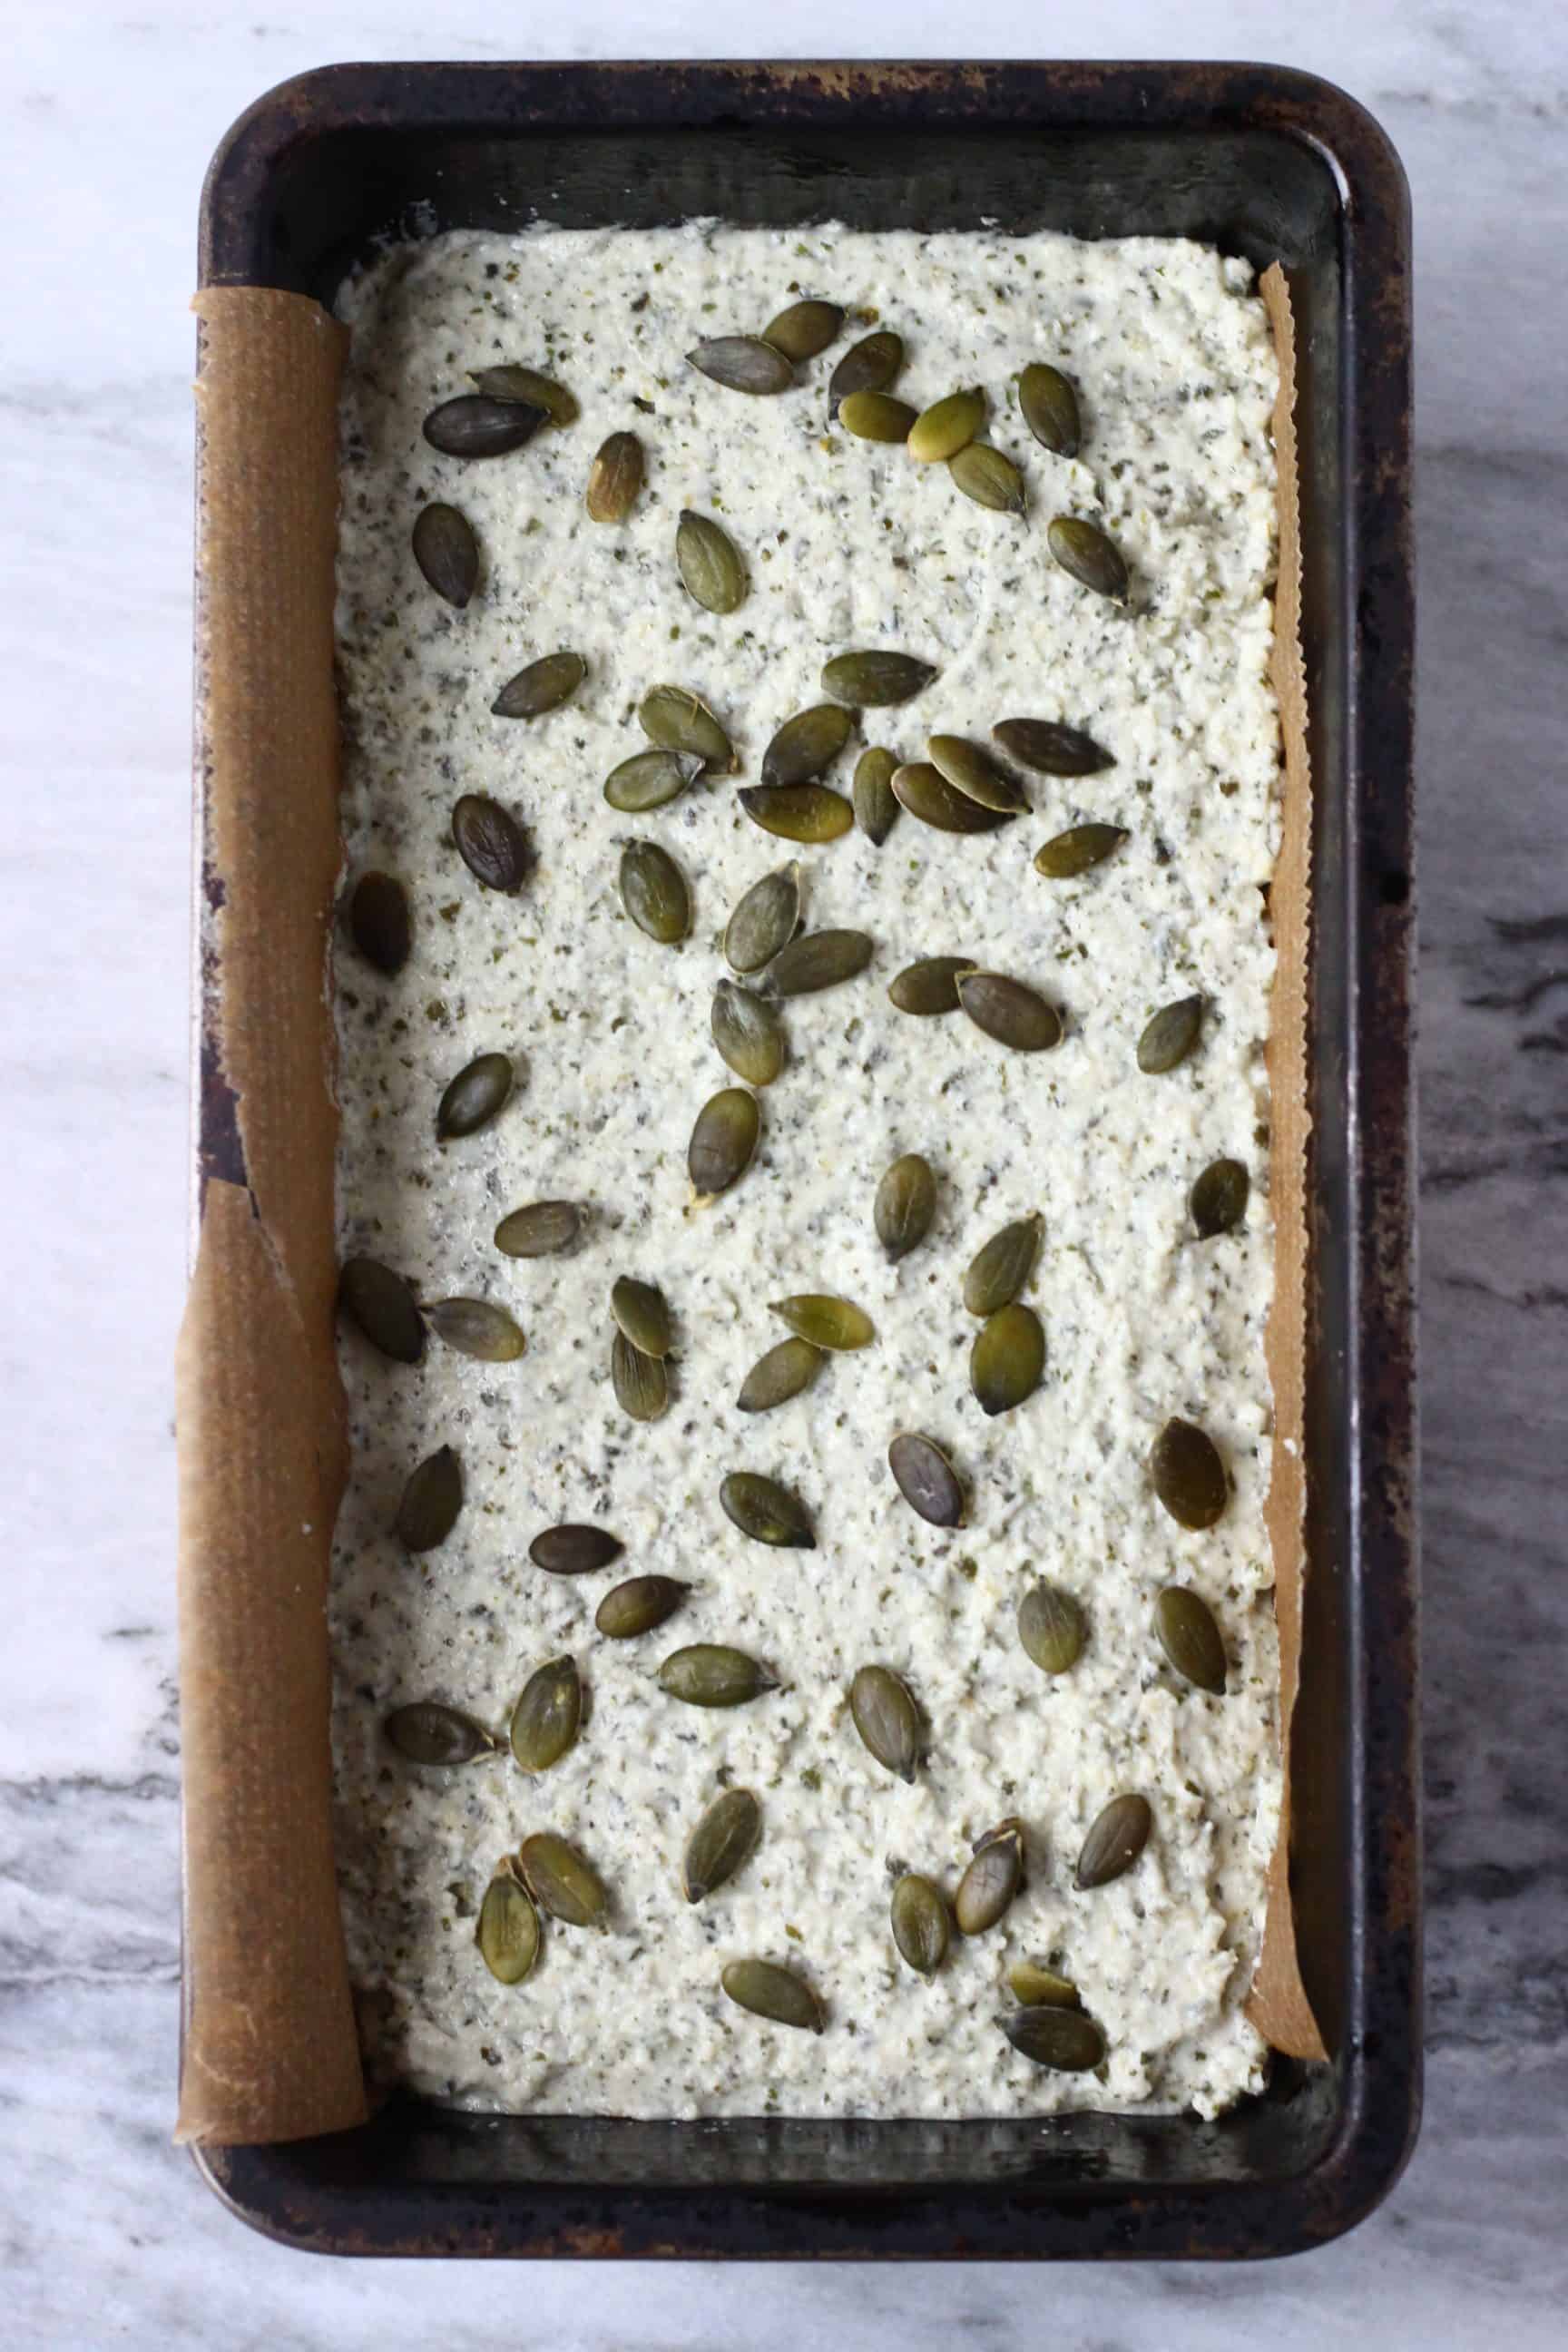
- Bake in the oven for 55 minutes.
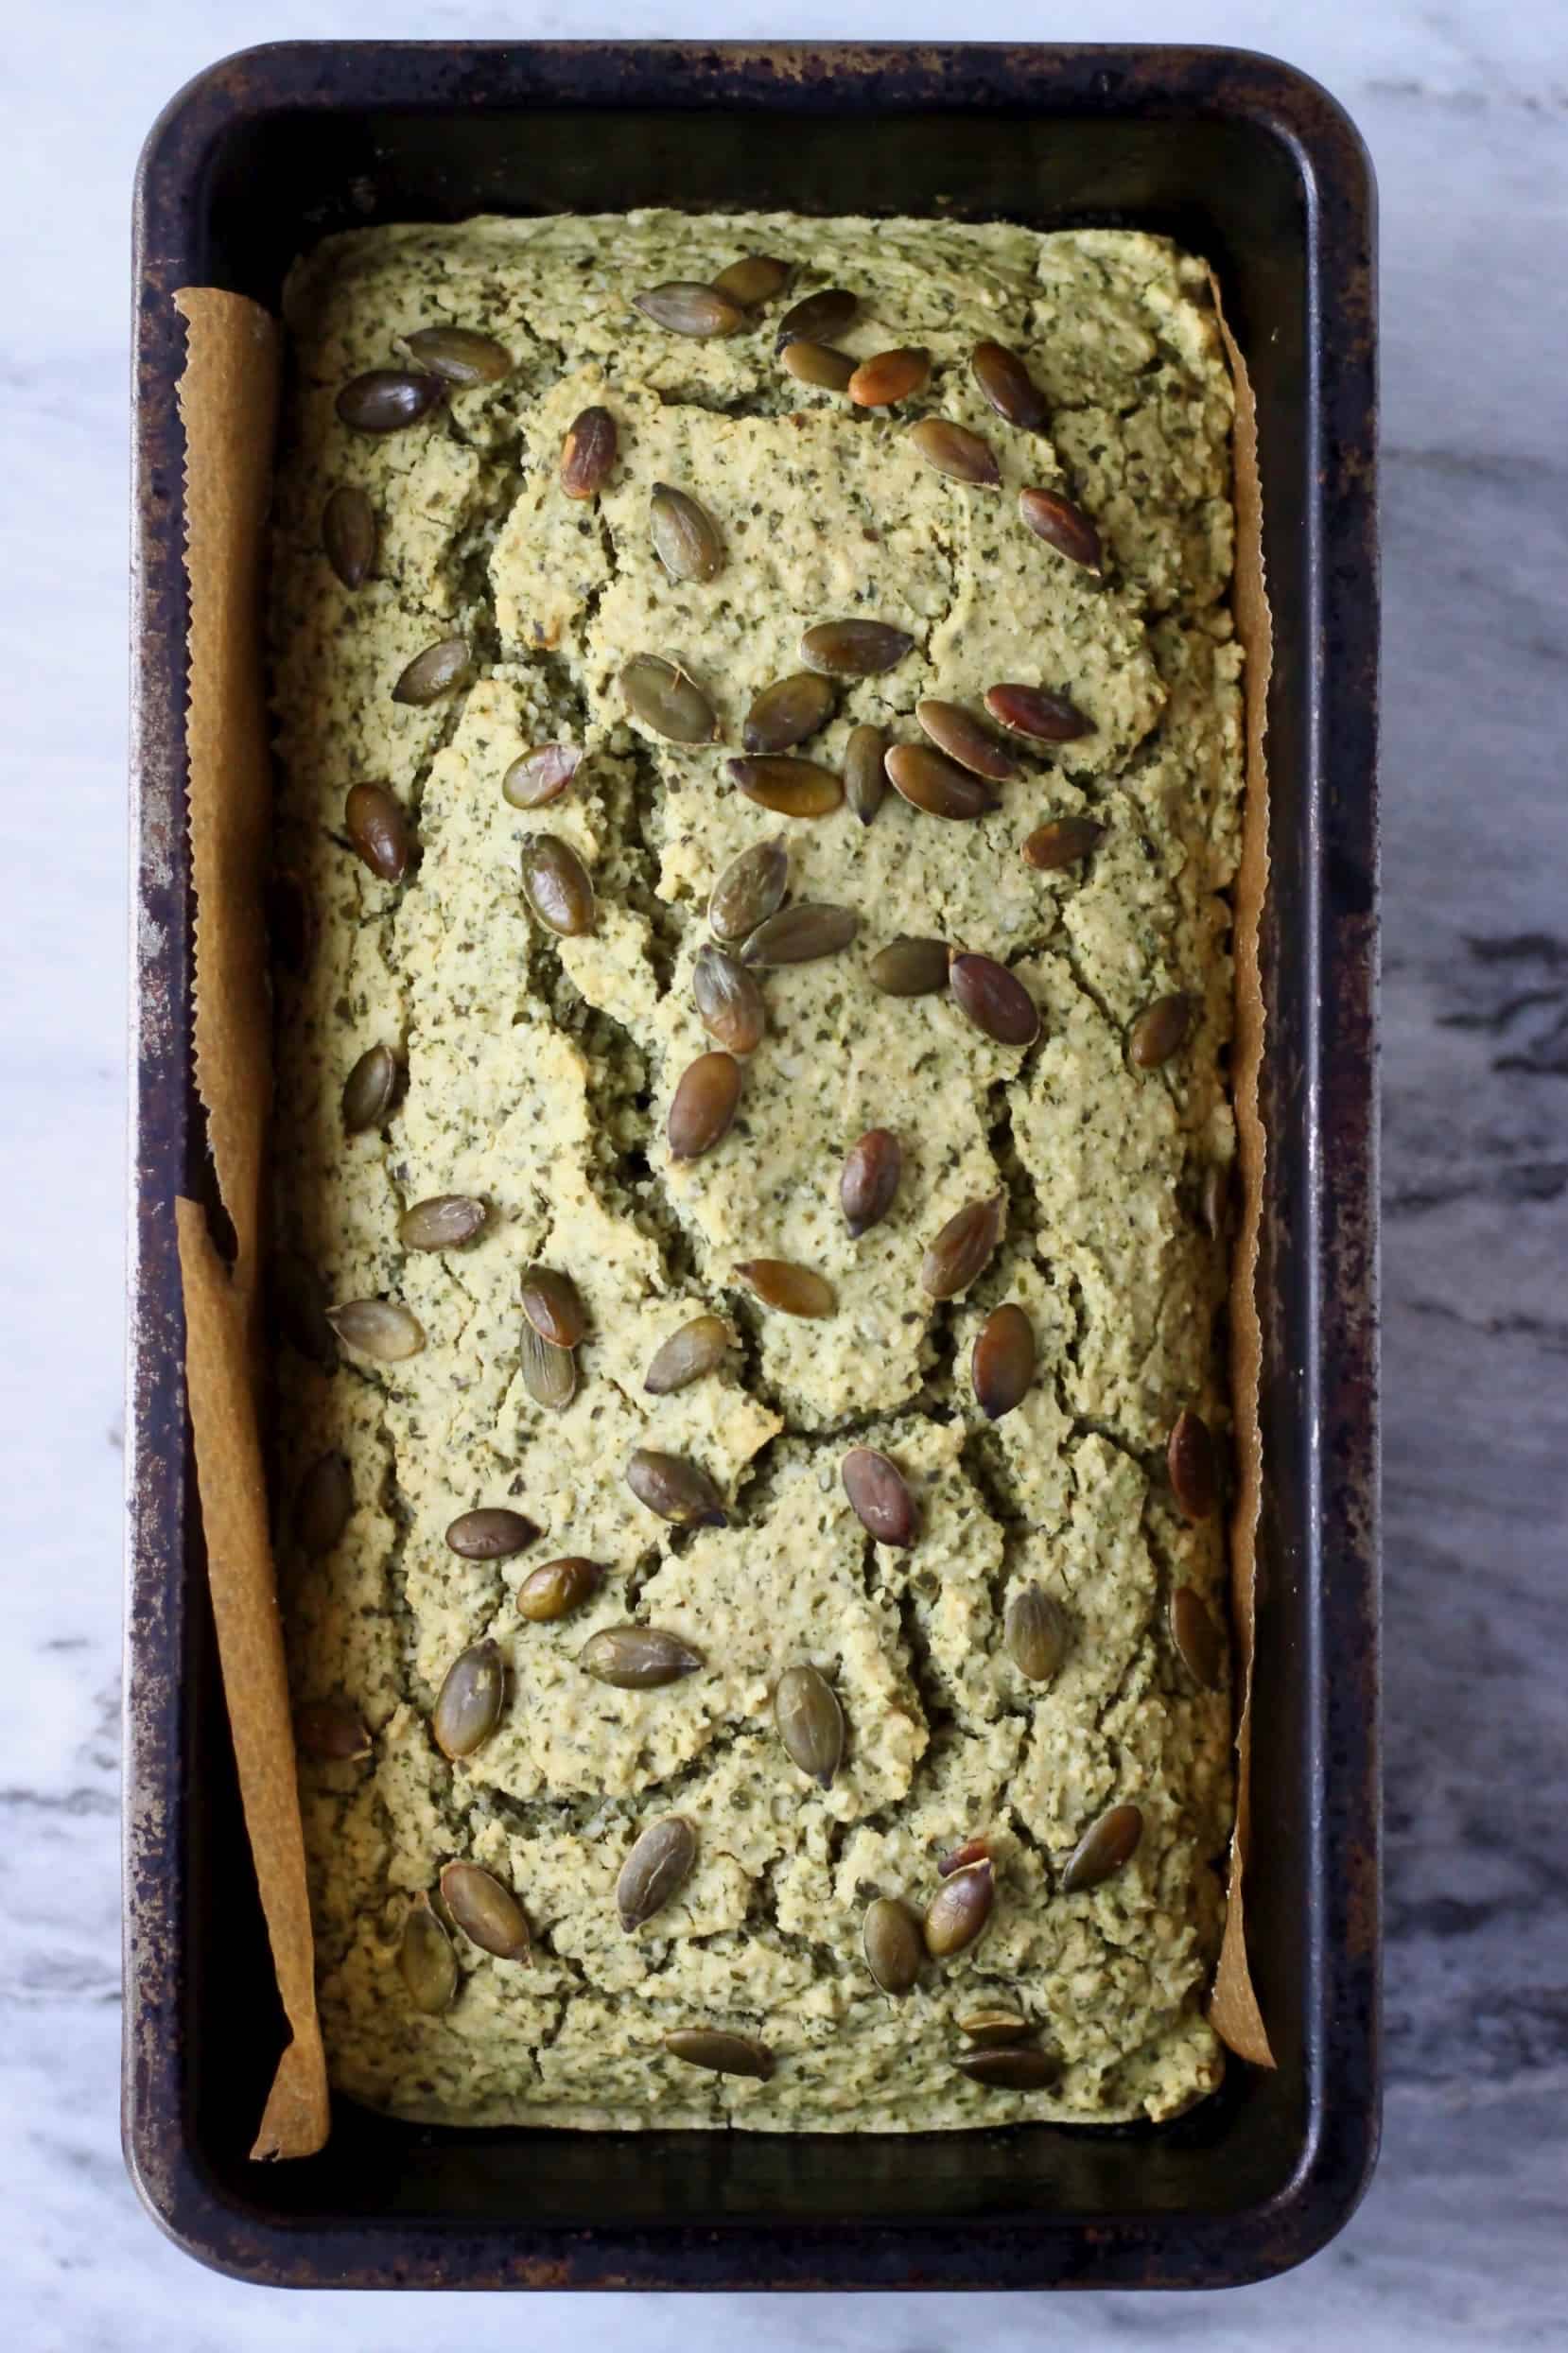
Tip: Transfer the loaf to a cooling rack to cool down completely before packing away to store because otherwise the steam from the warm bread will get trapped and you'll end up with soggy bread!
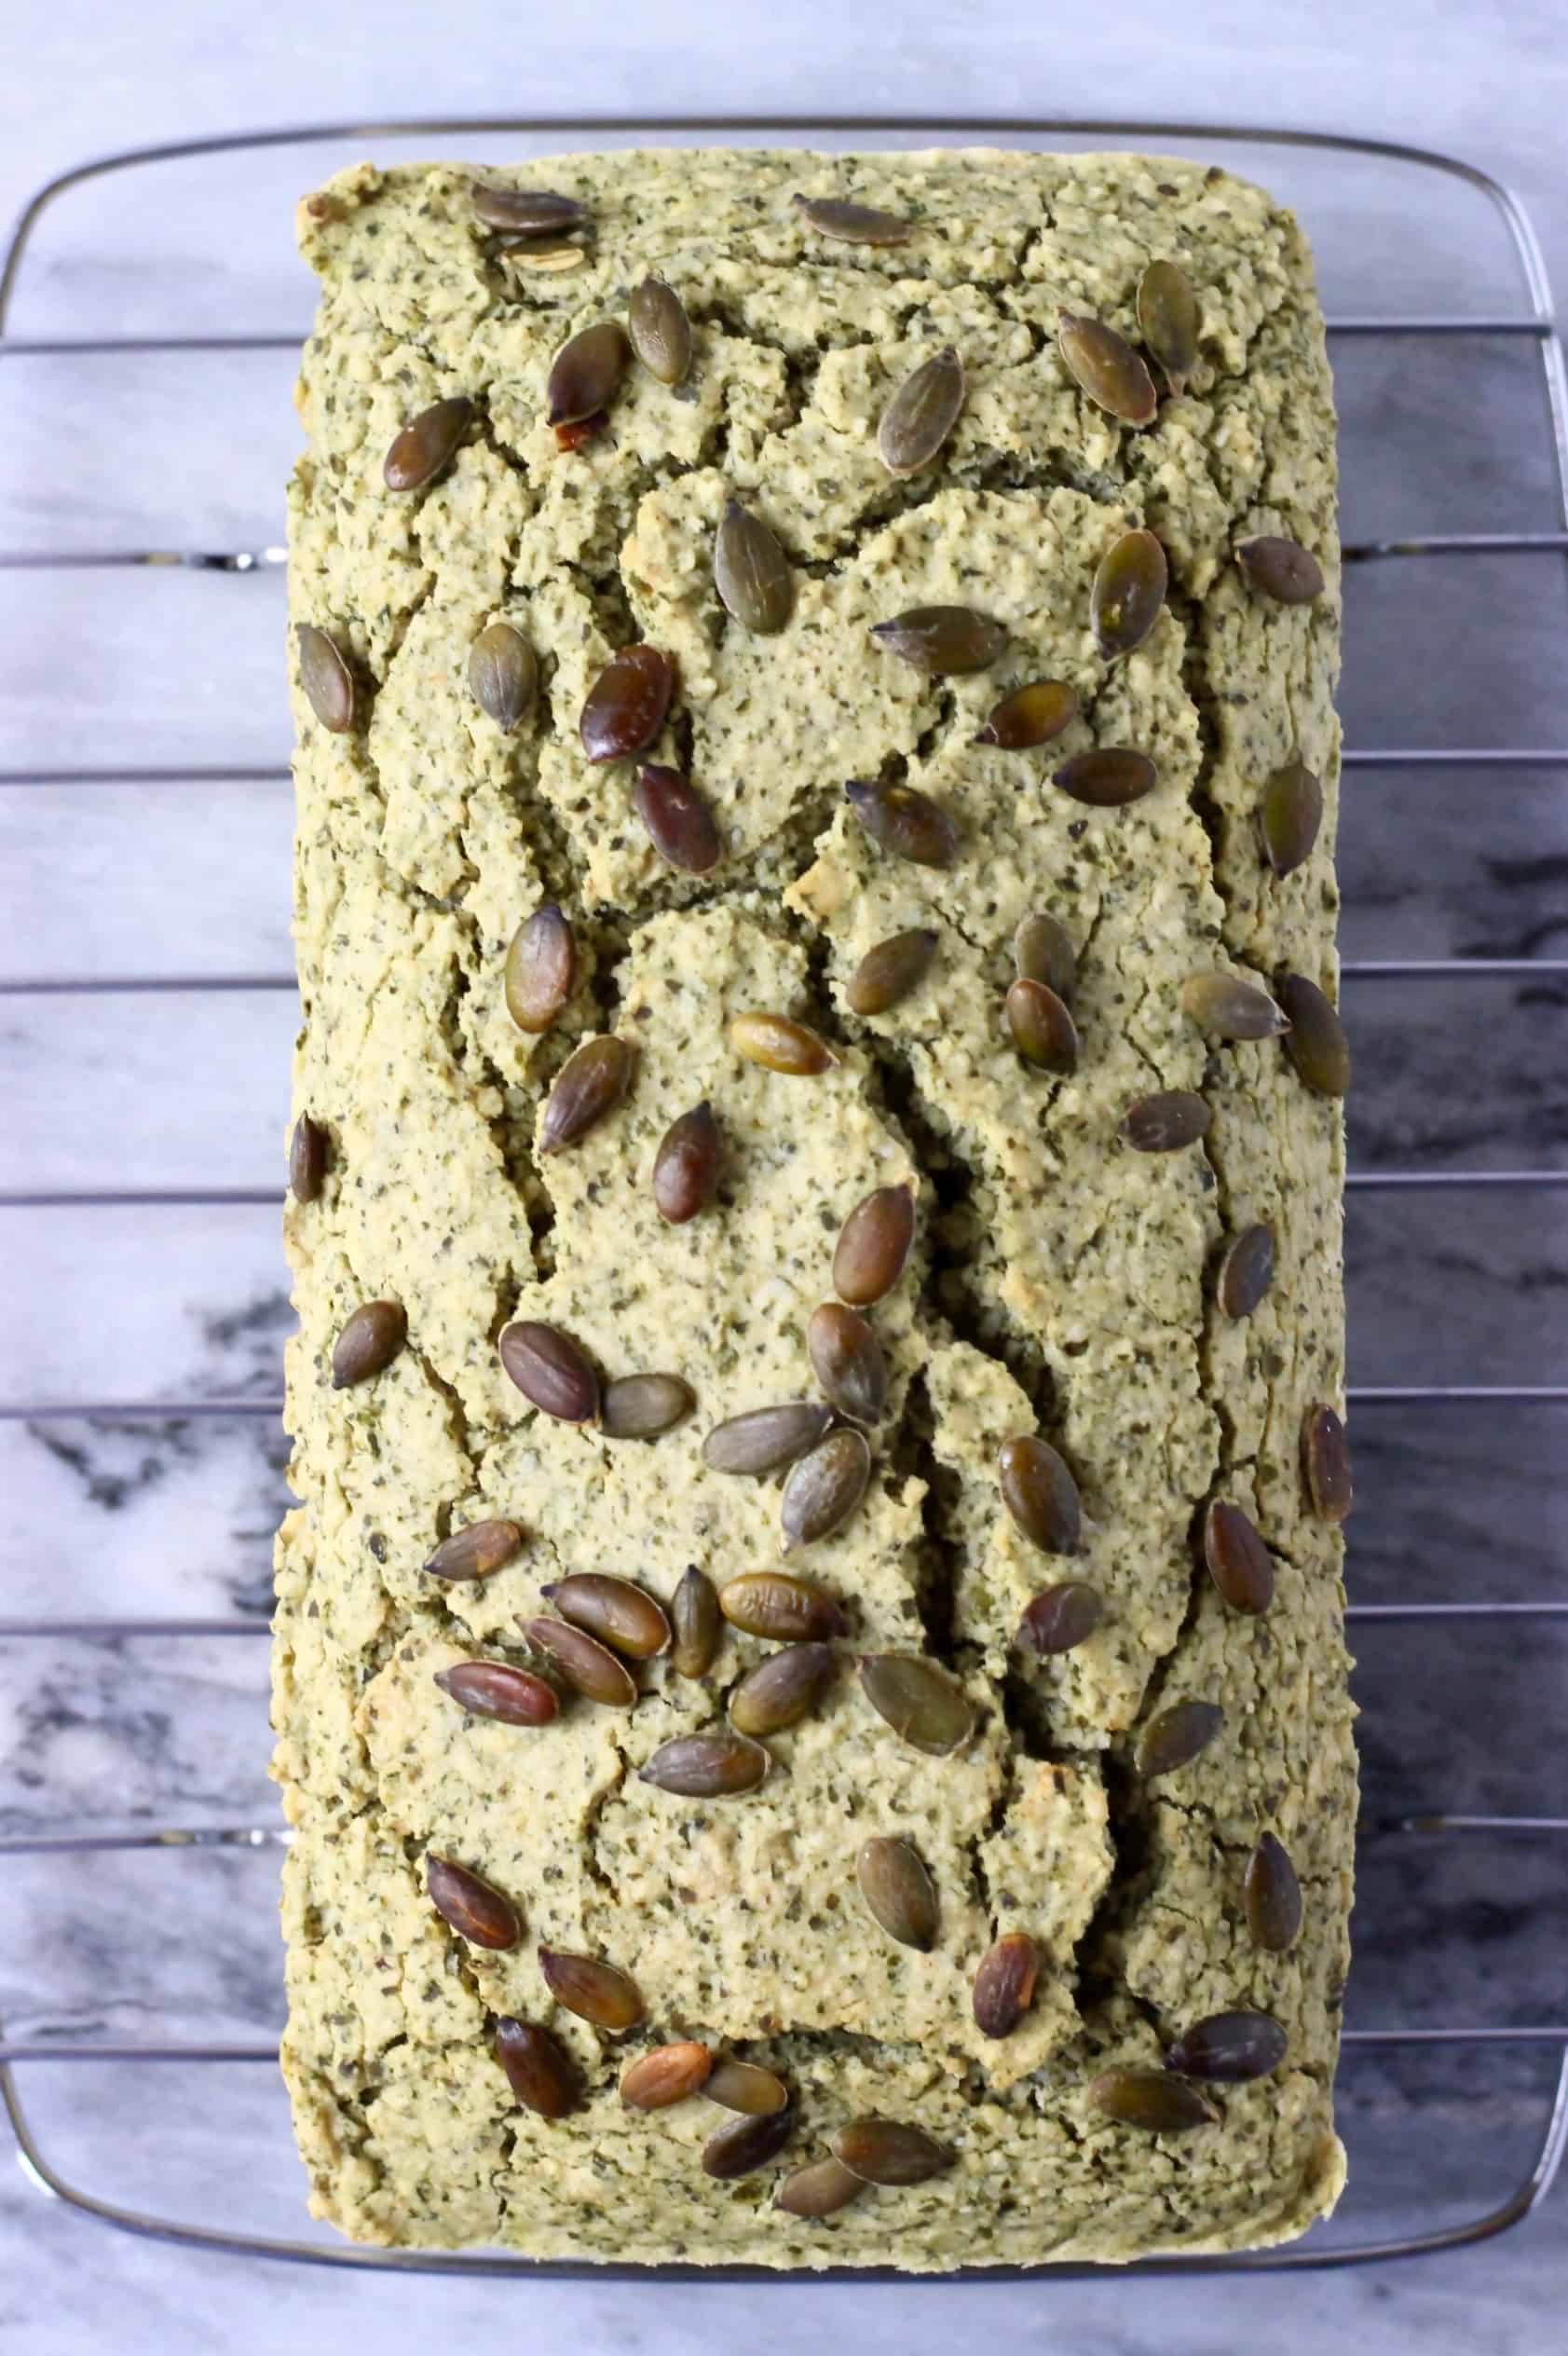
- Best left to cool completely before slicing.
How long does this keep for?
This bread keeps well covered in the fridge for a good few days. If not eaten on the day it's made, it's best toasted before eating.
Substitutions you can make
- You can replace the ground pumpkin seeds with ground sunflower seeds, ground almonds, ground walnuts or ground pecan nuts.
- If you're not gluten-free, you can use plain flour instead of gluten-free flour.
- You can use any type of plant-based milk: almond milk, soy milk, rice milk, cashew milk, oat milk etc.
- You can replace the apple cider vinegar with lemon juice.
More gluten-free vegan bread recipes
- Gluten-Free Vegan Chickpea Bread
- Gluten-Free Vegan Blueberry Banana Bread
- Gluten-Free Vegan Irish Soda Bread
- Gluten-Free Vegan Almond Bread
- Gluten-Free Vegan Oat Bread
- Gluten-Free Vegan Dinner Rolls
- Gluten-Free Vegan Seeded Buckwheat Bread
- Gluten-Free Vegan Cornbread
- Gluten-Free Vegan Bread Rolls
- Gluten-Free Vegan Oatmeal Bread
- Gluten-Free Vegan Biscuits
- Gluten-Free Vegan Oat Flour Bread
- Flaxseed Bread
- Quinoa Bread
- or browse the whole collection!
If you try out this recipe or anything else from my blog, I'd really love to hear any feedback! Please give it a rating, leave a comment, or tag a photo @rhiansrecipes #rhiansrecipes on Instagram! Thank you.
Watch how to make it
Pumpkin Seed Bread (Vegan + GF)
Ingredients
- 225 g (1 ½ cup) pumpkin seeds
- 225 g (2 cups) gluten-free flour blend (or sub plain flour if not gluten-free)
- 3 heaped teaspoons baking powder (ensure gluten-free if necessary)
- ¼ teaspoon bicarbonate of soda (baking soda)
- ¼ teaspoon salt to taste
- 345 ml (1 ½ cup) unsweetened almond milk (or any other plant-based milk)
- 1 tablespoon apple cider vinegar (ensure gluten-free if necessary)
To decorate (optional):
- Pumpkin seeds
Instructions
- Preheat the oven to 180 degrees Celsius (350 degrees Fahrenheit).
- Place the pumpkin seeds in a food processor and pulse briefly until you get a fine powder (be careful not to blend too much, otherwise you'll end up making pumpkin seed butter).
- Transfer the ground pumpkin seeds into a large bowl.
- Add the gluten-free flour, baking powder, bicarbonate of soda and salt and mix well.
- Add the milk and vinegar and mix again.
- Transfer the mixture to a loaf tin (I used a one-pound loaf tin) lined with greased baking paper.
- Scatter over more pumpkin seeds to decorate, if desired.
- Bake in the oven for around 55 minutes, until risen and an inserted skewer comes out clean.
- Leave to cool on a wire rack before putting away to store.
- Keeps well in the fridge for up to a few days.
Video
Notes
- If you've kept your bread in the oven for the right amount of time and it's still not done in the centre and the outside is becoming hard/burnt, then I would recommend covering it with a piece of baking paper to prevent the outside from becoming burnt, and and continuing to bake it until an inserted skewer comes out clean.
- Make sure to leave the bread to cool down completely on a cooling rack before packing it away to store because otherwise the steam from the warm bread will get trapped and you'll end up with soggy bread, which nobody wants!
- It keeps well covered in the fridge for a good few days. If not eaten on the day it's made, it's best toasted before eating.
- If you're freezing it, you can just slice it up and put the whole thing in the freezer. Then when you want to eat it you can just pop the slices of bread in the toaster straight from frozen.
Disclosure: This posts contains affiliate links to Amazon. If you purchase any of these products, a small percentage will come to me with no extra cost to you! This income will go towards the running of this blog - thank you.


John Guthrie
110 milligrams, 5% of the daily value, of sodium, in a serving, after a quarter of a teaspoon of salt, a quarter of a teaspoon of bicarbonate of soda and three heaped teaspoons of baking powder? 'There are 150 milligrams of sodium in 1/8 teaspoon of baking soda.' How big are these servings?
Rhian Williams
One serving is one slice of bread! This loaf has 12 slices.
Tara
I had trouble getting the bread to cook through completely. I left it in for 10 extra minutes, then 2 lots of 5 minutes but when I cut the loaf it was still doughy in the centre. My oven is usually pretty reliable, so this surprised me. I’m wondering if a lower temperature for longer, say 160-degrees for 80 mins might give a better result? What has your experience been, Rhian?
I must add, it toasted up well and was still fab, I’d like to perfect it so I can cook it again and again!
Rhian Williams
Hi - thank you so much for your feedback. I'm sorry to hear that. What type of gluten-free flour did you use? Baking it at a lower temperature such as 160 degrees for 80 minutes would work!
Irisel
Hi! I don’t have wheat flour nor enough gluten free blend flour, can I sub with oat flour? If not, what would you recommend? I have oat, quinoa, brown rice, chickpea and arrowroot. Thanks!!!
Rhian Williams
Hi! You can use brown rice flour and 1 tablespoon of arrowroot in place of the gluten-free flour blend! Or oat flour will work too! Hope that helps!
Jonathan
Hi Rhian,
I have just baked this bread. The loaf looks very healthy and has lots of healthy ingredients. However I did find it has a very strong after taste of baking powder. I have never used 3 heaped teaspoons of baking powder in baking before so I was hesitant but went with your advise. I wonder whether this amount is needed or would it be best to advise an exact amount of baking powder in grams as this would reduce the margin of error. I can imagine everyone has different interpretation of heaped teaspoons. Thanks
JK
Rhian Williams
So sorry to hear that! 1 teaspoon is 5g, one heaped teaspoon would be around 10g! The reason for the strong taste of baking powder in your loaf was the brand you used. The taste and strength of flavour can really vary between brands. Some brands I've used have a very strong and bitter taste. I use Dove's Farm which doesn't taste of anything so is ideal, especially for gluten-free bakes which tend to require larger quantities of baking powder. Hope that helps!
Anne
delicious! I used Bob's Red Mill 1 for 1 for the gluten-free flour. The result is one of the best gluten-free breads I have tried
Rhian Williams
Thank you so much, so happy to hear that!