


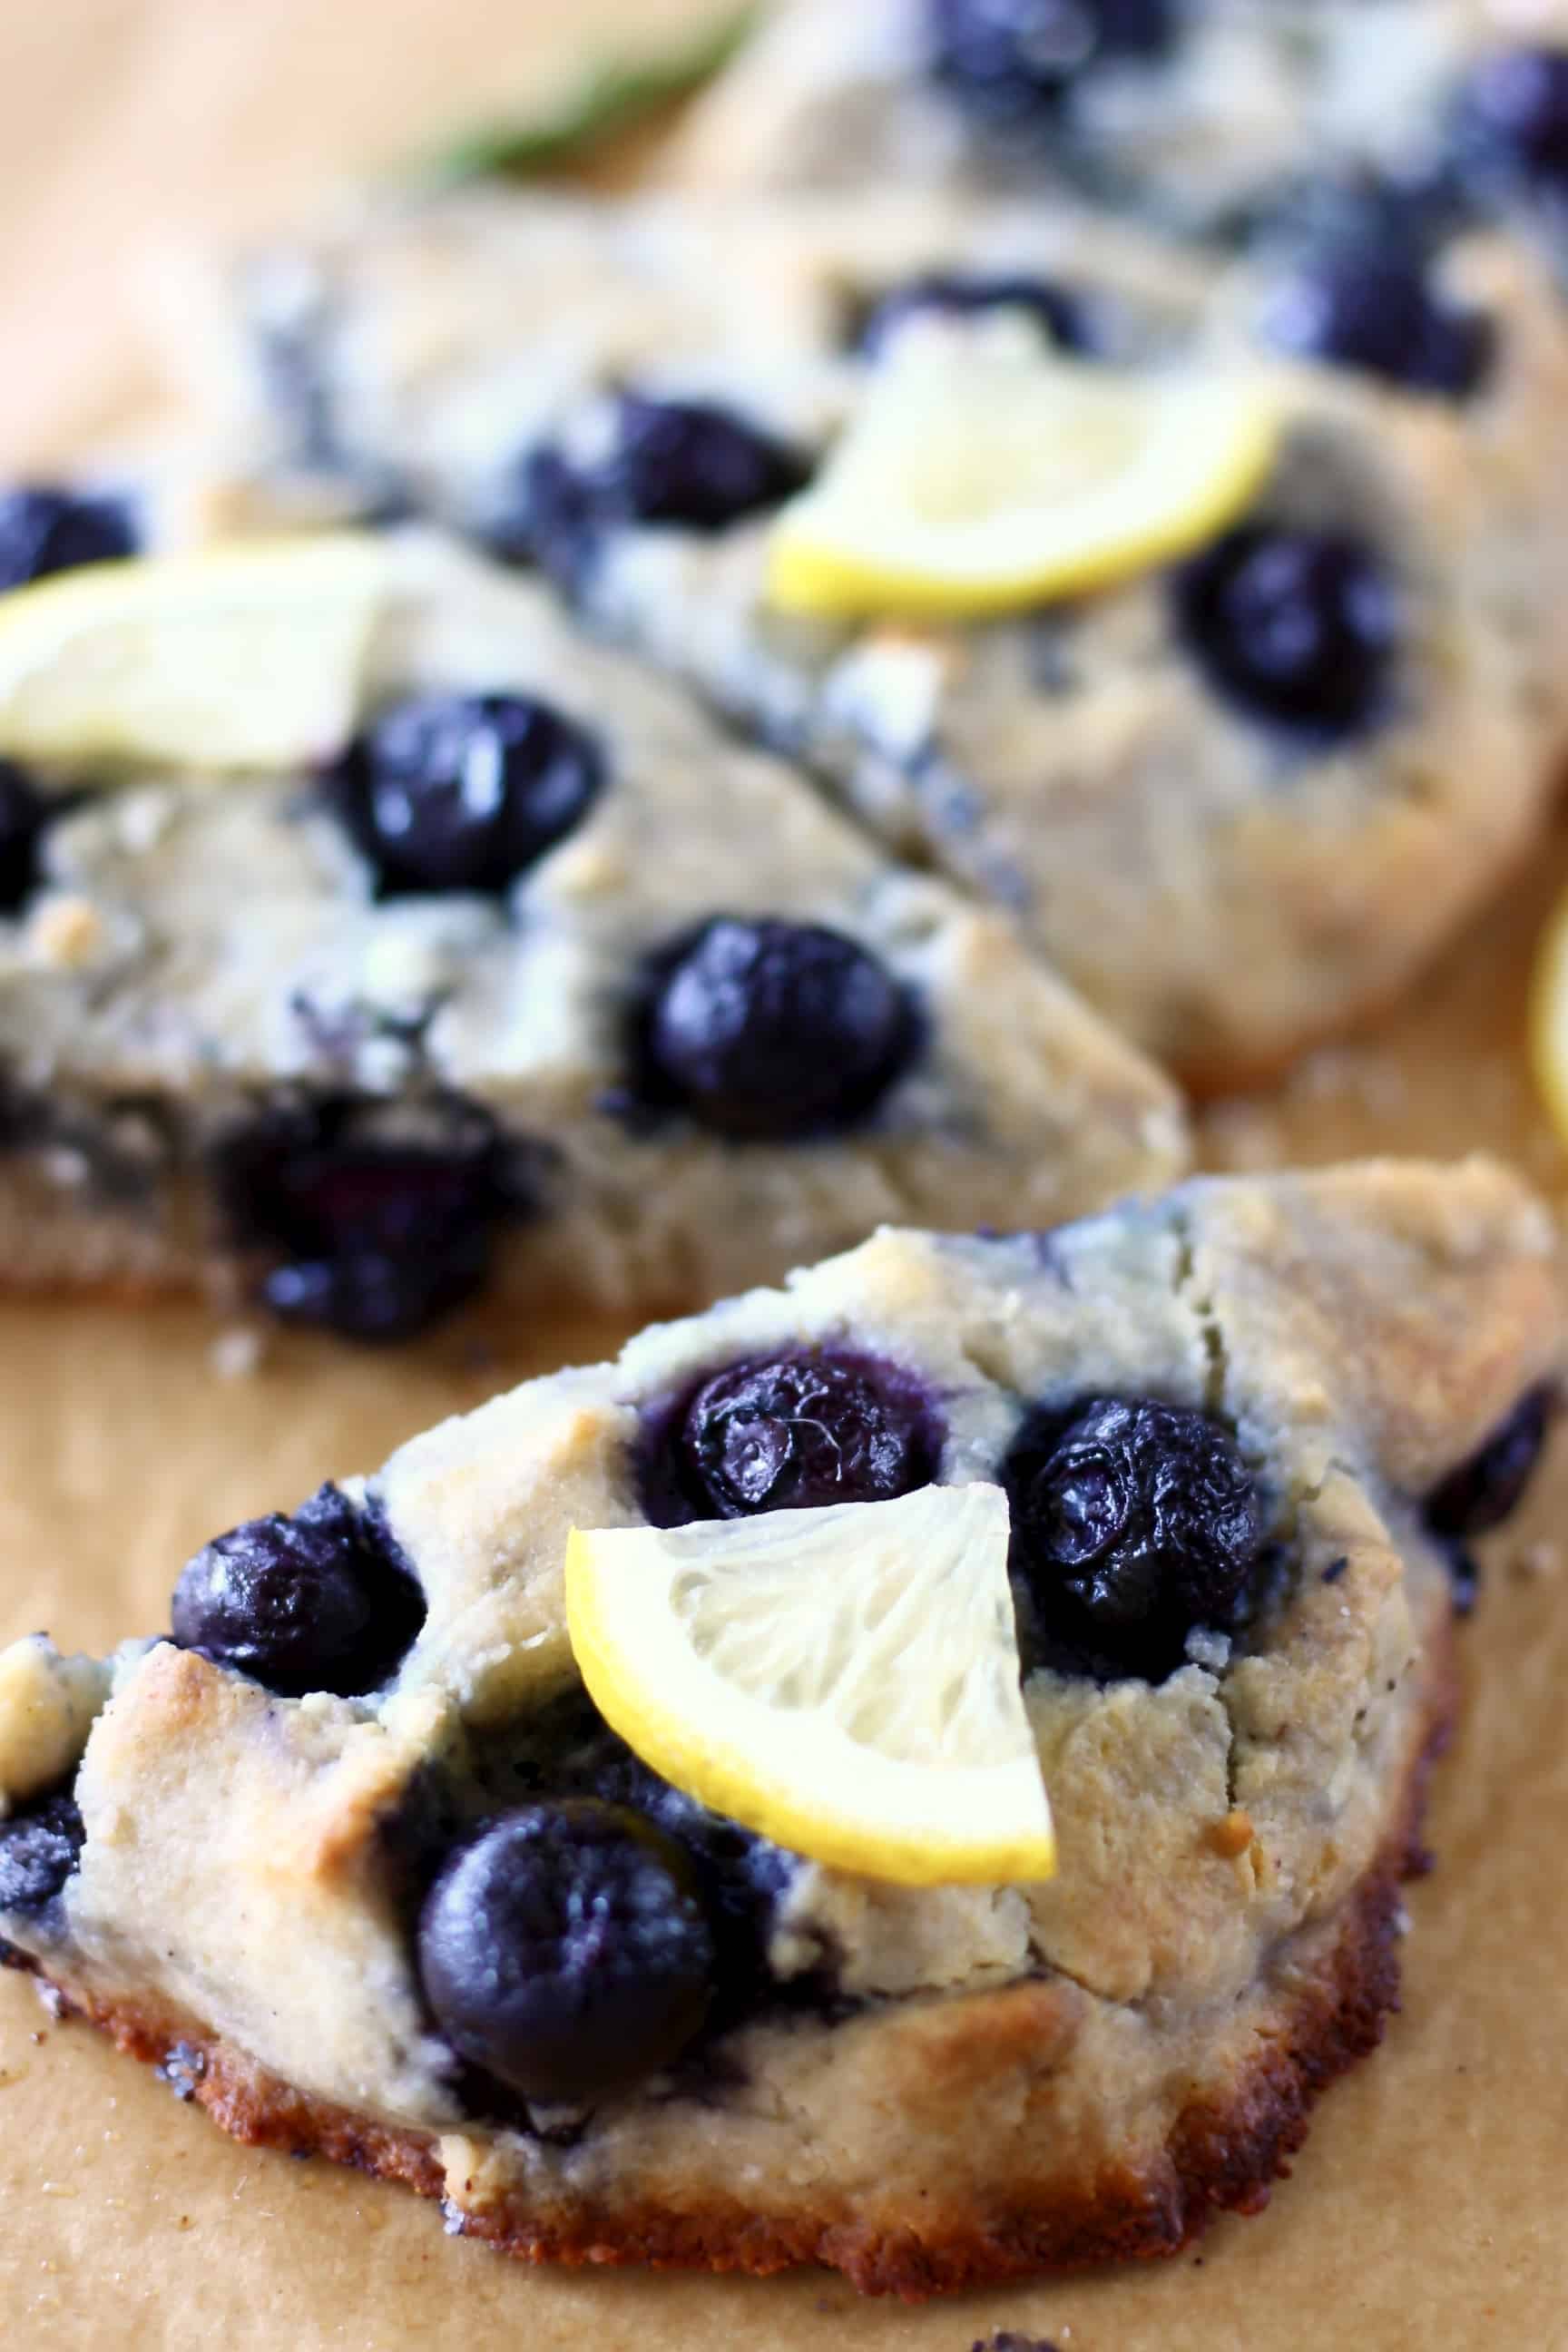
These Gluten-Free Scones are moist and fluffy, sweet and fruity, and rich and "buttery"! They're packed with juicy blueberries and lemon flavour, and are vegan and refined sugar free too. They're great for dessert, breakfast, brunch or a snack.

These Gluten-Free Vegan Lemon Blueberry Scones are easy to make, come together in one bowl and much healthier than the traditional version. Perfect for Easter, Mother's Day, baby showers, bridal showers and anything else in between!
These Lemon Blueberry Scones are American scones, which are quite different from British scones. Here are the main differences between American and British scones:
1. The shape: American scones are triangular, British scones are circular.
2. The way they're baked: American scones are made by making a round shape with the dough and cutting before baking, whereas British scones are made by cutting out individual circles from the dough.
3. Add-ins: American scones usually include add-ins like fresh fruit, whereas British scones are usually plain or contain a small amount of dried fruit such as currants.
4. The way they're eaten: British scones are sliced in half and eaten with clotted cream and strawberry jam.
Scones should be firmer than cakes or cupcakes but not as hard as cookies. They should be fairly firm but fluffy on the outside - a similar texture to American biscuits.
If you're having trouble with your gluten-free scones being too dry or crumbly, things that you should focus on are:
1. The amount of oil - too little oil can make them too dry, but too much can make them crumbly.
2. The type of gluten-free flour you're using.
3. Although xanthan gum does help with gluten-free baking, I don't think it's necessary to use for this gluten-free scones recipe.
4. The consistency of the dough/the amount of milk you use - if the dough is dry, the scones will be even drier!
You'll probably notice that this recipe calls for a lot more milk than a traditional scone recipe. The dough for gluten-free vegan scones should be firm enough to easily mould into shape, but it will be a little softer than a traditional scone dough. This is because gluten-free flour soaks up much more moisture than normal wheat flour, so you'll need the dough to be slightly softer otherwise the resulting scones will be dry.
You can slice them in half and put them in the toaster (or keep them whole and put them in an oven toaster if you have them). You could spread over some coconut oil/coconut butter or vegan butter.
Top tips for making perfect fluffy gluten-free vegan scones
- They should be slightly crispy on the outside and fluffy on the inside.
- They should have a rich, buttery flavour, but shouldn't be too greasy - if you add too much oil they'll turn out more like cookies.
- They often taste better with some fruit baked in, as this adds extra flavour and moisture.
- Make sure the dough isn't too firm as that will make the scones too dry.
- But also make sure the dough isn't too wet as that will make it hard to shape.
- I'd recommend adding the plant-based milk a little at a time until you get a soft dough that's still firm enough to easily mould into a shape - stop adding milk if the dough is already too soft.
- If the dough is too dry to combine or very hard after you've added all the milk, add a little extra plant-based milk, as otherwise the scones won't rise as much and won't be fluffy.
- Make sure you use enough baking powder - using too little will make them very dense instead of fluffy.
- Be careful not to over-bake them as this will make them too dry!
How to make this recipe
Scroll down to the bottom of the post for the full recipe.
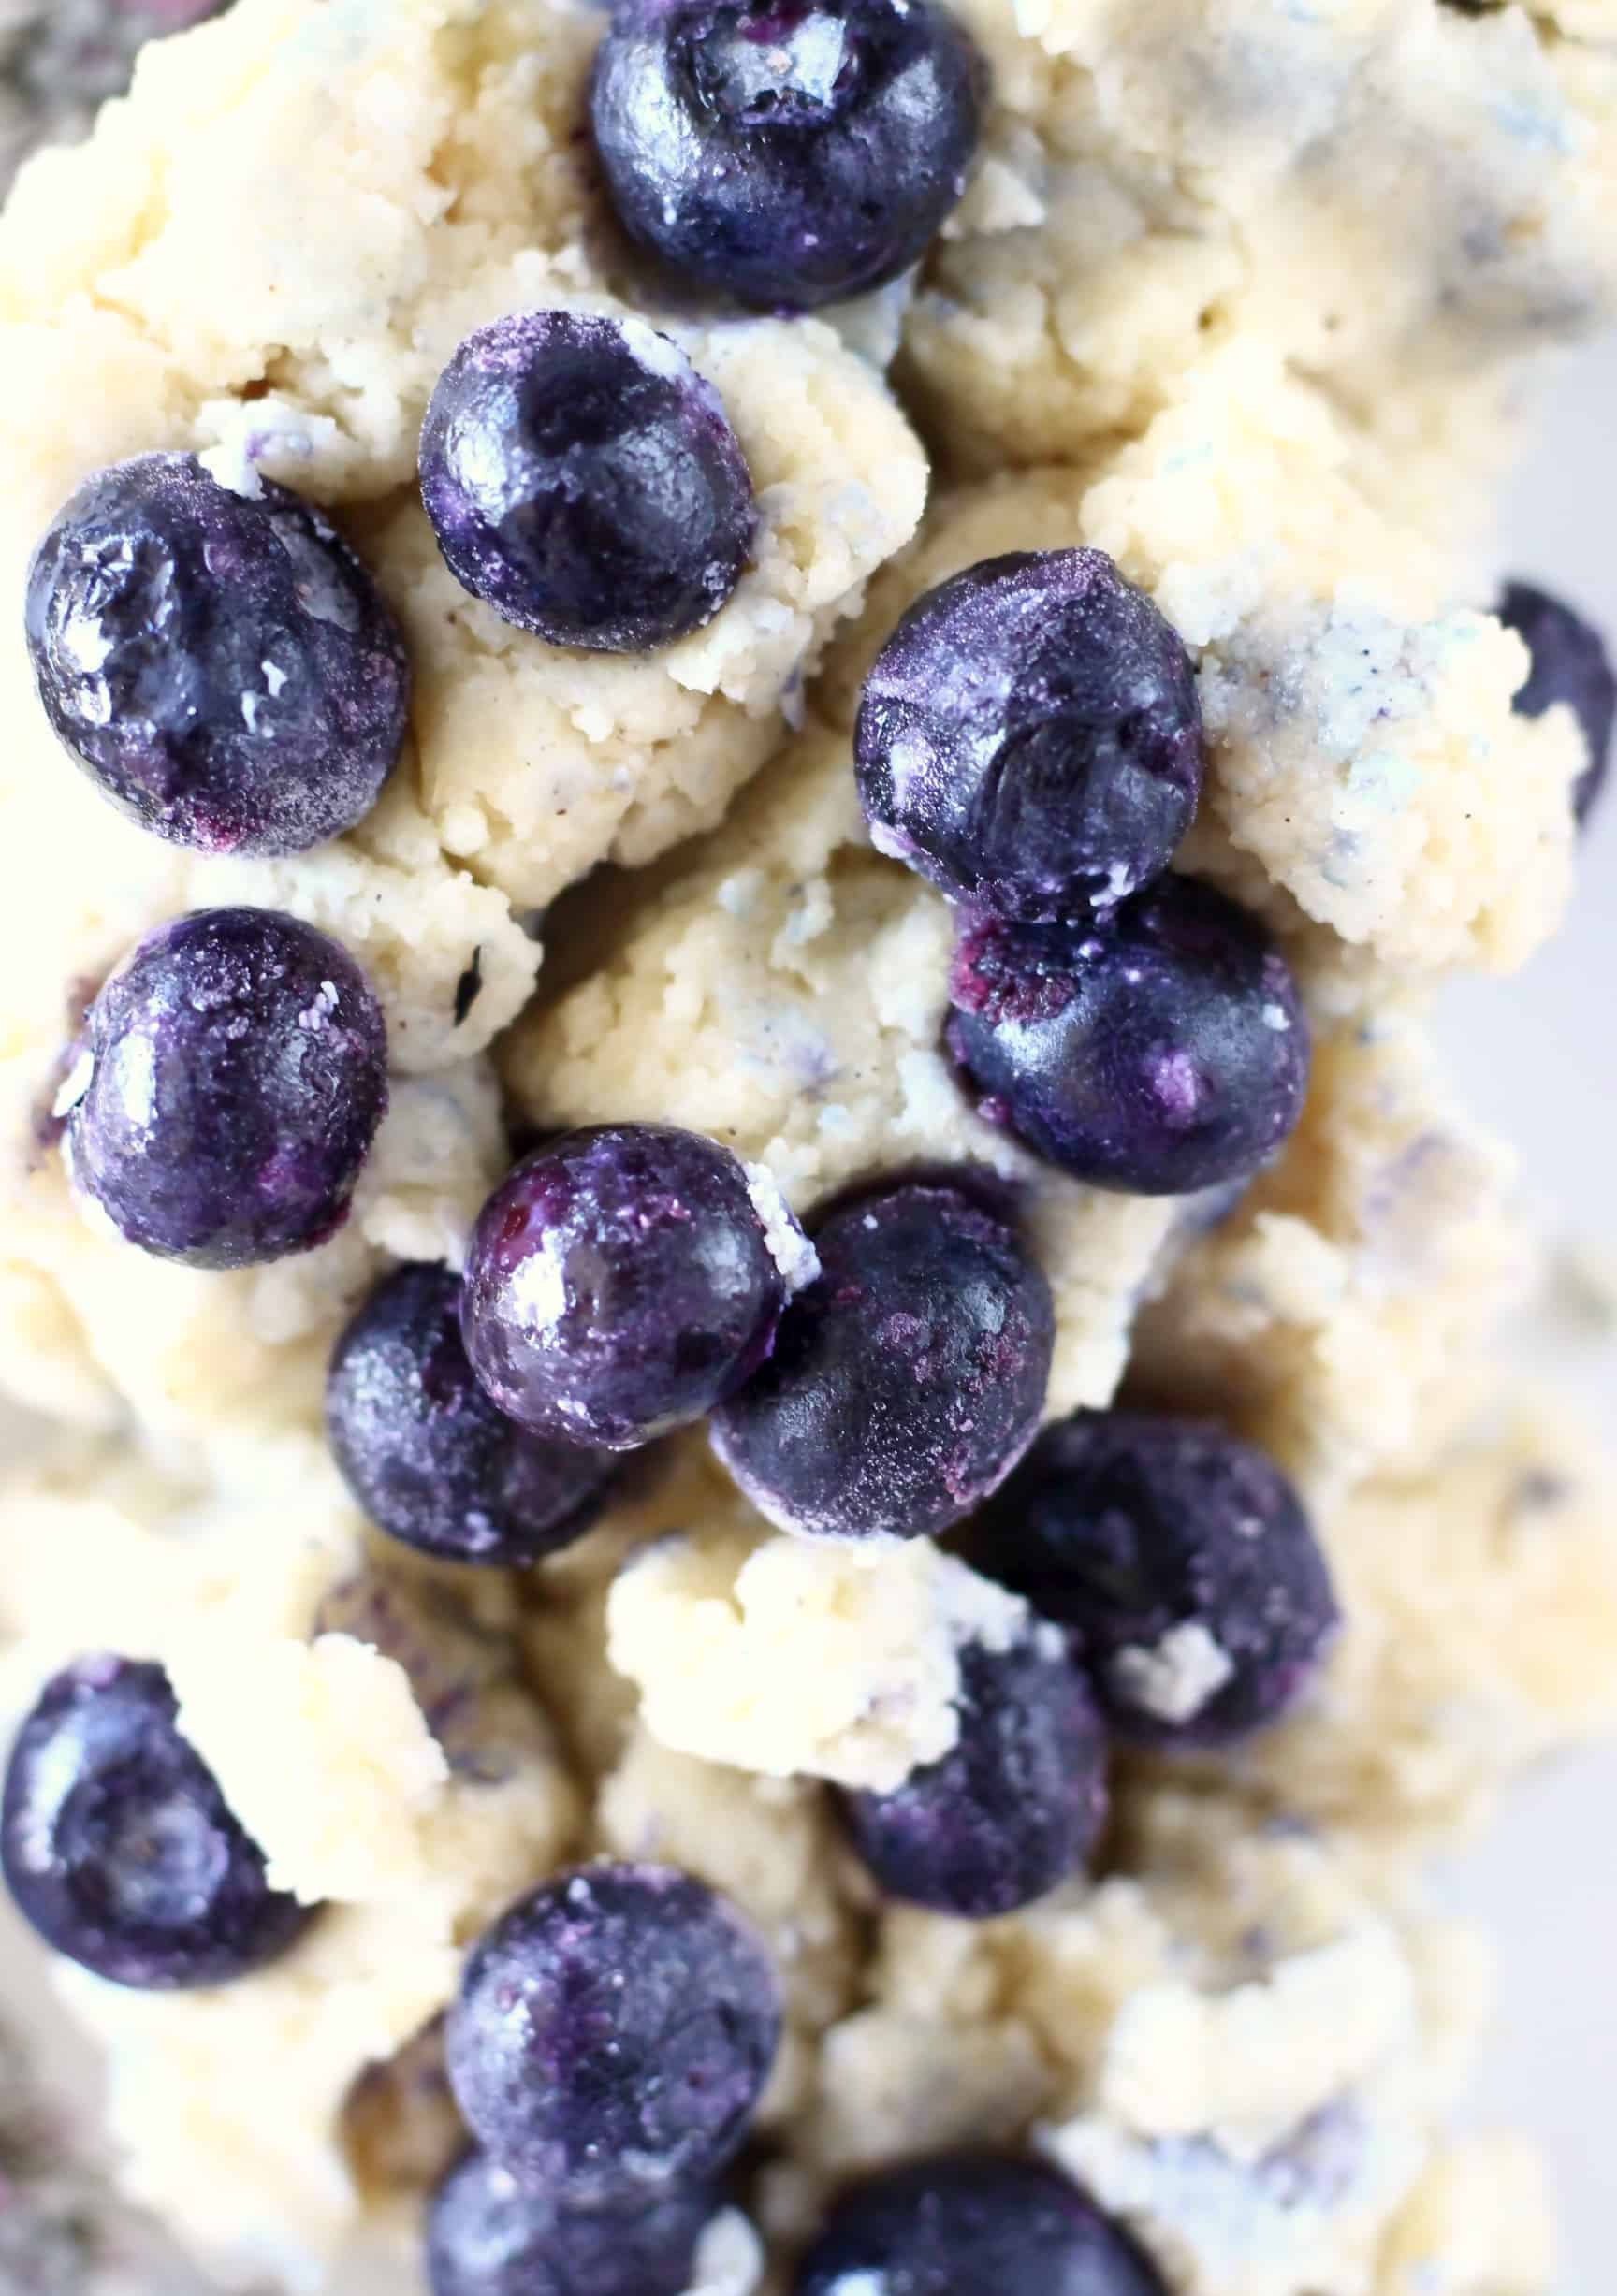
- Mix together all the ingredients for the dough in a mixing bowl.
Tip: Use a measuring jug to measure out the plant-based milk.
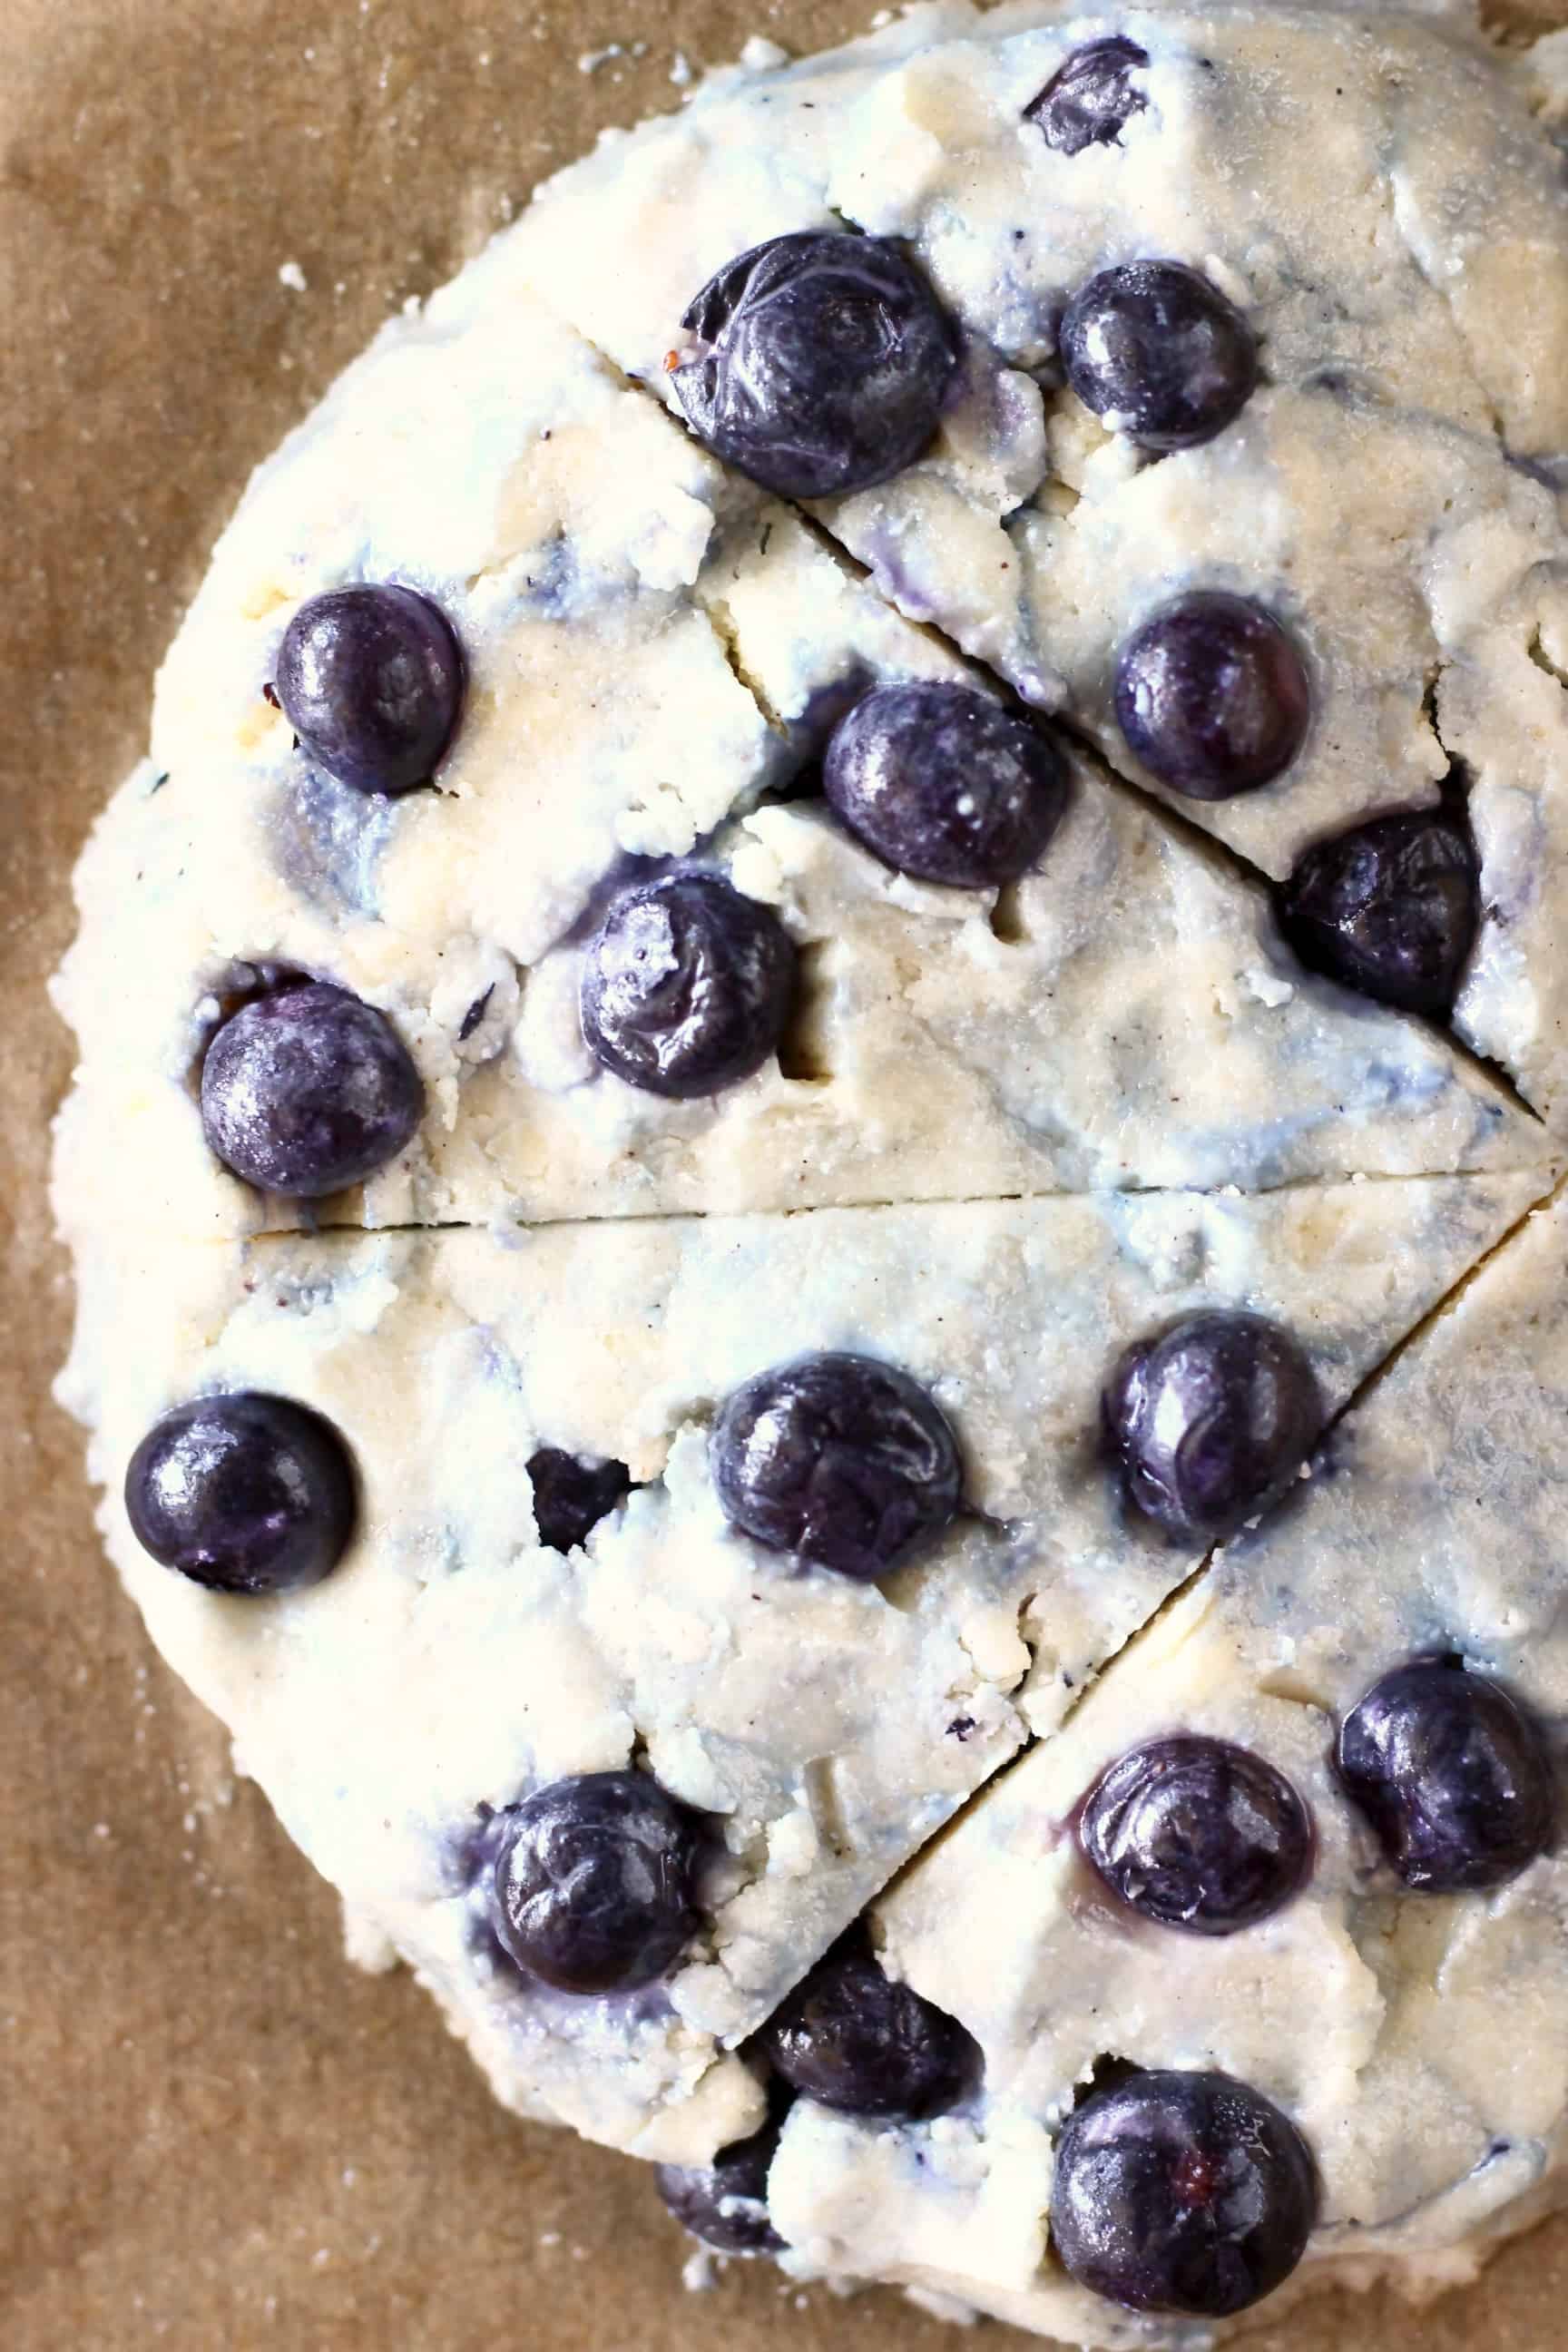
- Once you've made the dough, all you need to do is get a rectangular baking tray lined with greased baking paper, and use your hands to create an elongated circular shape.
Tip: You can use a rolling pin, but I like to avoid floured surfaces and all the faff that comes along with that, so I prefer to just use my hands as it's easier. You can use a floured rolling pin if you like, but there's no need to use a floured surface as the baking paper works to stop the dough from sticking.
- Once you've got that circular shape, just use a knife to carve lines into the surface of the dough - it's kind of like cutting a pizza, but don't cut it all the way through to the bottom!
Tip: This is because they come out fluffier when baked pressed together!
- Bake in the oven for 15-20 minutes.
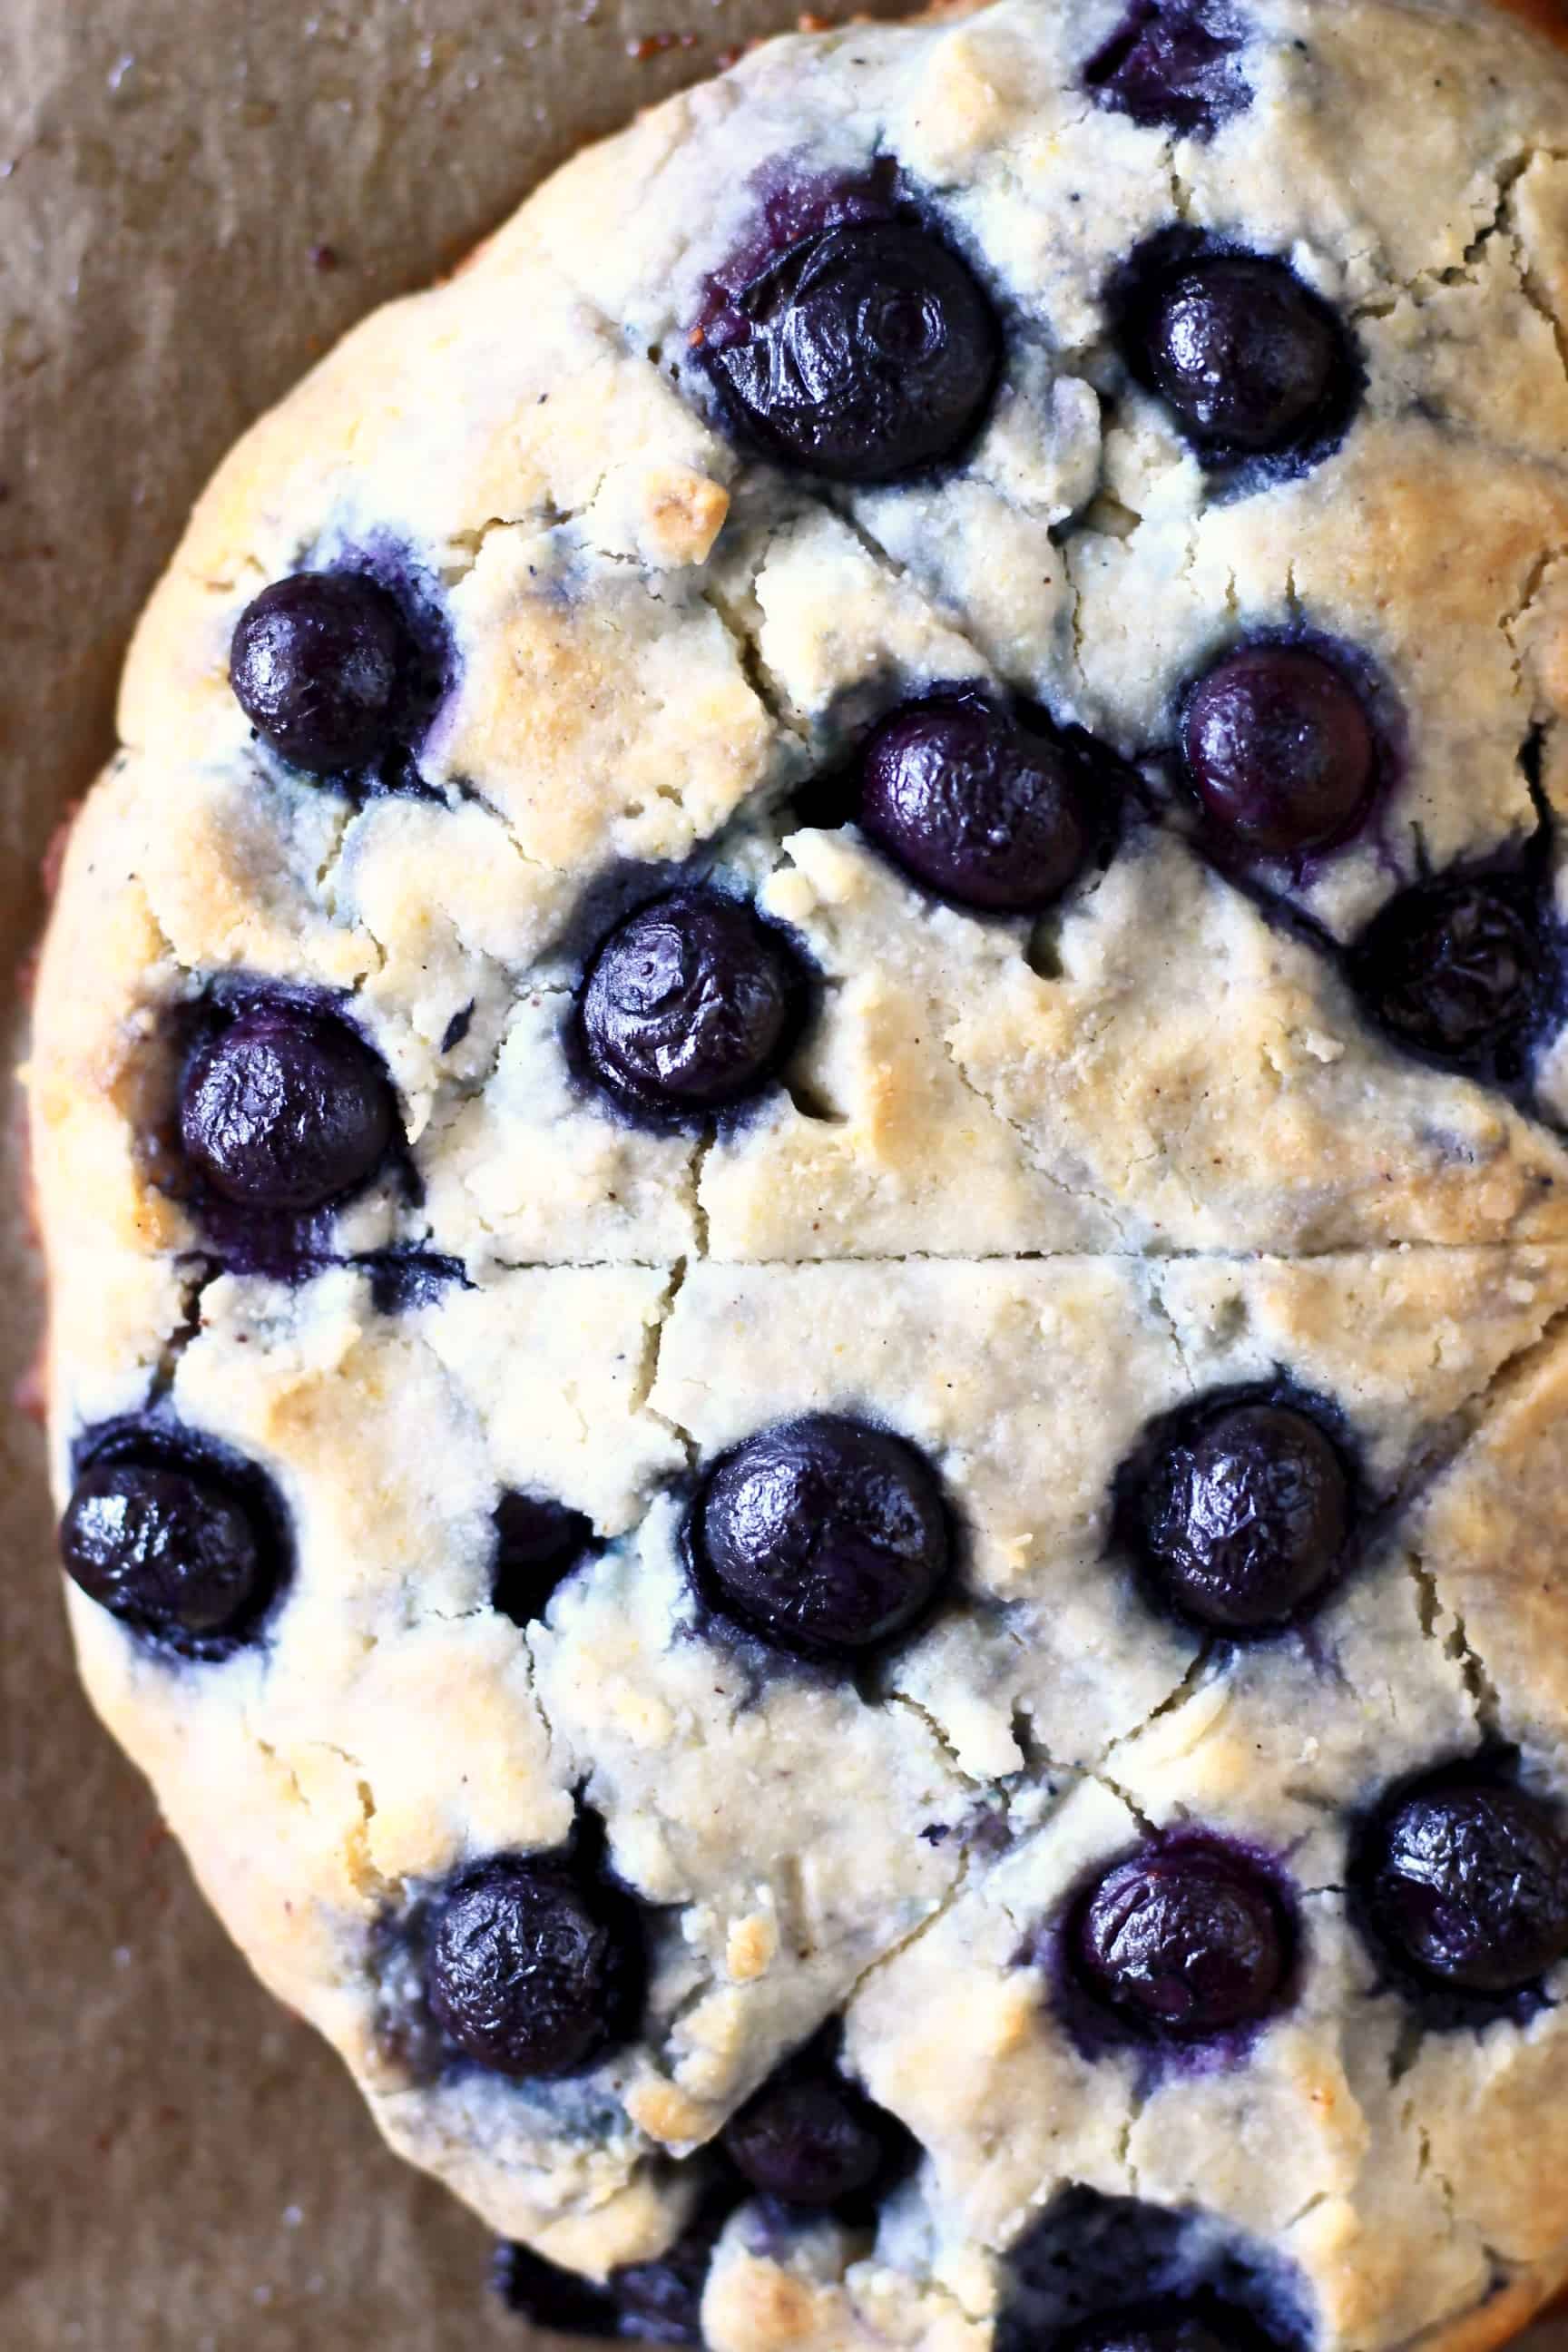
- Leave to cool slightly then slice them into separate pieces.
Substitutions you can make
- You can use any type of oil: coconut oil, olive oil or vegetable oil.
- You can use any type of plant-based milk: almond milk, rice milk, soy milk, cashew milk, oat milk etc.
- You can use any type of liquid sweetener: maple syrup, agave syrup, brown rice syrup etc.
- You can use plain flour, wholemeal (whole wheat) flour or spelt flour instead of the gluten-free flour if you're not gluten-free.
- You can replace the ground almonds (almond meal) with ground walnuts or ground sunflower seeds.
- For a nut-free version: use ground sunflower seeds instead of ground almonds and a nut-free plant-based milk.
- You can use either fresh or frozen blueberries.
Flavour substitutions you can make
- If you're not into blueberries, you can replace them with a similar fruit such as raspberries, blackberries, strawberries or cherries.
- You can replace the fresh fruit with dried fruit instead, such as dried cranberries, raisins or sultanas, chopped dates, dried mango, dried papaya or dried pineapple.
- You can make pumpkin scones instead!
Serving suggestions
These Gluten-Free Blueberry Scones work well as part of a brunch (especially for an occasion like Easter or Mother's Day!) and would pair well with other treats like:
How long do these keep for?
Theses scones do taste best on the day they're made, but can be stored covered in the fridge for up to a few days.
Can you freeze them?
Yes - they keep well in the freezer for up to a few months. You can defrost them by leaving them to thaw at room temperature.
Can you make these ahead of time?
Yes - but, as they do taste best fresh, for optimum results I'd recommend freezing them and warming them up in the oven on the day you want to eat them.
More gluten-free vegan blueberry desserts
- Blueberry Cheesecake
- Blueberry Banana Bread
- Lemon Blueberry Mug Cake
- Blueberry Muffins
- Blueberry Pie
- Lemon Blueberry Cake
If you try out this recipe or anything else from my blog, I'd really love to hear any feedback! Please give it a rating, leave a comment, or tag a photo @rhiansrecipes #rhiansrecipes on Instagram! Thank you.
Watch how to make this recipe

Gluten-Free Lemon Blueberry Scones (Vegan)
Ingredients
- 60 g (¼ cup) coconut oil (or sub olive or vegetable oil)
- 4 tablespoons lemon juice
- 1 tablespoon lemon zest
- 8 tablespoons maple syrup (or sub any other sweetener)
- 1 teaspoon vanilla extract
- Pinch of salt
- 150 g (1 ¼ cup) ground almonds (almond meal) *
- 100 g (1 cup) fresh blueberries
- 150 g (1 ¼ cup) gluten-free flour blend (or sub plain flour if not gluten-free)
- 2 heaped teaspoons baking powder (ensure gluten-free if necessary)
- ¼ teaspoon bicarbonate of soda (baking soda)
- 80 ml (⅓ cup) unsweetened almond milk (or any other plant-based milk)
Instructions
- Preheat oven to 180 degrees Celsius (350 degrees Fahrenheit).
- Place the coconut oil in a large bowl and melt over a saucepan of boiling water or in the microwave (skip this step if using any other oil).
- Once melted, add the lemon juice to the same bowl along with the lemon zest, maple syrup, vanilla, salt, ground almonds and blueberries.
- Sift in the flour, baking powder and bicarbonate of soda.
- Mix well until a dough forms, adding the milk a little bit at a time to ensure you don't add too much - it should be soft, but firm enough to mould easily. You can add a tiny splash more milk if it's looking too dry.
- Line a baking tray with greased baking paper.
- Use your hands to shape the dough into a slightly elongated circular shape about 2 cm (1 inch) thick - you can also use a floured rolling pin for this, but I prefer to do it with my hands because it's easier. There's no need to use a floured surface as the baking paper works to stop the dough from sticking.
- Keeping the dough in that shape, use a knife to carve the surface of the dough into eight - cut in half first, then each half into half, and each quarter into half again until you end up with eight even triangles. It's a bit like cutting up a pizza, but make sure not to cut all the way down through the dough - this is because they come out fluffier when baked pressed together!
- Bake in the oven for 15-20 minutes until browned and an inserted skewer comes out clean.
- Leave to cool slightly then slice them into separate pieces.
- Tastes best when fresh, but keeps covered in the fridge for up to a few days - delicious reheated in the toaster!
Video
Notes
- I'd recommend adding the plant-based milk a little at a time until you get a soft dough that's still firm enough to easily mould into a shape - stop adding milk if the dough is already too soft.
- If the dough is too dry to combine or very hard after you've added all the milk, add a little extra plant-based milk, as otherwise the scones won't rise as much and won't be fluffy.
- Make sure you use enough baking powder - using too little will make them very dense instead of fluffy.
Disclosure: This posts contains affiliate links to Amazon. If you purchase any of these products, a small percentage will come to me with no extra cost to you! This income will go towards the running of this blog - thank you.

Julie
Hi. These turned out delicious and a favorite of several gf and dairy-free folks who look for good recipes! I did have an issue while making them I'd like to ask about... when I added the other wet ingredients into the coconut oil it solidified into a million pieces and got very sticky and hard (I assume because some of them were cold)... I was using a metal bowl so I put it in a pot of water and heated the whole thing until the oil melted again, then added the dry ingredients. It all worked out in the end, but I wondered if that was 'normal' for coconut oil and if I could have simply proceeded, and it would have worked itself into the dry ingredients? Or would adding the oil in a different sequence change the outcome? Thanks for any help - I'd like to make these again but want to know if the extra step (and time) is needed?
Rhian Williams
Hi, thank you for your feedback! I'm glad the recipe turned out ok in the end but so sorry about the problem you had. I will retest the recipe and see if I can find a better way. I think the next time you make it you could just do it as per the instructions but add the milk at the very end after adding the dry ingredients, rather than at the beginning after the coconut oil. I hope that helps and thank you for letting me know!
cynthia carrera
Thank you for the delicious vegan scone recipe. So easy! I was worried about the solidification of the oil so I heated it in a mason jar (in the boiling water) and added it last. It worked out just fine. Smells incredible when I’m making them! I will definitely make them often!
Rhian Williams
Thank you so much, so happy to hear that! Thank you for sharing about the coconut oil, that sounds like a really good idea!
Jenae
These were amazing! I needed to bake mine about 10 min more than suggested but they turned out great! Definitely a keeper!
Rhian Williams
Thank you so much, so glad you liked them! And thank you for letting me know about the baking time!
Denise Runde
I was going on a trip with a group of women and offered to make scones. I wanted to make them gluten free as a couple of my friends can not eat gluten. I am an experienced baker, but do not have any experience baking without gluten, so I asked my friend for a favorite site or recipe. She sent me this recipe.
I am also inexperienced at cooking using metric measurements, I do have a scale and looked up the conversion of metric to imperial. But I think I may have made errors in conversion. So here are my questions:
On measurements:
The recipe calls for 60 g of coconut oil. I measured 60 grams of coconut oil on my kitchen scale and went with that. The conversion to imperial is 2.1 oz. or approximately 4 tablespoons. Could I have just used 4 tablespoons?
Most of the solid ingredients (blueberries, almonds) are measured using metric. but the dry ingredients go between metric and imperial. flour etc is metric, baking powder and soda imperial etc. Is there a reason for this or can I just use 1 cup for the blueberries and 1.5 cups for the flour and ground almonds?
I am curious as to why the almond milk is measured using metric while other liquids such as lemon juice, vanilla and maple syrup use imperial (tablespoons etc.). As I am not used to these conversions I do not know the rules about when to use which measurement system and it was a very frustrating experience. It would be helpful for me, and educational to know why the recipe is written using the different systems.
Flour/almond meal.
I purchased almond flour, gluten free flour and almonds.
The recipe calls for adding " ground almonds". I ground the almonds to what I thought is the consistency of álmond meal" but I am not sure if it was fine enough or not. I make my own almond butter and I know that if I kept 'grinding'it it would become butter. So I stopped at what I thought was the consistency, although wetter than corn meal. I think this is a critical step as a finer grind would absorb more liquid and could be the reason for my dough being too wet in the end.
As the dough was too wet, I added almond flour until I could handle the dough. I had used the gluten free flour in the recipe and when I realized that I needed to add more flour I decided to switch to almond flour, which is much finer than the gluten free flour. The almond flour has only ground almonds listed as an ingredient.
Baking tray: I commonly use a cookie sheet for making cookies etc and what is often referred to as a "jelly roll pan" a cooking sheet with a one inch high rim around it for bars. When I use the jelly roll pan for cookies the consistency of the cookie is too soft. I wasn't sure what to use so I used the flat cookie sheet I am not sure if that is the same as a baking tray. I read in one of your commments that a person used a flan pan, which I believe has a much higher rim than the long jelly roll pan.
In the end, I added the almond flour until I was able to handle the dough and form a circular shape. I had to cook the scones about 15 minutes longer than the recipe called for.
I am probably not the best taste tester of gluten free baked goods as they do have a different texture and taste than other baked goods. Having said that I they are certainly as good as other gluten free baked goods that I have tasted, although I did sprinkle a bit of raw sugar on top of mine. The gf friend will be the final test taster.
It would be wonderful if you could clarify some of the issues for me. I want to make this recipe again but am too uncomfortable guessing on the issues I raised.
Thanks so much.
Rhian Williams
Hi Denise, thank you so much for your feedback and for sharing how you got on with this recipe in so much detail, that's really helpful to know! In order to switch to alternative measurements, if you click on the blue 'US Customary' button at the top of the ingredients list, you can switch between metric and US measurements. I hope that helps for next time and very sorry if that was unclear. Thank you again!
Denise
Thank you for your reply. I have eaten every scone !! The trip got cancelled so I ate them!
i appreciate the tip on the US conversion.
Thank you for the great recipe. I am going to check out your others. I might even be a convert!
Denise
Rhian Williams
Thank you so much! Sorry the trip got cancelled but glad you liked the scones!